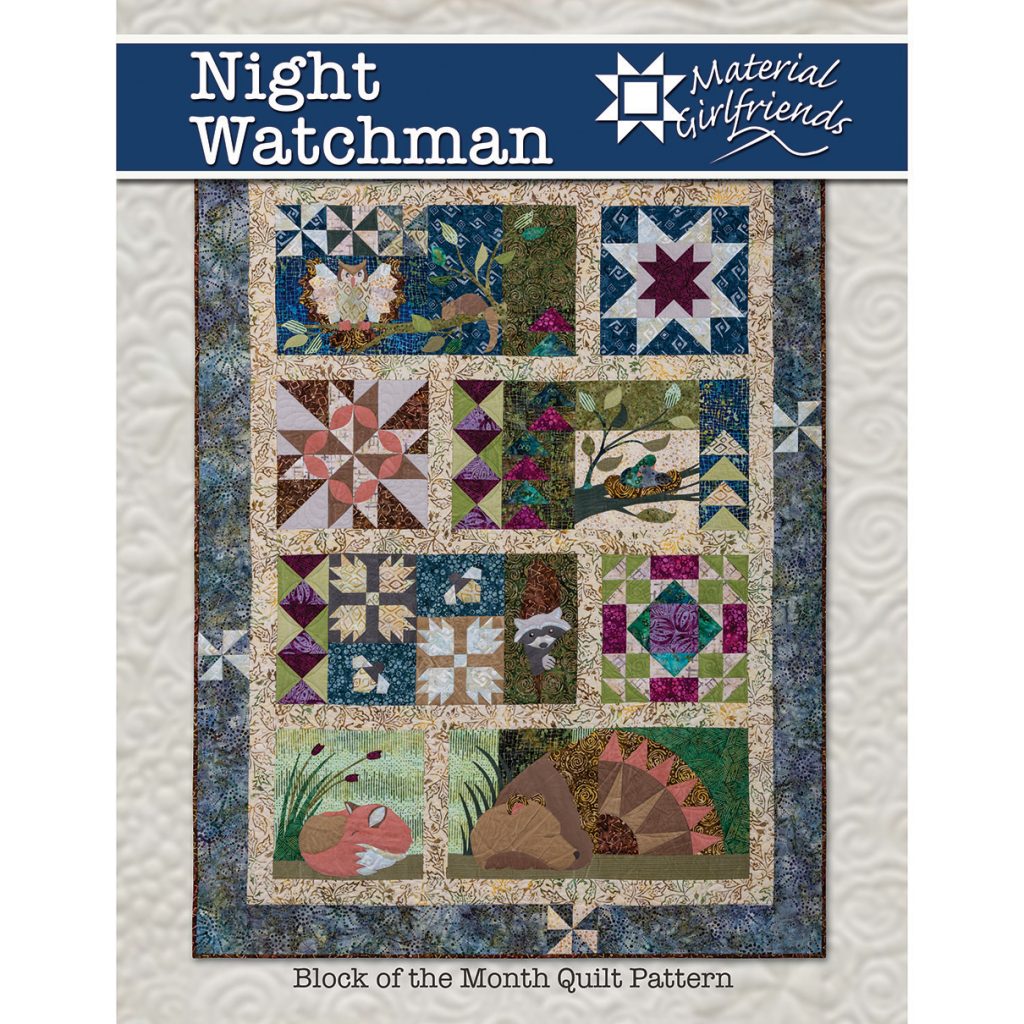
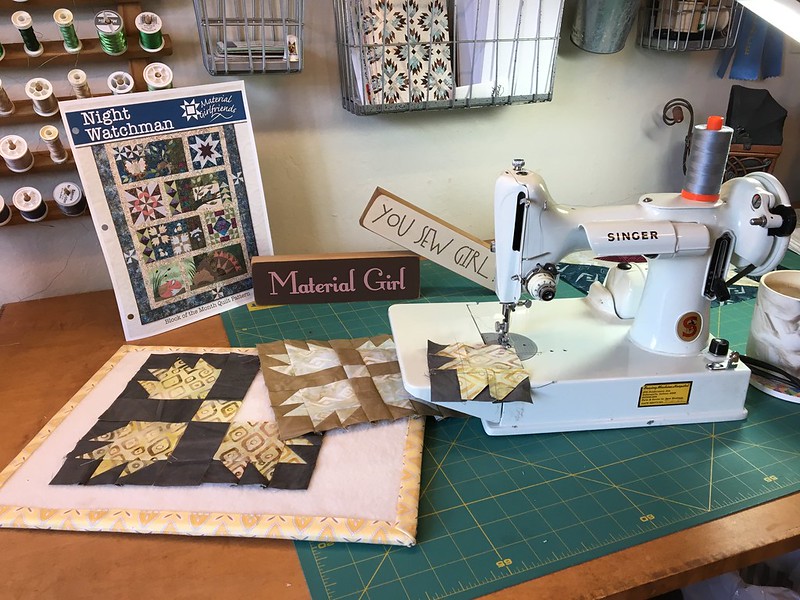
Congratulations on embarking on a challenging Block of the Month quilt. In this program you will use several different quilting techniques. Don’t worry! The quilting community is one of the best communities to belong too. If you need a little help, reach out! I’ll be giving tips, tricks and helpful hints to help guide you through this fun quilt.
September, Month 1
First of all, Read. Read every word. If you read the first word to the last word, out-loud even, it will really help prevent mistakes. Second, stay organized! Three hole-punch your pattern and stick it in a binder for easy reference. Keep zip baggies handy to keep block pieces together.
If you are making this quilt through a quilt shop program, be sure read the right column on page 2. These are the fabrics you should expect to receive each month. SAVE all your extra fabrics for future months!
When I teach a class, we always start off checking the seam allowance. The seam allowance is usually blamed when the block doesn’t turn out the correct size. However, there are four elements to making the block the correct size.
- Cutting
- 1/4″ seam
- Alignment
- Pressing
Cutting your fabric. Be sure you iron out all wrinkles and folds (steam is fine). Have good lighting, your pretty glasses, and a sharp rotary blade. Always stand when cutting. Sitting is convenient but standing over your ruler allows for better accuracy. Always cut once away from your body and don’t see-saw back and forth. If your blade is skipping or you’re having to cut several times, time for a new blade. If your ruler is sliding, try non slick grips on the back and anchor your pinky on the non-cutting side of the ruler. Use a flat hand when holding your ruler in place. No spider finger tip hold, the ruler will slide on you.
Your 1/4″ seam needs to be accurate. Most modern sewing machine come with a programmed setting for piecing. On many models it is marked by a P. I can’t tell you how many students I have helped find the correct setting for their quarter inch seam. They’d been using tape when all along their machine had a perfect setting for them. Be sure to know your machine’s settings and have the proper foot. MEASURE that quarter inch before you start.
Alignment is so important. Some ladies sew like it is a race. I’m guilty too. And none of us like to be last in the class room. But it isn’t a race and accuracy is more important than finishing first. Take your time. Align that fabric up perfectly. Take time to pin. Ask yourself, “What’s the point?” When sewing points, be sure to align the ends at the point. If the fabric is slightly long or short at the other end it isn’t going to matter as much as getting your point to be at the quarter inch seam.
Pressing Matters. Press first with the seam closed (no steam). Open the pieced item and from the wrong side of the fabric, knock the seam, with the side of the iron, the direction the arrow shows in the instructions. You’re just knocking it over. Then from the front do the same, making sure the seam hadn’t folded over on itself. When pressing, I hold one side of the fabric taunt while pressing with the iron – not tight enough to stretch the fabric but enough to press the seam well. No steam in my iron unless I want the piece to grow.
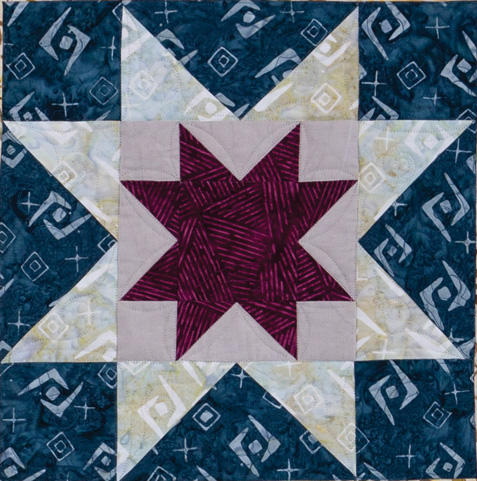
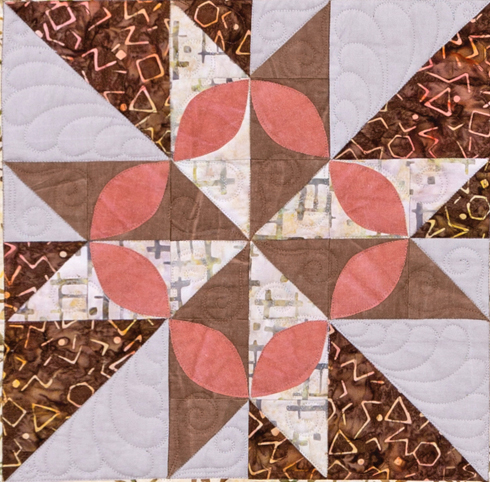
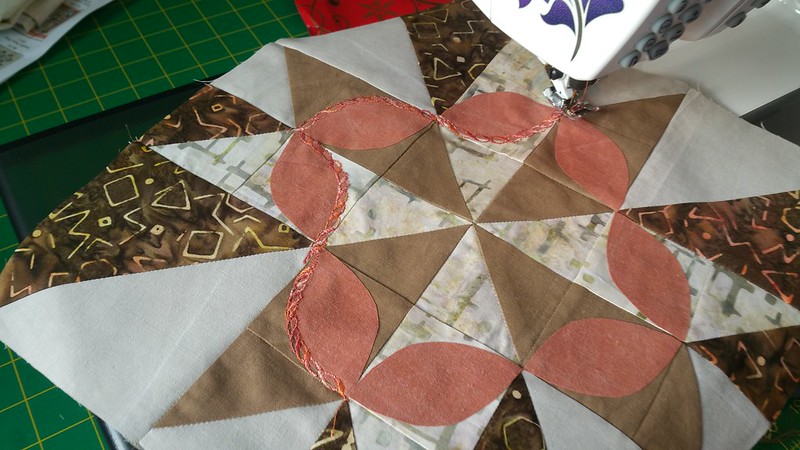
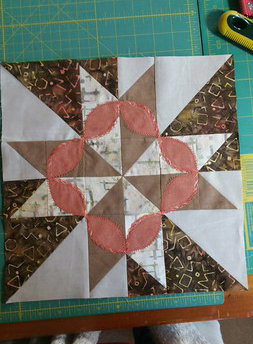
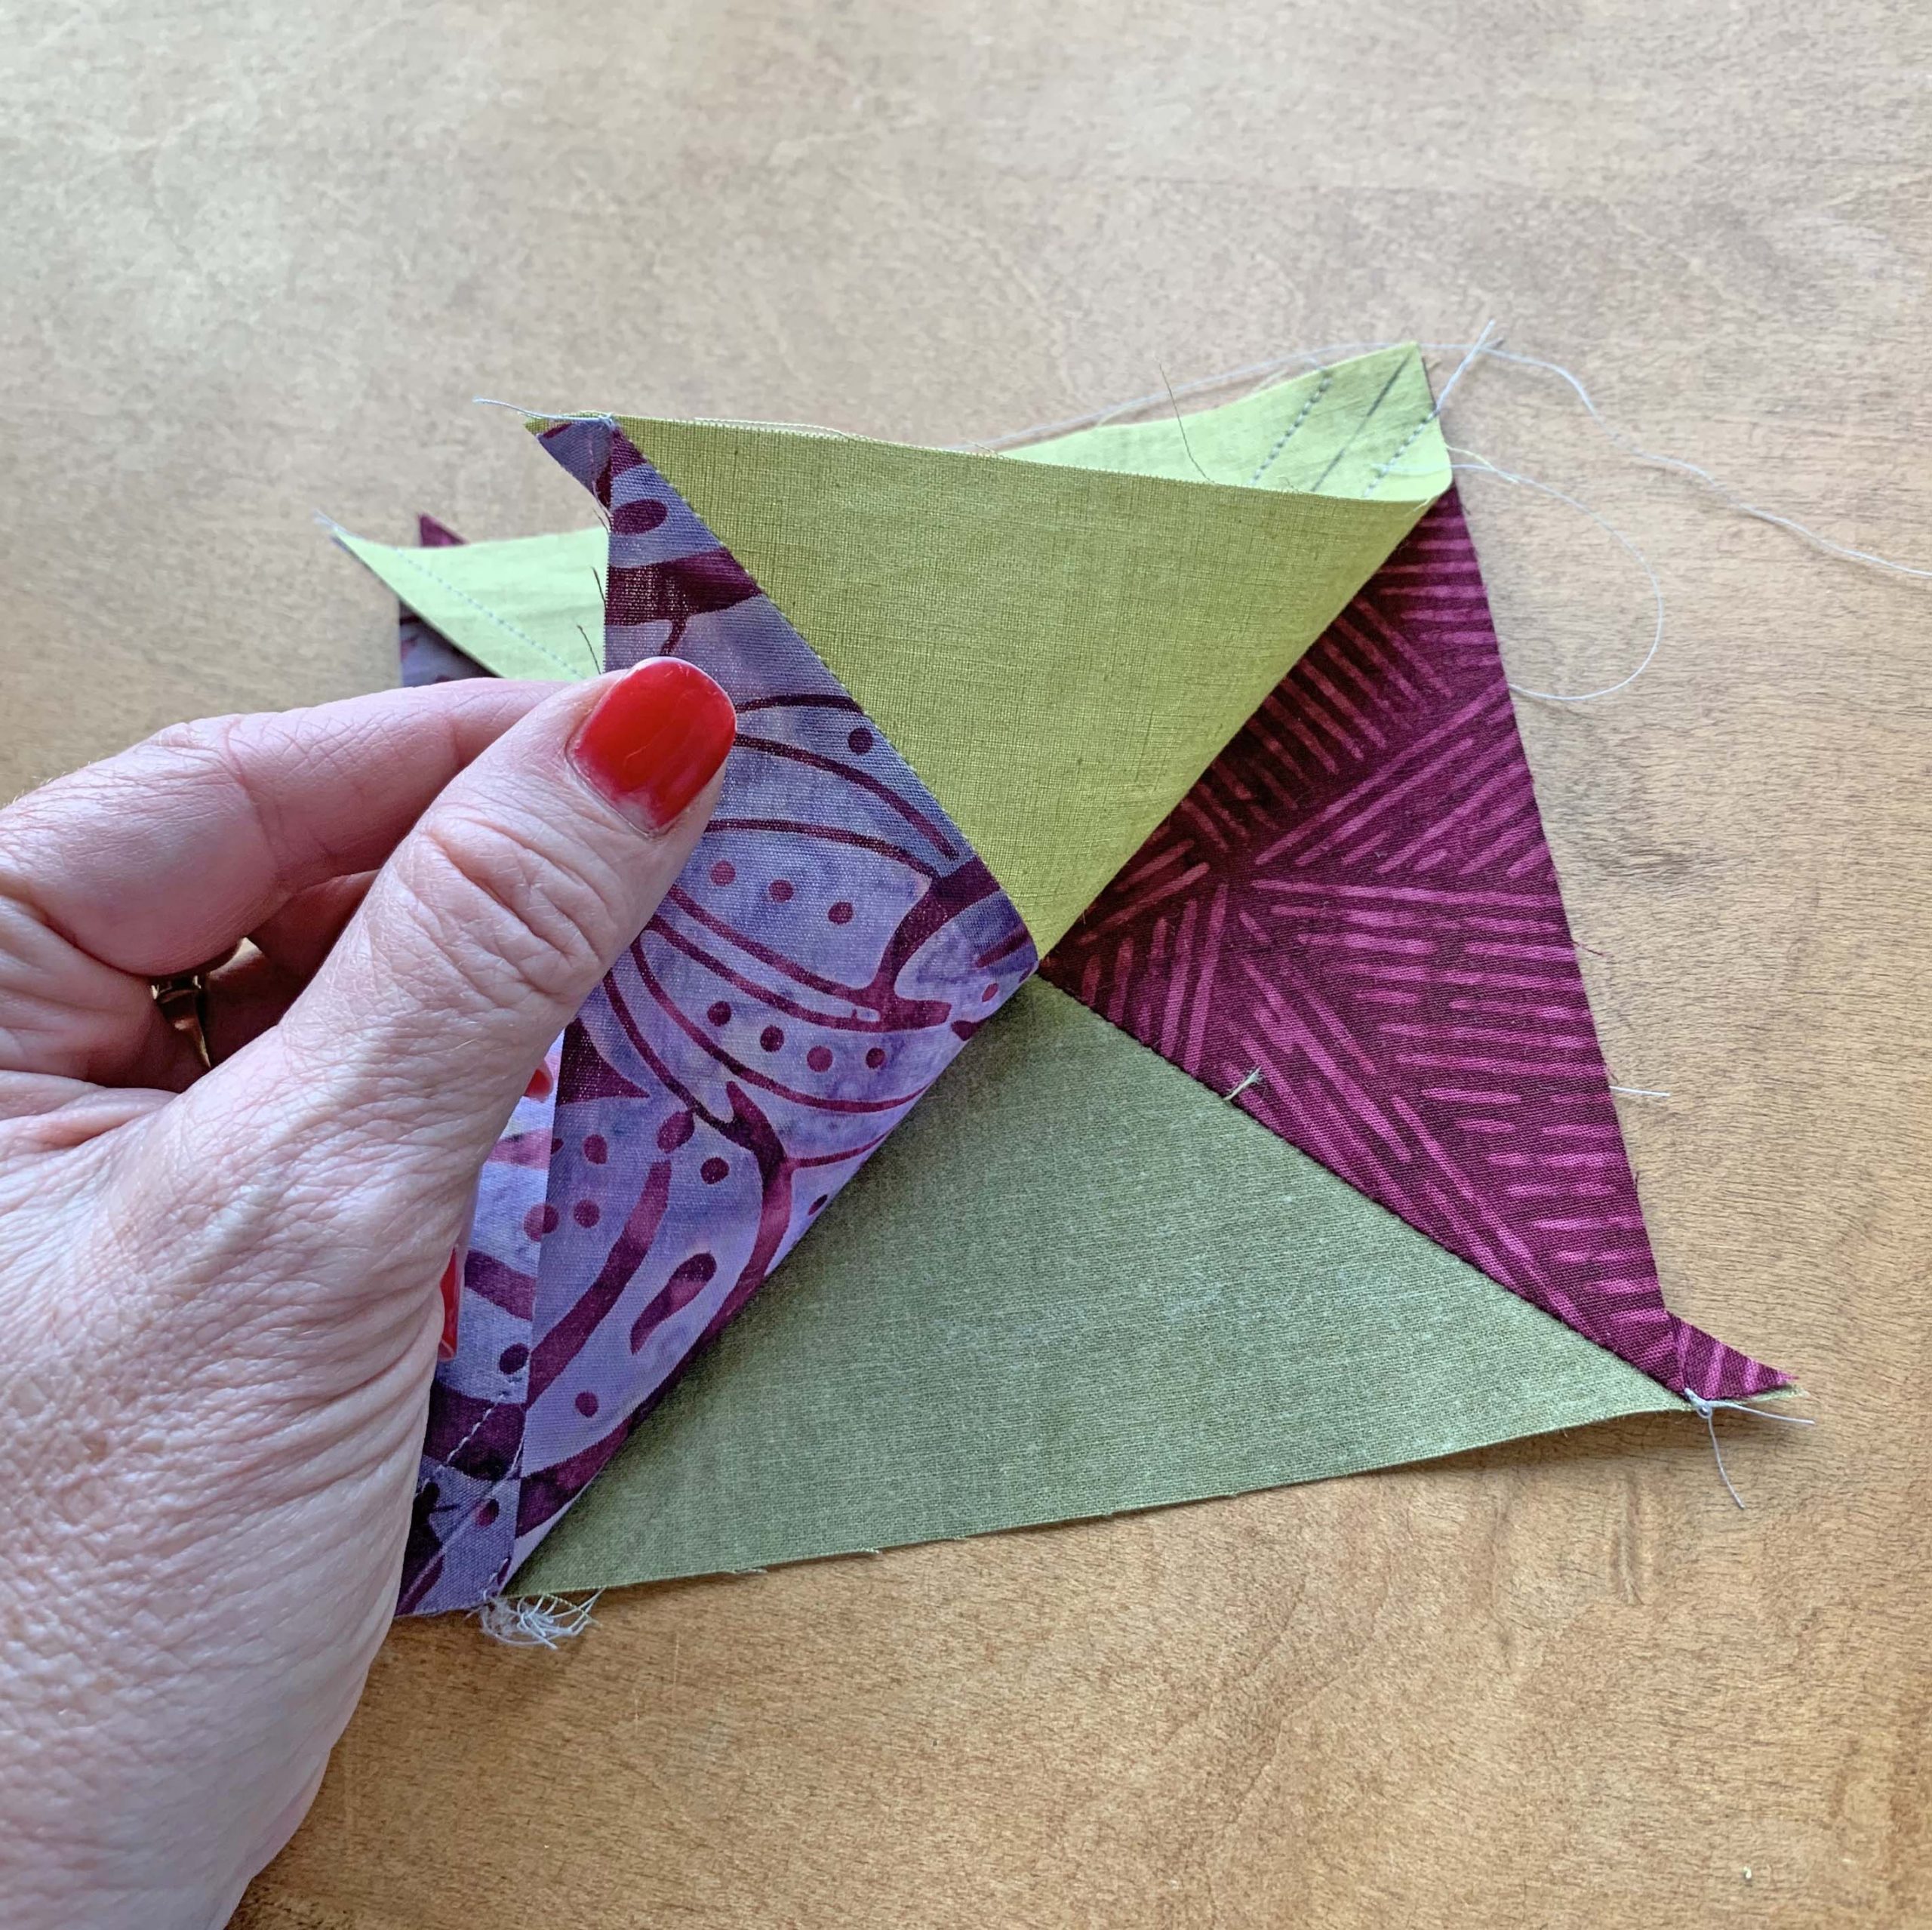
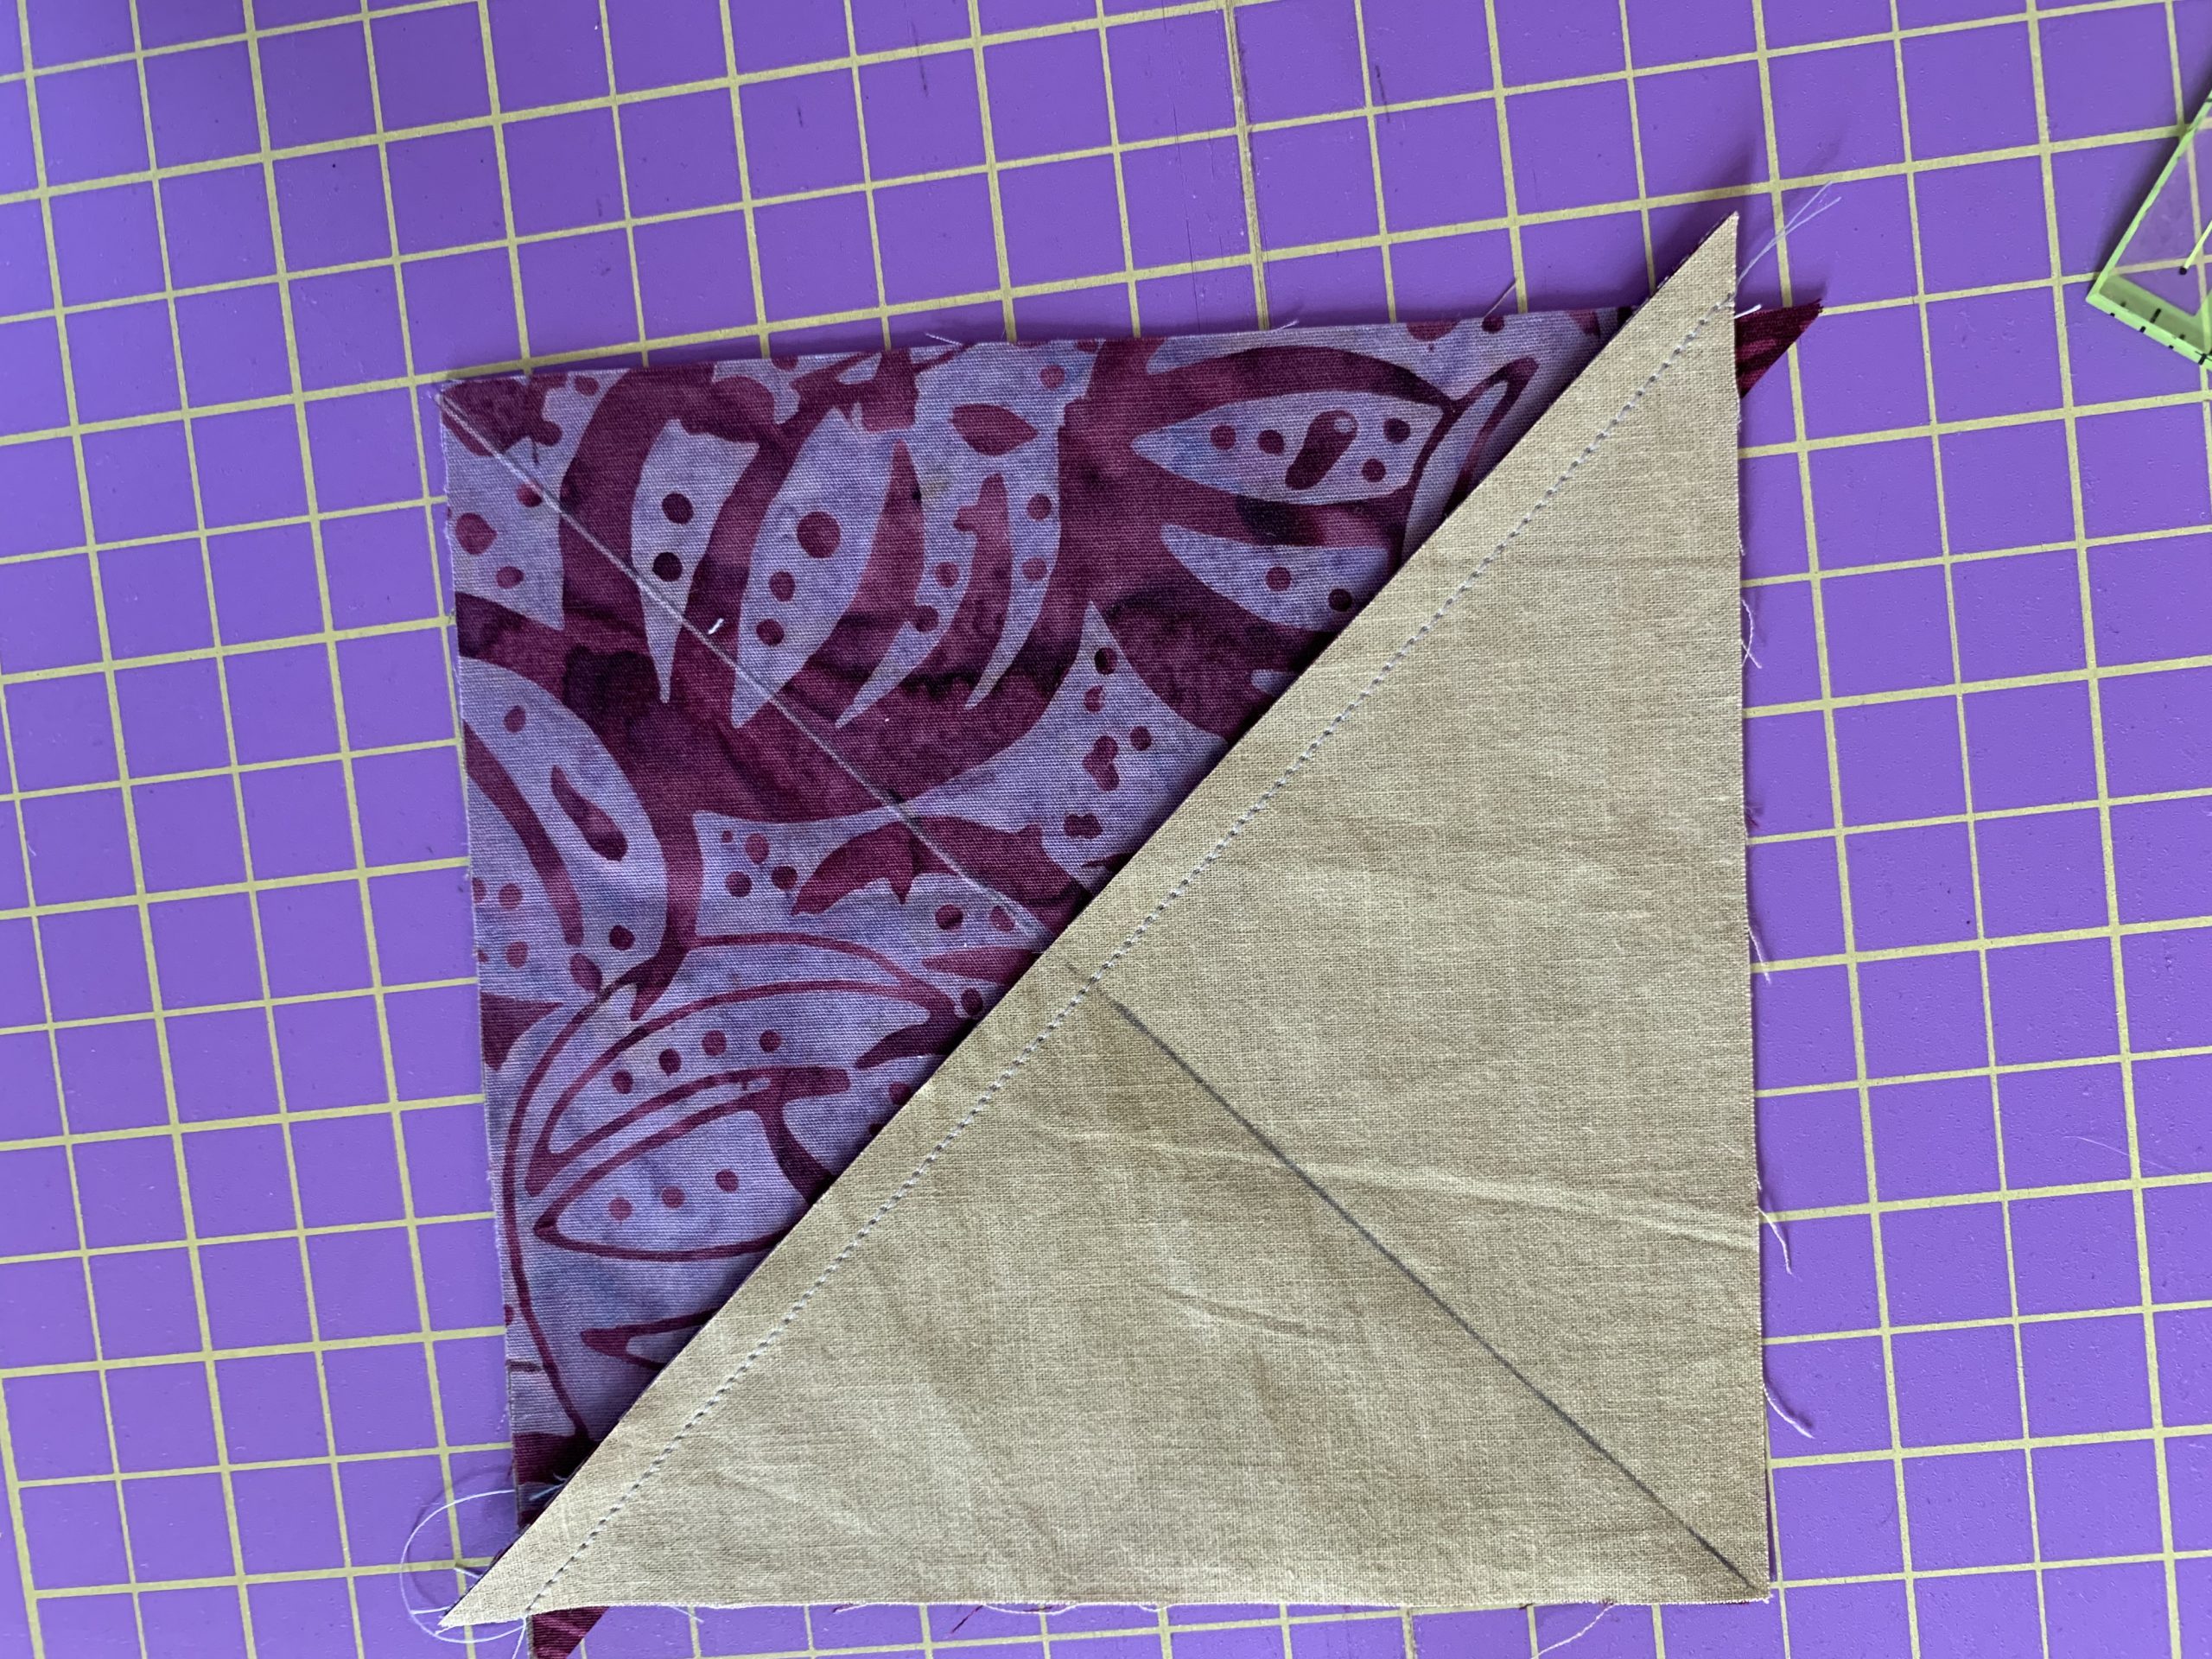
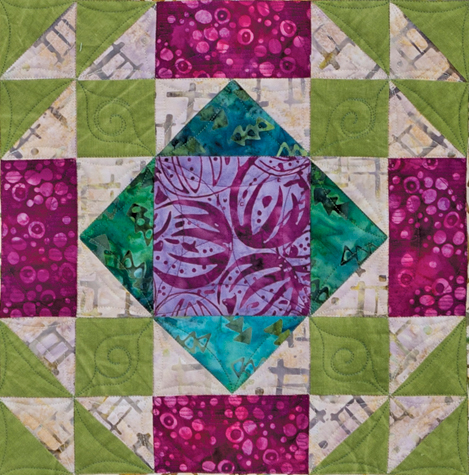
The Month 1 block is a beautiful Sawtooth Block. It was first published in Farm & Fireside in 1884. You can double the sparkle when putting a Sawtooth within a Sawtooth block! Keep in mind the four points of accuracy described above and enjoy sewing up this pretty block.
October, Month 2
Once upon a time, my oldest son was beginning 2nd grade. The teacher was having all her students fill out a questionaire on the student’s perceived strengths and weaknesses. When Matthew reached a page entitled, “What is your most difficult subject?” he wrote three words, ‘Speling is hord.”
I really enjoy different quilting techniques. I love trying new things, new rulers, new tools. In my block of the month patterns, I like including more than one quilting technique. Many times I will include a couple blocks of paper piecing or foundation piecing. I think I heard a collective groan. I really enjoy paper piecing. It is so precise! My squares come out perfect. But I understand that “Speling is hord” for many and so is paper piecing. It has to do with left brain vs. right brain, I’m sure.

Paper Piecing Fireflies
I have made a tutorial for the fireflies paper piecing (remember videos add 10 years and 25lbs to the actress) and I’ve linked it below for you. But if you have a hard time wrapping your brain around my technique, there are lots of different ways to do paper piecing. Search Youtube for different tutorials. Google paper piecing or foundation piecing to find different blogs. Someone, somewhere, has a method that will click for you. Don’t give up! Practice with some scrap fabrics first.
- Copy your pattern onto some foundation paper. You can use printer paper but Carol Doak’s foundation paper is so much easier to remove. Separate the two pattern halves so it is easier to sew.
- Trace the lines and numbers on the back of the paper. This is to assist you in positioning your fabric.
- Pre-cut your fabrics. I estimate an inch or more bigger than the space it will cover.
- Start with number one. On the back side of the paper where you drew the lines, pin right side up the fabric piece so it covers the entire area by at least a quarter inch on all sides.
- Position the fabric for number 2 right sides facing together on top of the fabric for position 1. Check the position. Imagine if you sewed on the line between 1 and 2 to make the seam, then as fabric 2 is opened, it should cover the entire area of spot 2 plus a quarter inch beyond. Pin to hold it in place, flip it over and stitch the line between 1 and 2 with a small stitch. I use 1.8 on my machine’s settings and I prefer an open toe foot so I can easily see where I’m sewing.
- Finger press the seam open. Does the fabric generously cover position 2? No, seam rip and try again. Yes? Trim the seam to 1/4″ using a postcard to fold the paper over and an Add-A-Quarter ruler.
- Before adding fabric for position 3, it is easier to pre-trim the seam allowance on the line between two and three before adding the next fabric. From the front, align the post card on the line between 2 and 3. Fold the paper back over the postcard. Butt the Add-A-Quarter ruler along the card edge and trim the quarter inch. Now you can easily align the fabric for position 3.
- Continue in the same manner until you’ve covered all the pieces. Trim on the outside solid line and tear away the foundation paper.
- Align, pin, and sew the two halves together. Give it a good pressing.
Matthew eventually learned to spell. I am confident you will learn to paper piecing. Keep practicing!
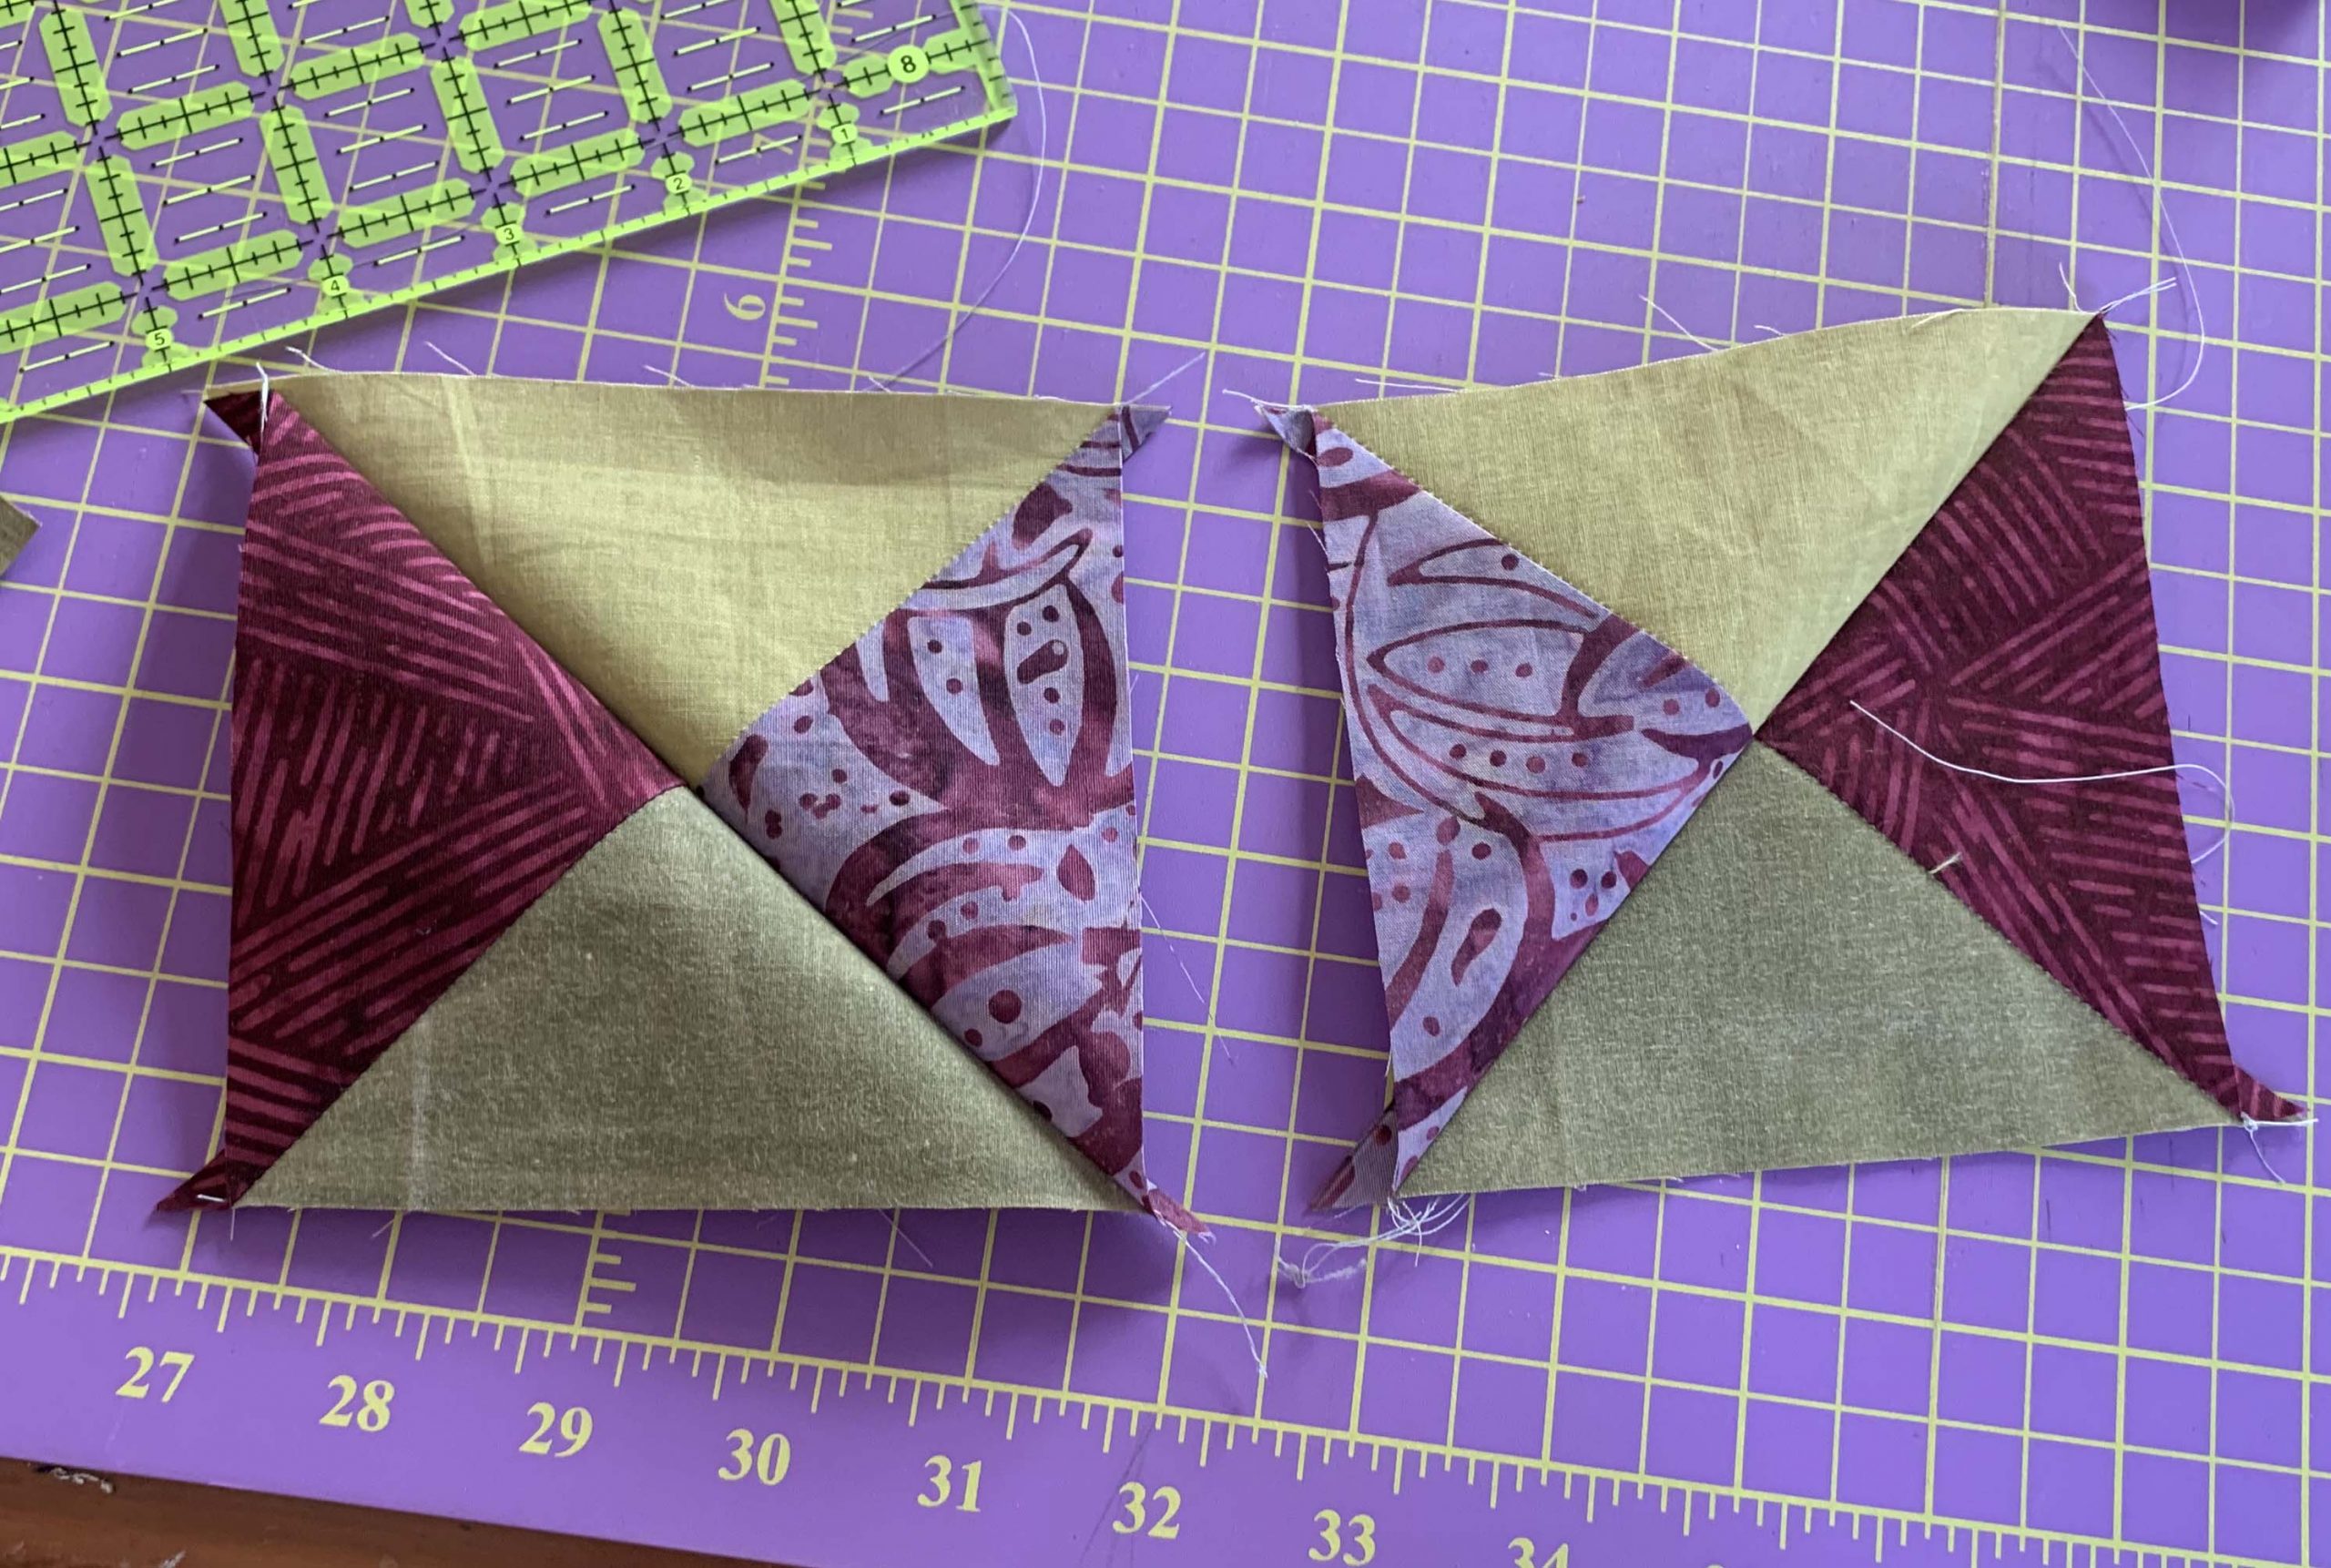
Bear Paw Blocks
These little Bear Paw Blocks are time consuming! I promise not all the months require this much work! The trick for having successful Bear Paw blocks is to read the instructions before you start and to stay organized by keeping the Paw pieces in baggies.
When you make the Half Square Triangles (HST) be sure to trim them to 1 1/2″ after you create them. Align the 45 degree line of your square on the seam to square them up. The diagonal seam MUST stay at the corner when trimming.

Alignment is important. When you are sewing anything with a points, you have to ask yourself, “What’s the Point?” Align the point perfectly with the edge of the second fabric and sew. If it is slightly long or short at the other end, it doesn’t matter. That end will be in a seam. But the point alignment is important so that when you sew your block together, you’ll still have your points.
November, Month 3
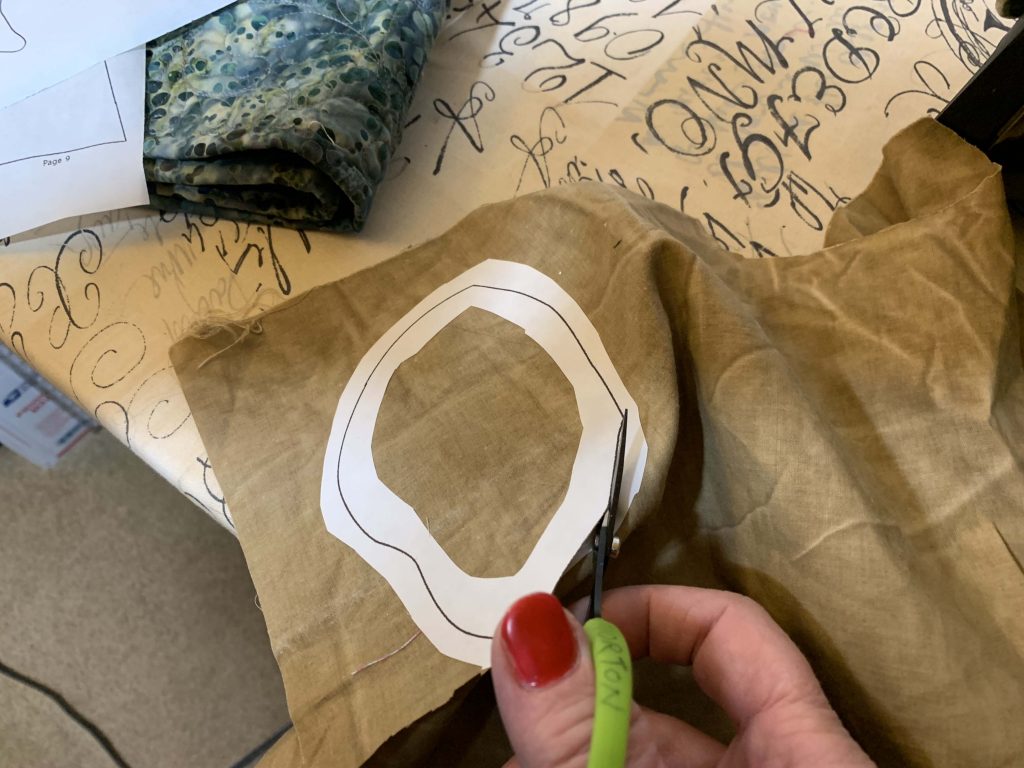
The Fox Chase block was first published in 1905 by Clara Stone in Practical Needlwork. It is such a pretty block and I keep playing with the idea of making an entire quilt with this one block! Same tips as last month, read the instructions. Read them out loud really helps too if you are confused. Use baggies to stay organized.
Remember to trim your Half Square Triangles (HST) to 4 1/2″ by aligning the 45 degree diagonal line with the seam before sewing them into their units.
Appliqué the Fox Tails
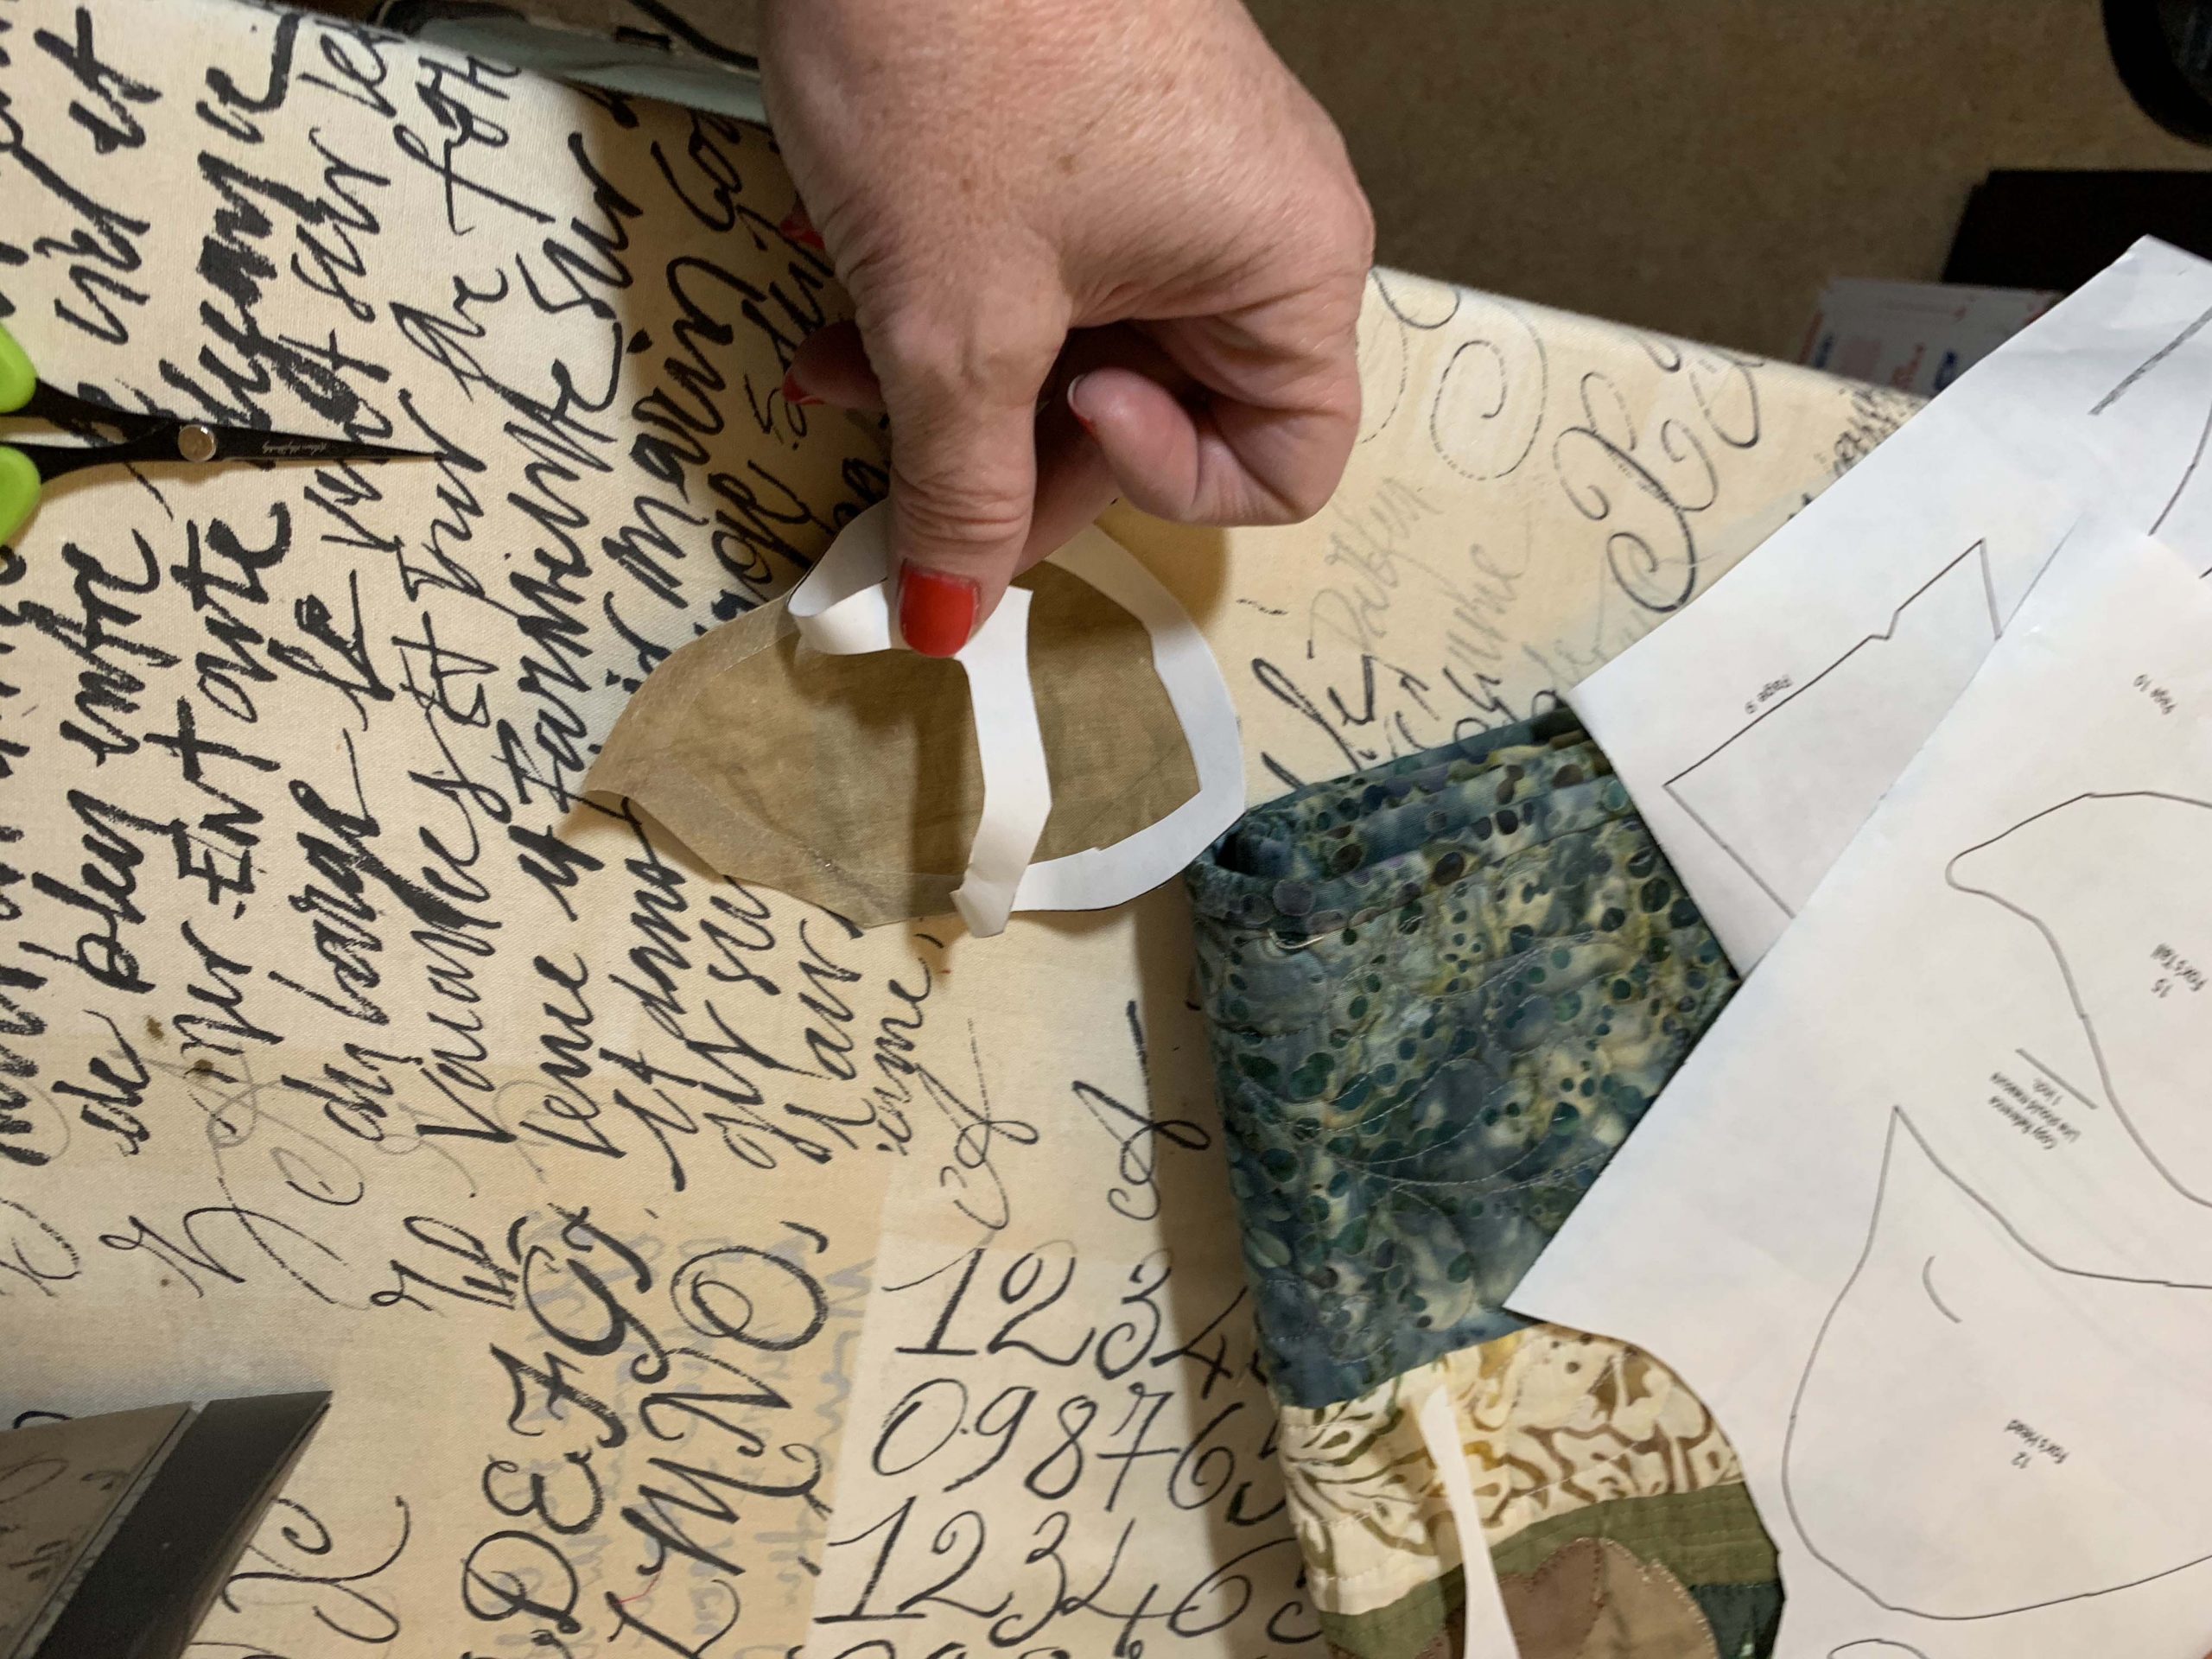
Raw edge fusible appliqué is fun and quick. Follow the instructions of your double sided fusible web product. Not all products are the same. The product you purchased likely will have a youtube tutorial on how to use it. Sometimes watching a tutorial makes things so much more understandable!
Once your fox tails are positioned in the square – should be a 1/4″ from the corners, fuse in place with your iron. I recommend laying a teflon sheet on top so your iron doesn’t get mucked up. Once it is fused, you can add a decorative stitch. You can use a standard blanket stick, a satin stitch, a zig zag OR bust out one of those fancy stitches that your machine can do, that you never get the opportunity to use! Check out how fun this stitch is on the fox tail.
December, Month 4
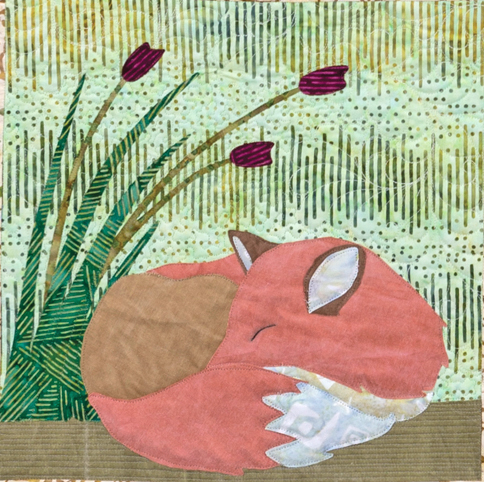
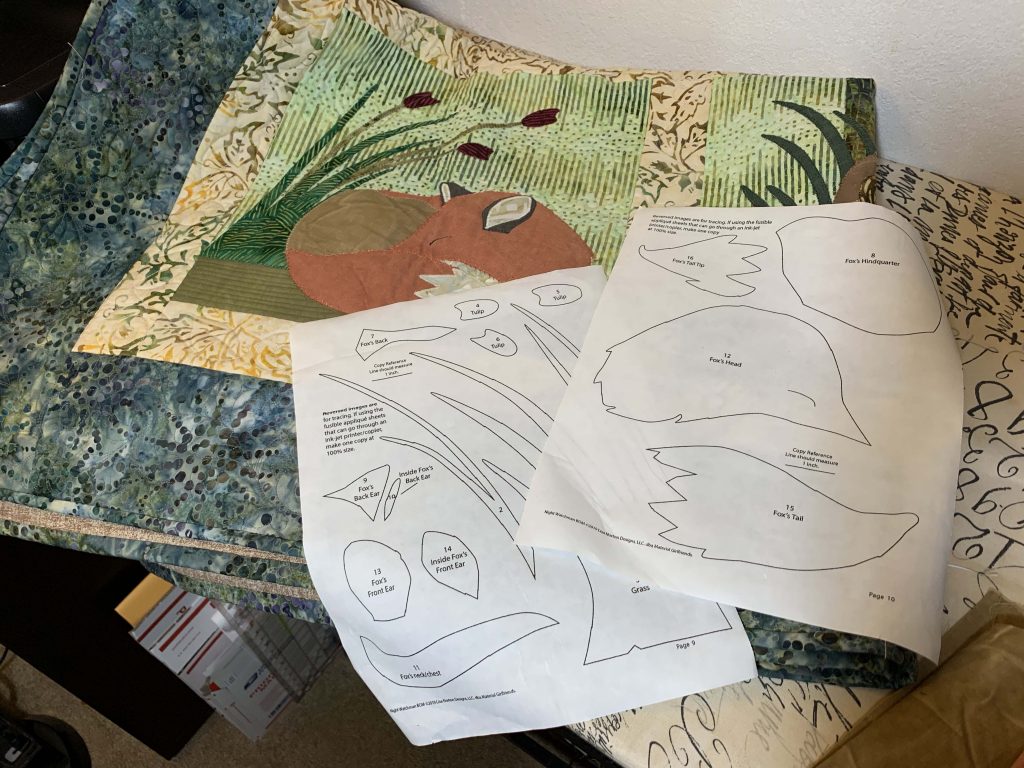
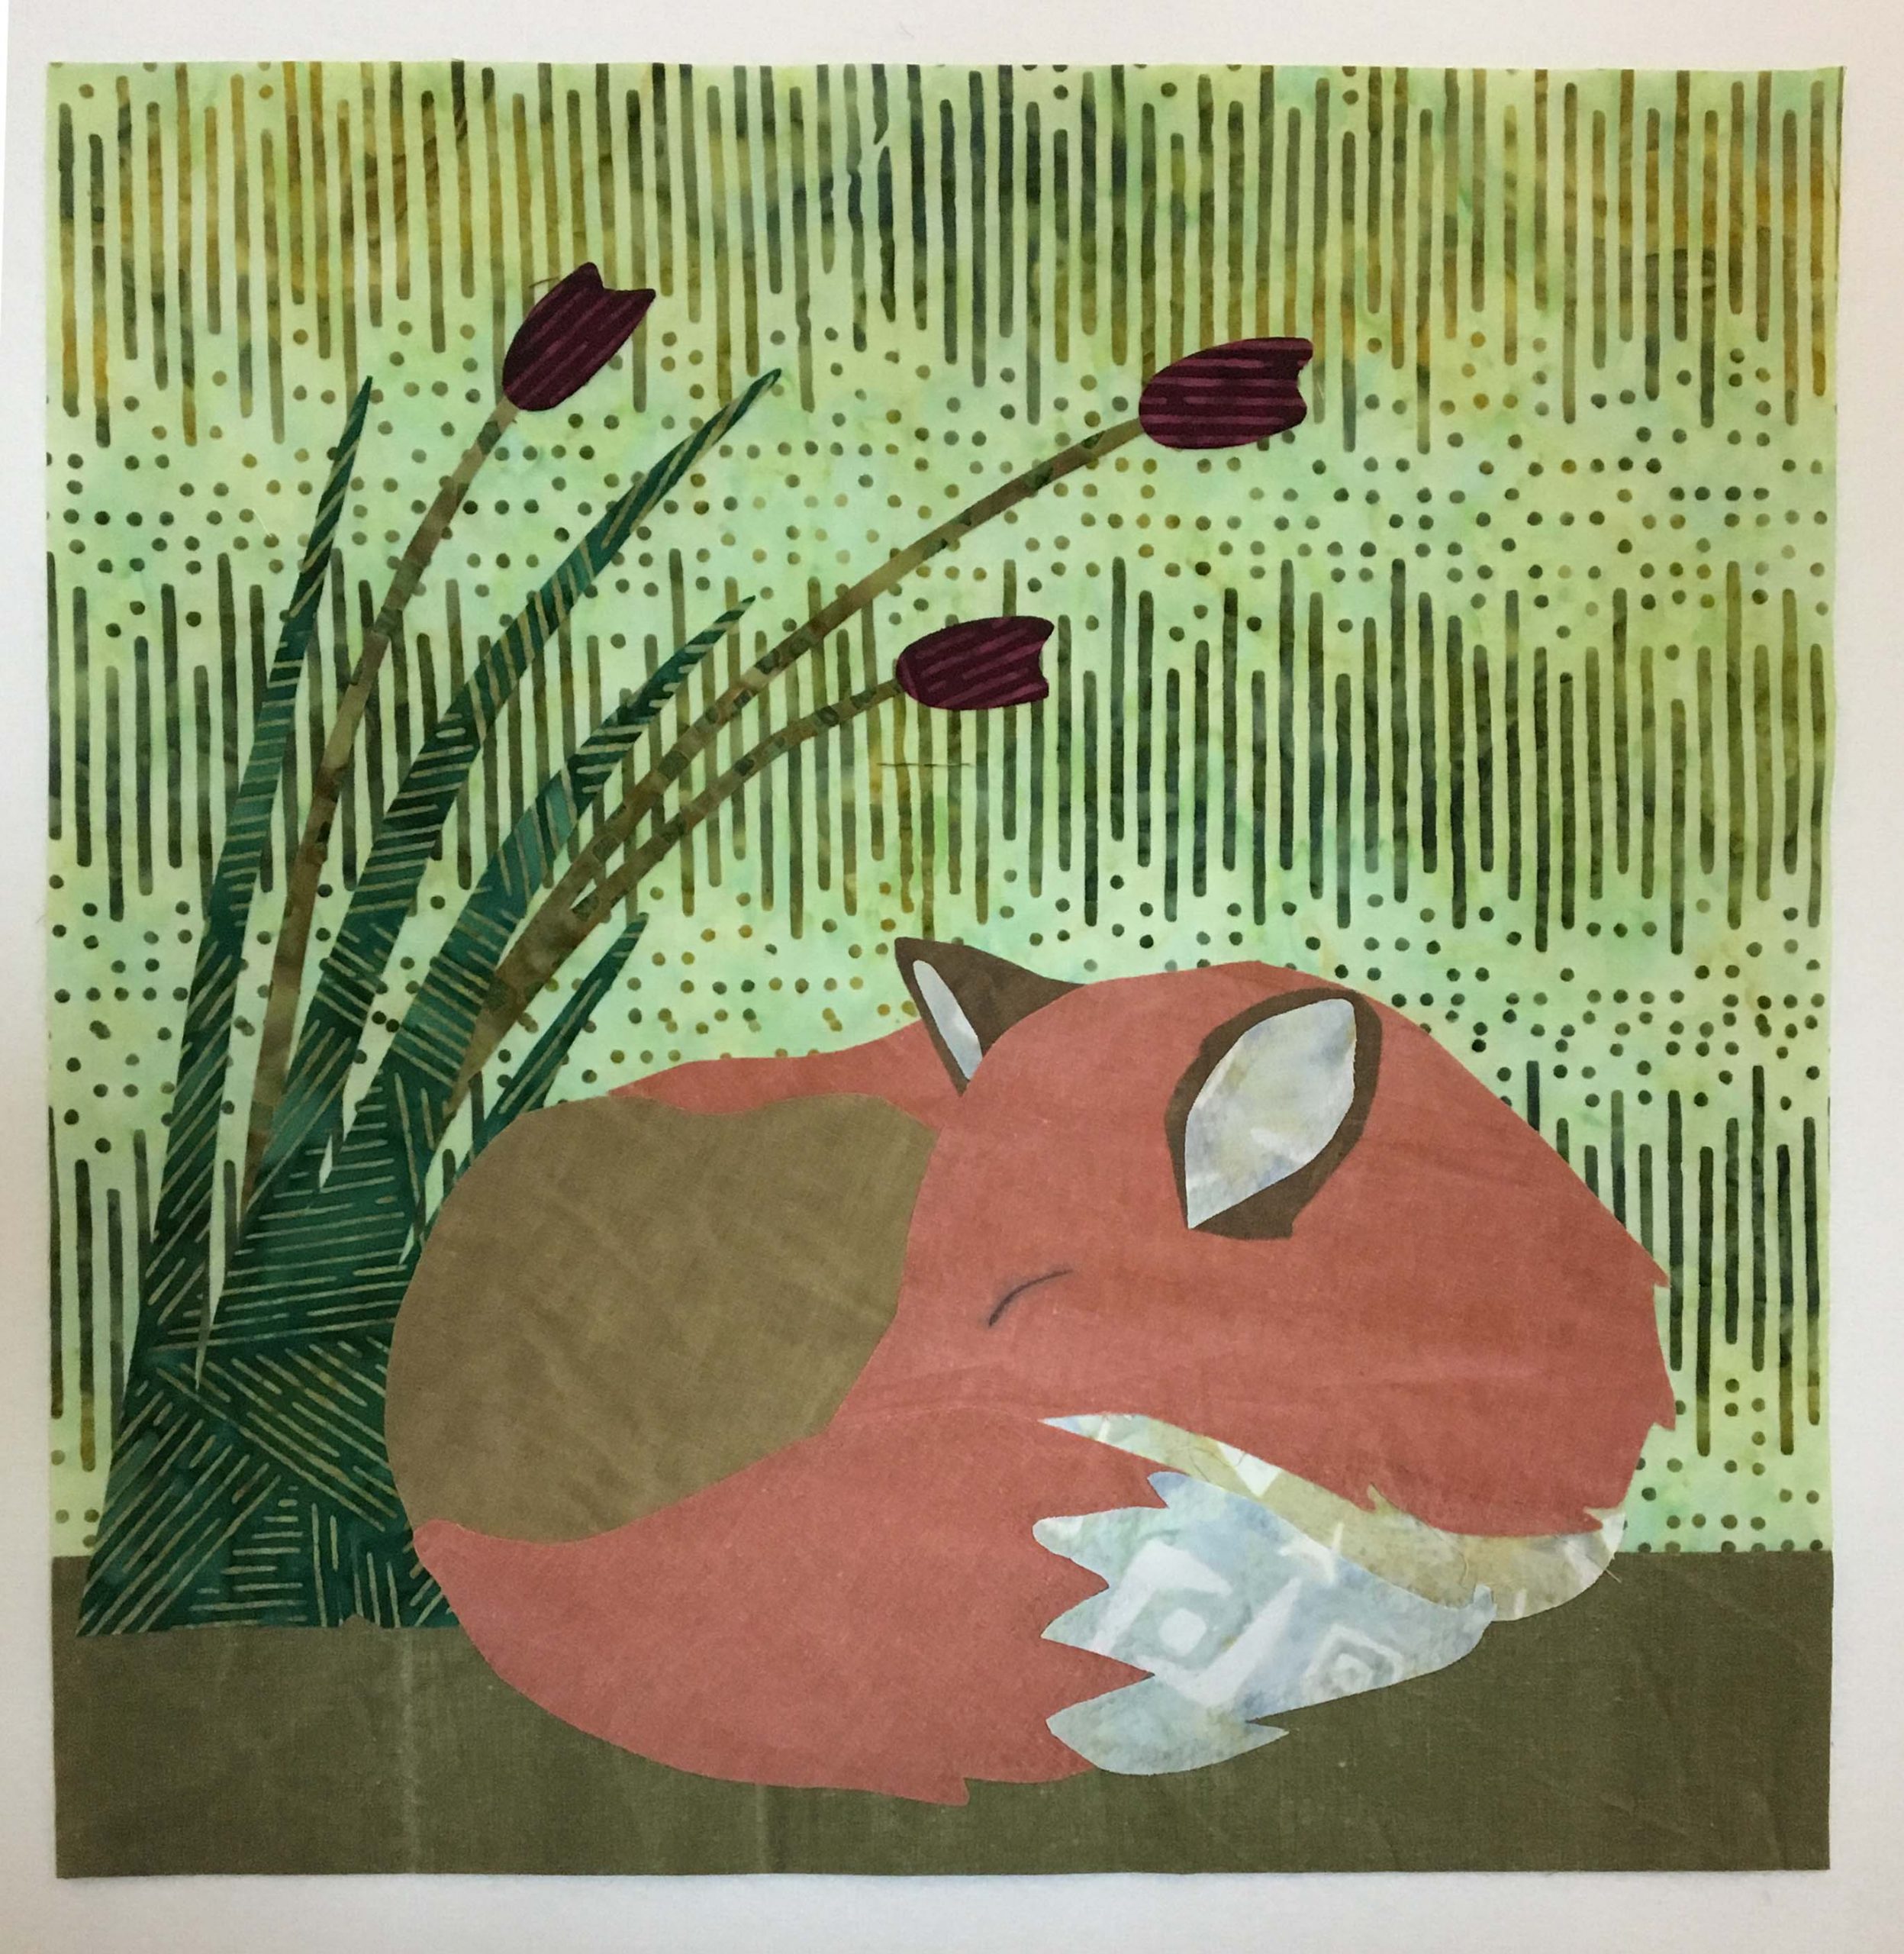
The Sleeping Fox Appliqué block is one of my favorites. The fox has his nose tucked under his tail and appears to be cozy in his slumber. I love appliqué. There are many ways to appliqué and a quick search in youtube will bring up many different ways for you to view. My favorite method of appliqué is the raw-edge, double-sided fusible web. It makes appliqué quick and easy.
 The fox pieces are already reversed so you won’t need to flip them when tracing. Just trace the pieces on pages 9 and 10 as per the instructions of the fusible web product you choose to use. All fusible web products are not the same and vary greatly. It is VERY important to read the instructions. Search for the product name in youtube and you’ll likely find a product demonstration by the manufacturer.
There is a great product available now that can make raw-edge, double-sided fusible web even faster, called Thermoweb Heat’nBond EZ print Lite Sheets. This product eliminates the need to trace your pieces because you use it as paper in your inkjet printer and just copy the appliqué pieces. Here is a quick video by the manufacturer on how it works.
Be sure your printer is an inkjet printer and not a laserjet. Laserjet printers use heat and the fusible product will make a mucky mess all over the rollers! My inkjet printer handles this fusible web paper great. I just load one page in at a time so I don’t waste a sheet with a misfeed. Lay page 9 or 10 on the glass and then just copy the image to the fusible paper.
In this picture, you see I’ve copied pages 9 and 10 on the fusible product with my inkjet printer. If you’re not using a printer, trace your images instead. I prefer a fine tip permanent pen instead of pencil. Graphite will smudge and get on your fabric where the fine tip marker will not.
After your image is copied or traced, rough cut each piece out, leaving about a quarter inch around the outside of the line.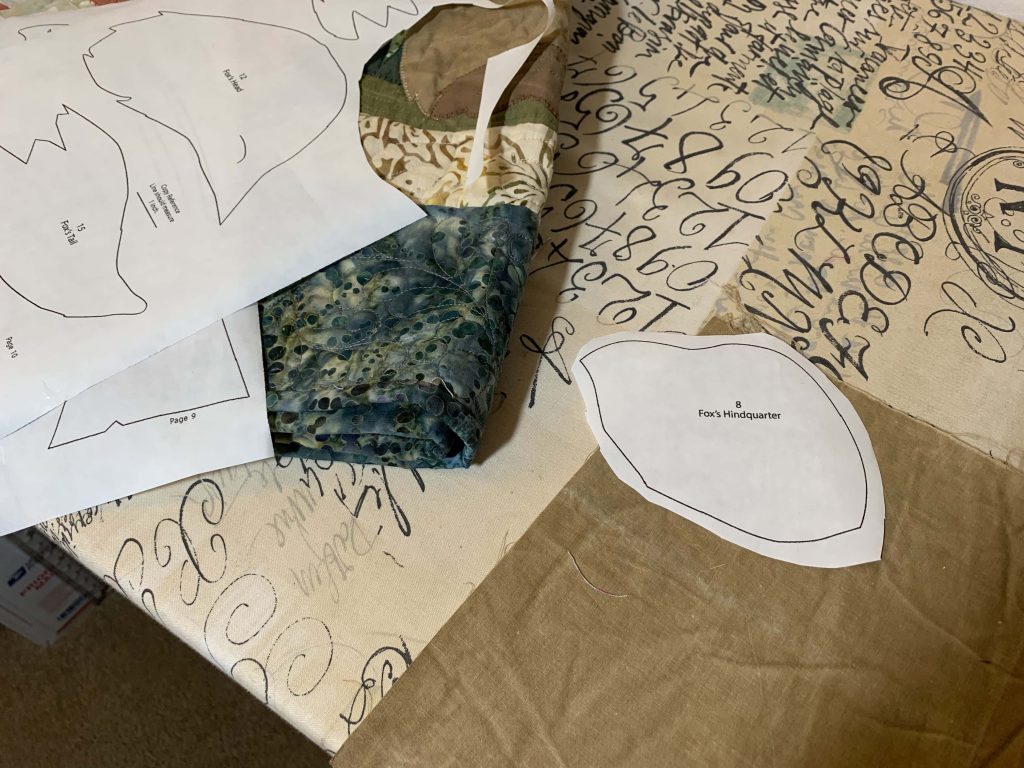
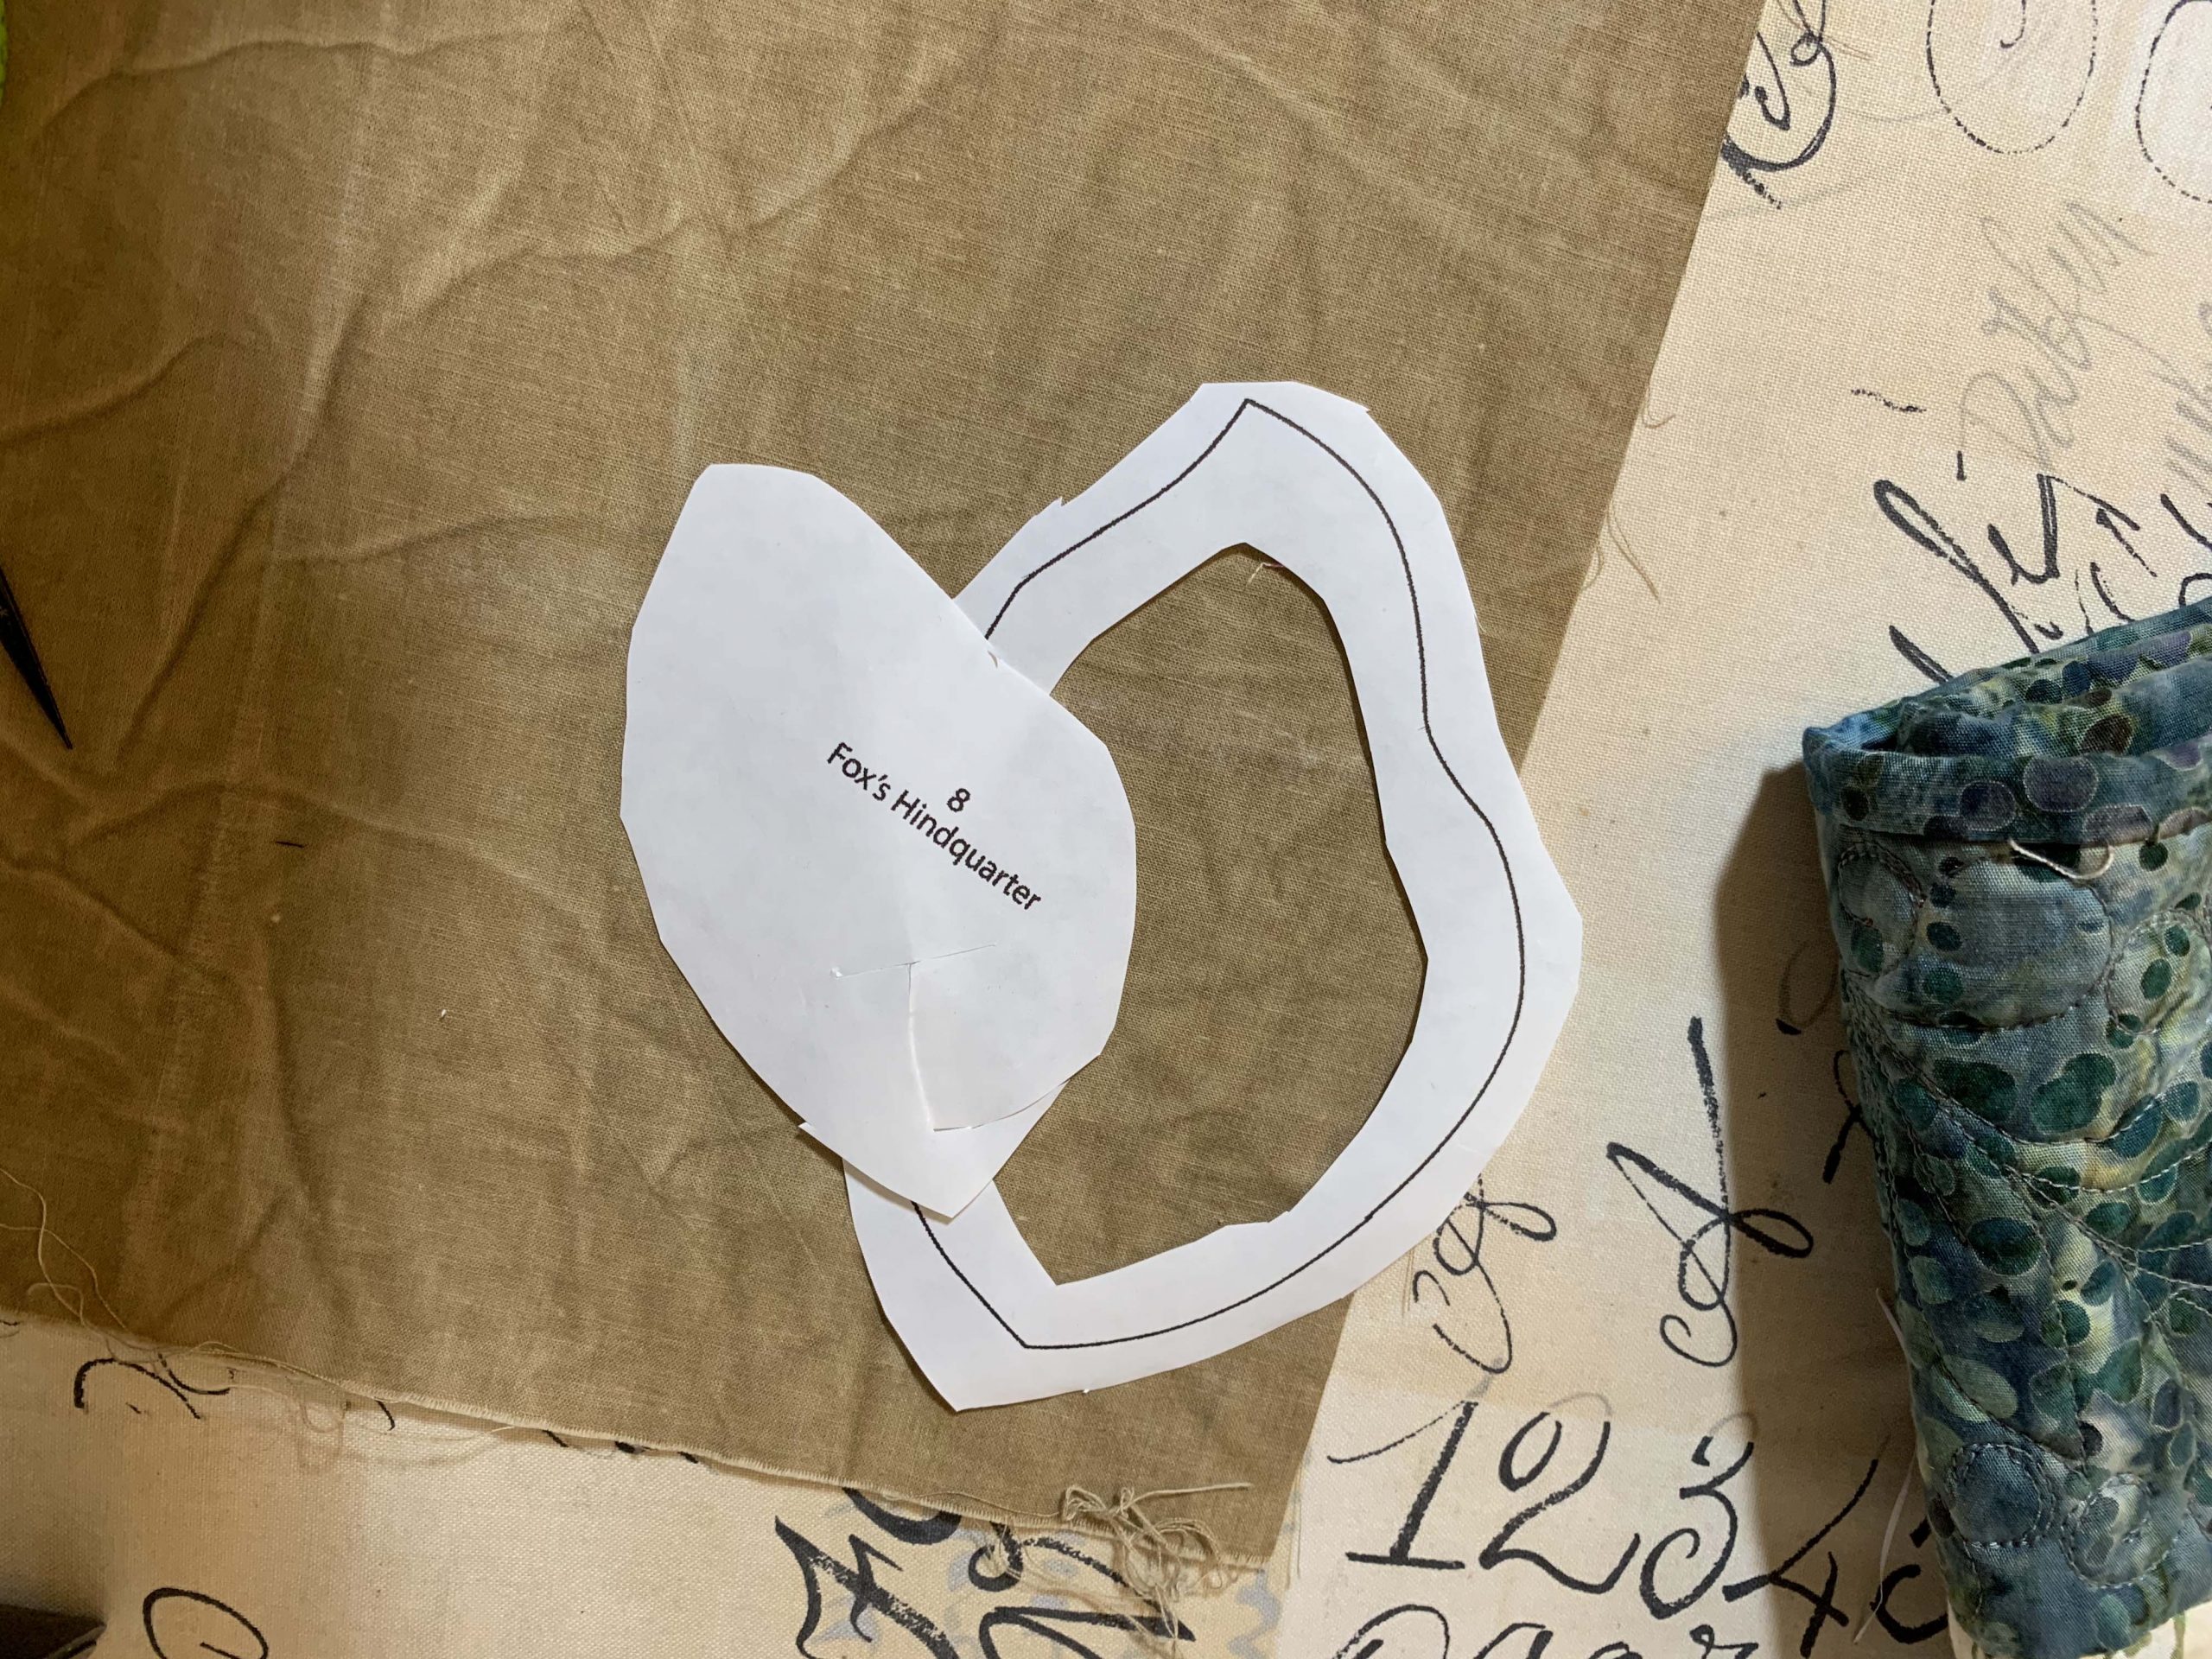
I like the “window” method for my larger pieces. With the window method, you would trim out the fusible product from the inside of the line as well, leaving roughly a quarter of an inch from the line. By cutting out the inside, this allows my appliqué pieces to be light instead of stiff from the product.
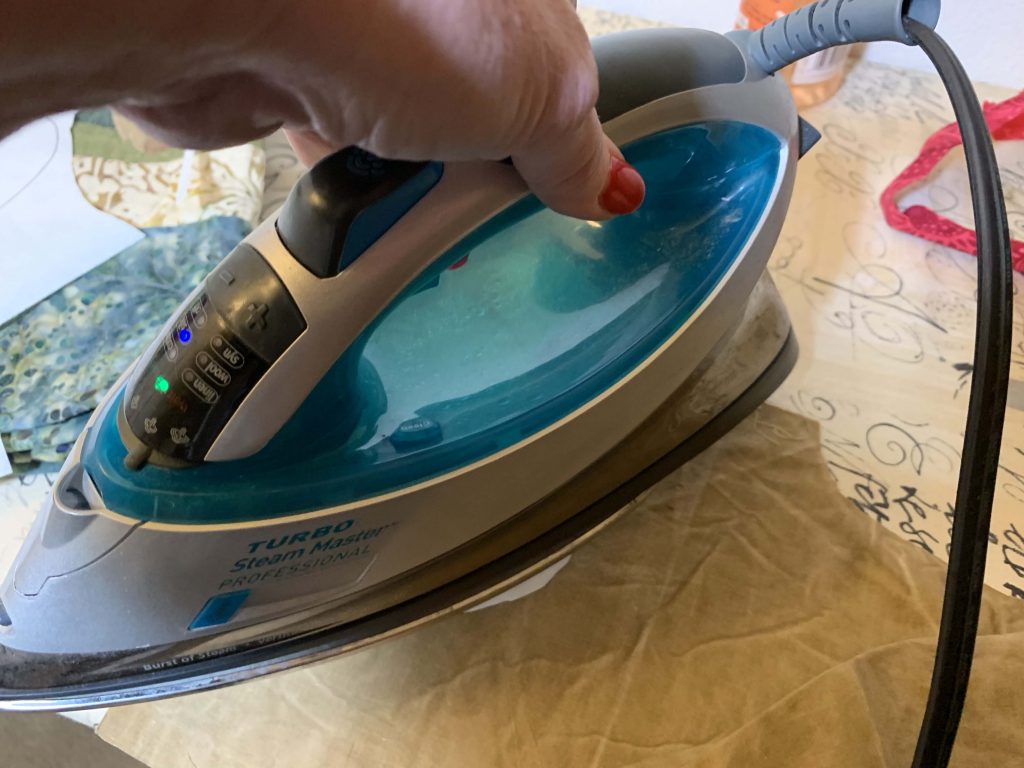
Fuse the bumpy side of the appliqué piece to the wrong side of your fabric. READ your instructions. Fusing time is different per product. Medium heat for two seconds, for the Thermoweb Heat’nBond EZ print Lite Sheets. If you over fuse your product, it may not want to fuse to your background. If that happens to you, use a little fabric glue to hold in place until you can top stitch it.
After it is fused, then trim out on the line.
Peel the paper off and you’ll be able to see the shiny fuse product.
 Once all your pieces are prepared, your’e ready to layer them onto your background. Background preparation instructions are on page 8. A light box or light tablet is extremely helpful when layering your pieces. Use the large sheet insert to help position the pieces. Layer in numeric order. Once everything is layered to your satisfaction, press with the iron according to your products directions.
 Next, add a straight, blanket, or zigzag stitch in coordinating threads to the edges of the appliqué pieces. Change your machine foot to an open toe foot so it is easier to see where you’re going. Set your machine to slow and be patient. Select a blanket or zig zag stitch and practices on a scrap of fabric first. Once you feel you have the hang of it, switch to top stitching your fox.
Once you’re all done, then trim the block to size following the instructions on page 8. Be sure to take note of the alignment tips in step 4.
January, Month 5
Quarter Square Triangles and the Masked Bandit Appliqué blocks will be made this month.
Quarter Square Triangles can be made by cutting triangles and sewing them back together OR you can just sew squares! I love it when there is an easy method to make a complicated block.
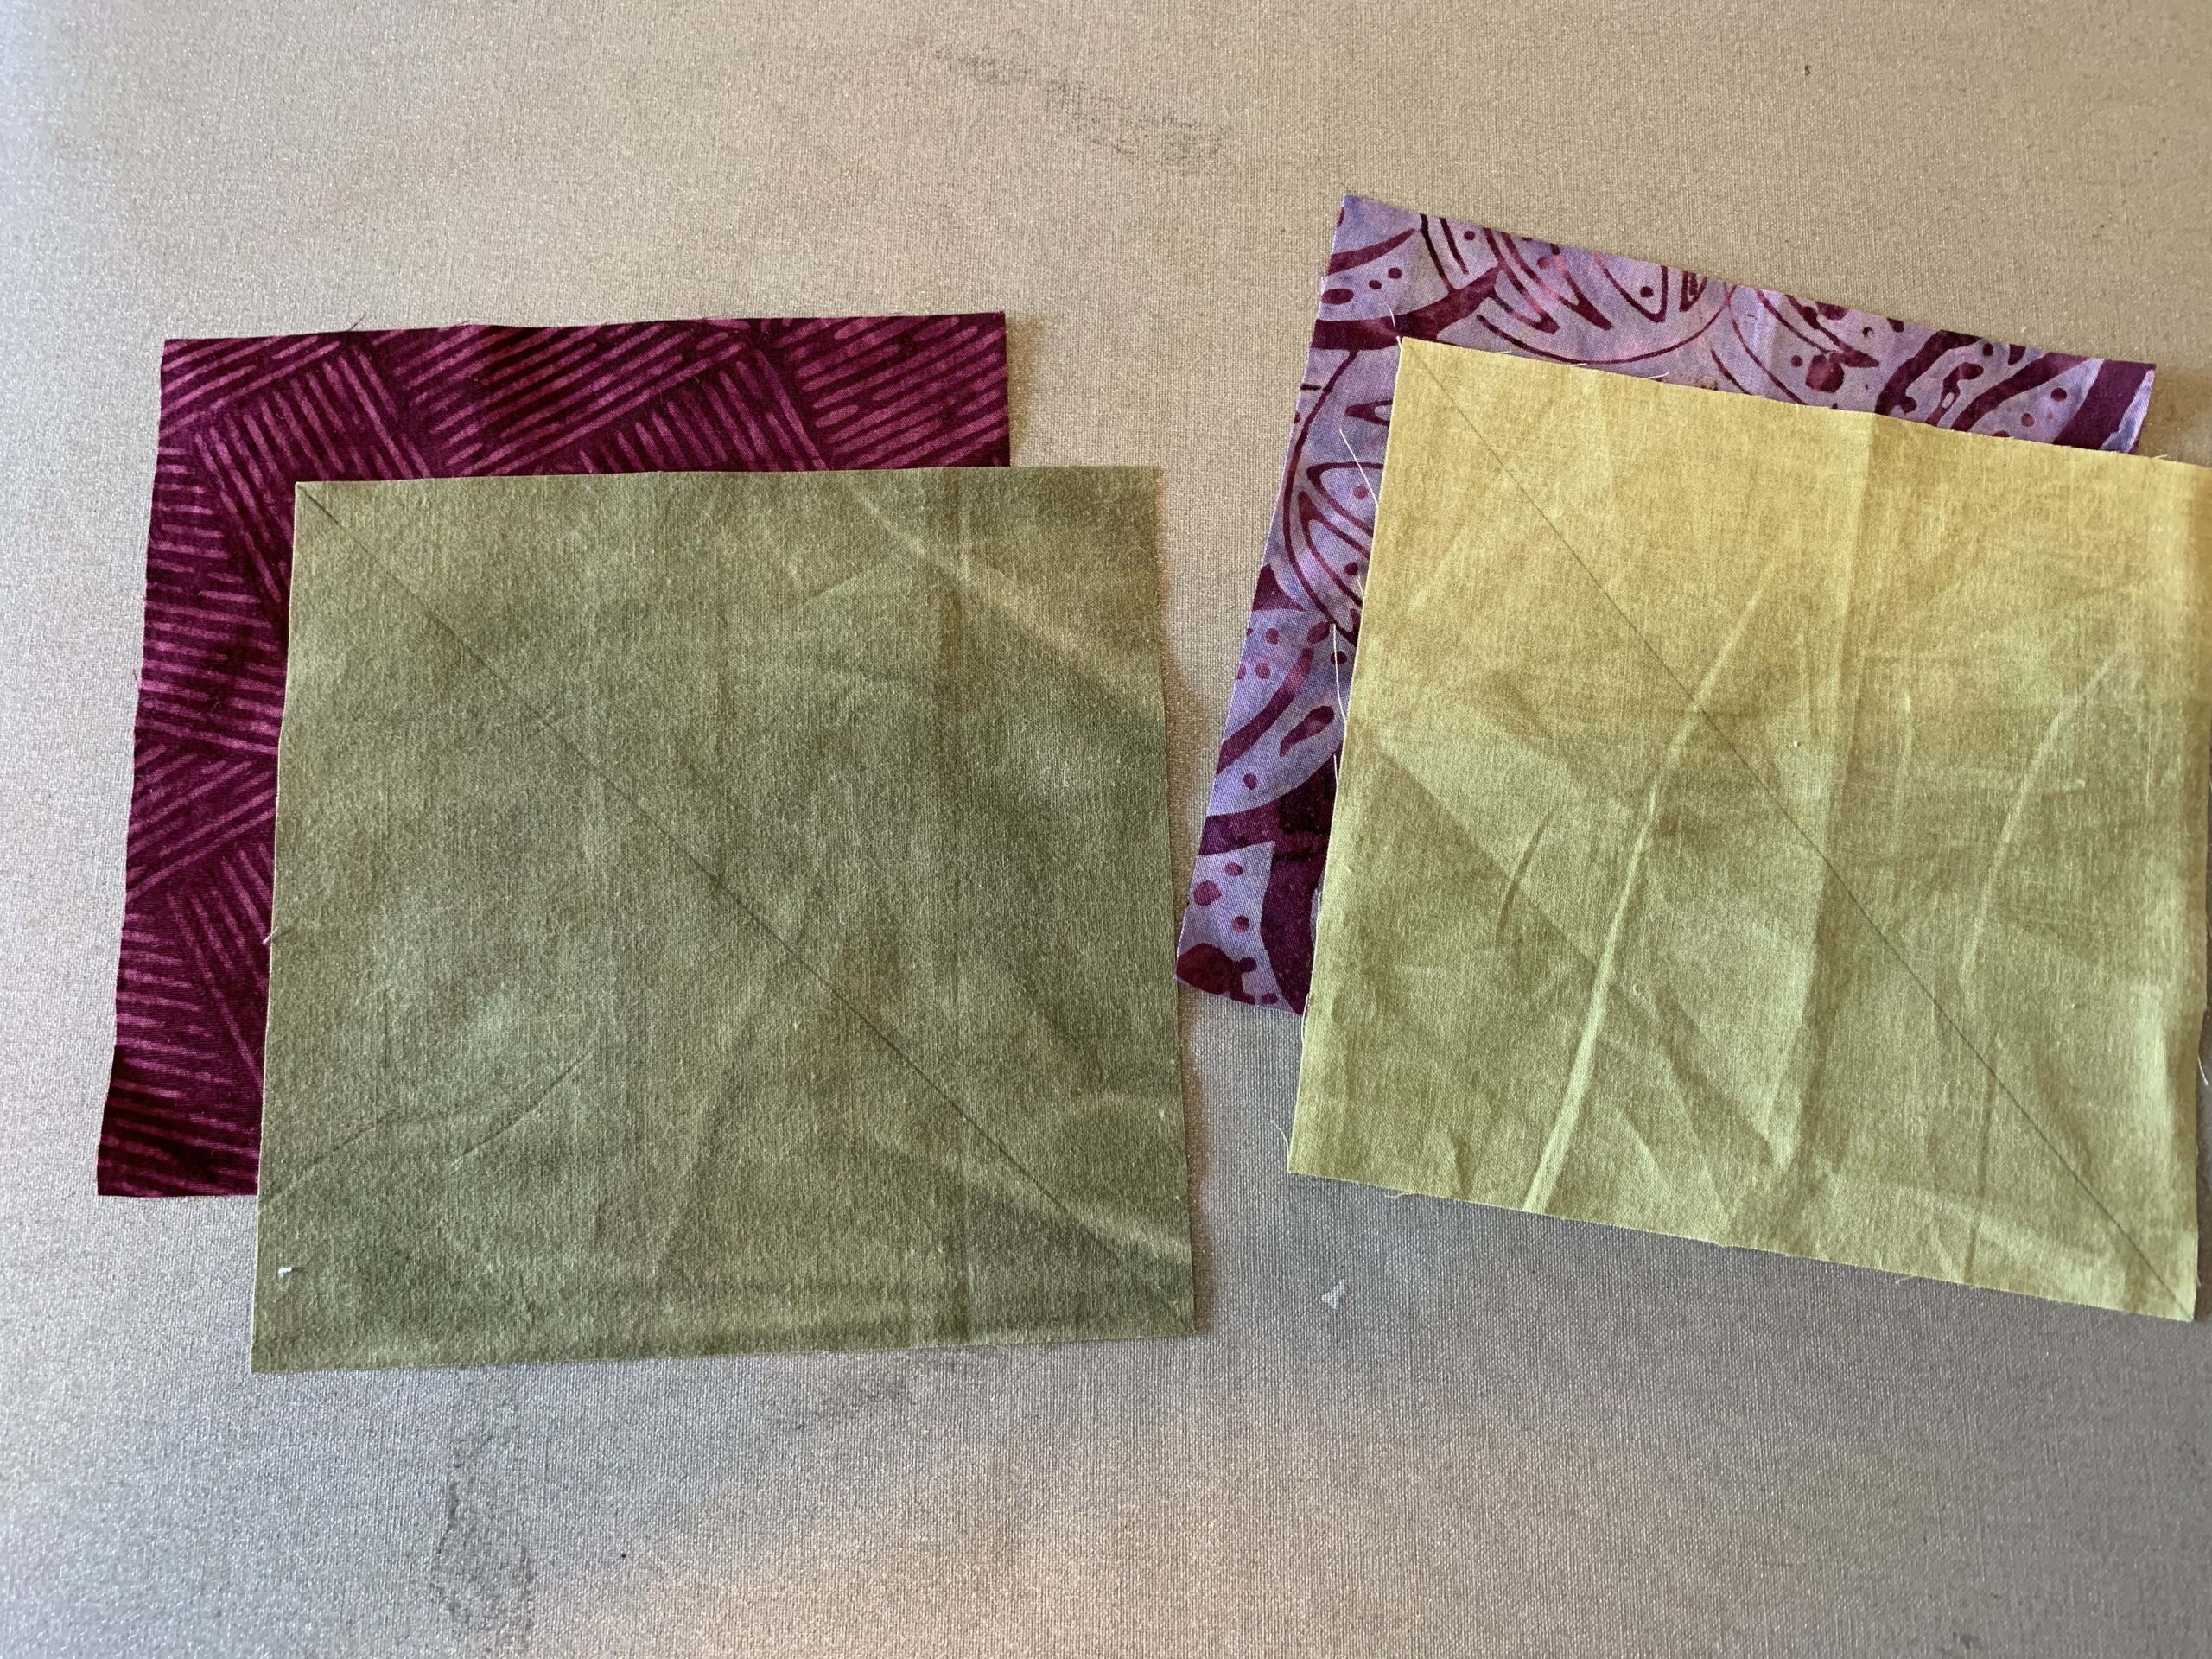
Start by cutting the 5 1/2″ squares marked with QST on page 11. QST stands for Quarter Square Triangle. Draw a diagonal line on the wrong side of the green squares. Pair the green squares with the appropriate burgundy squares.
With right sides together, sew a quarter inch seam on each side of the drawn line. (Interesting how lighting sure changes the fabric color! Those were the same green squares!)
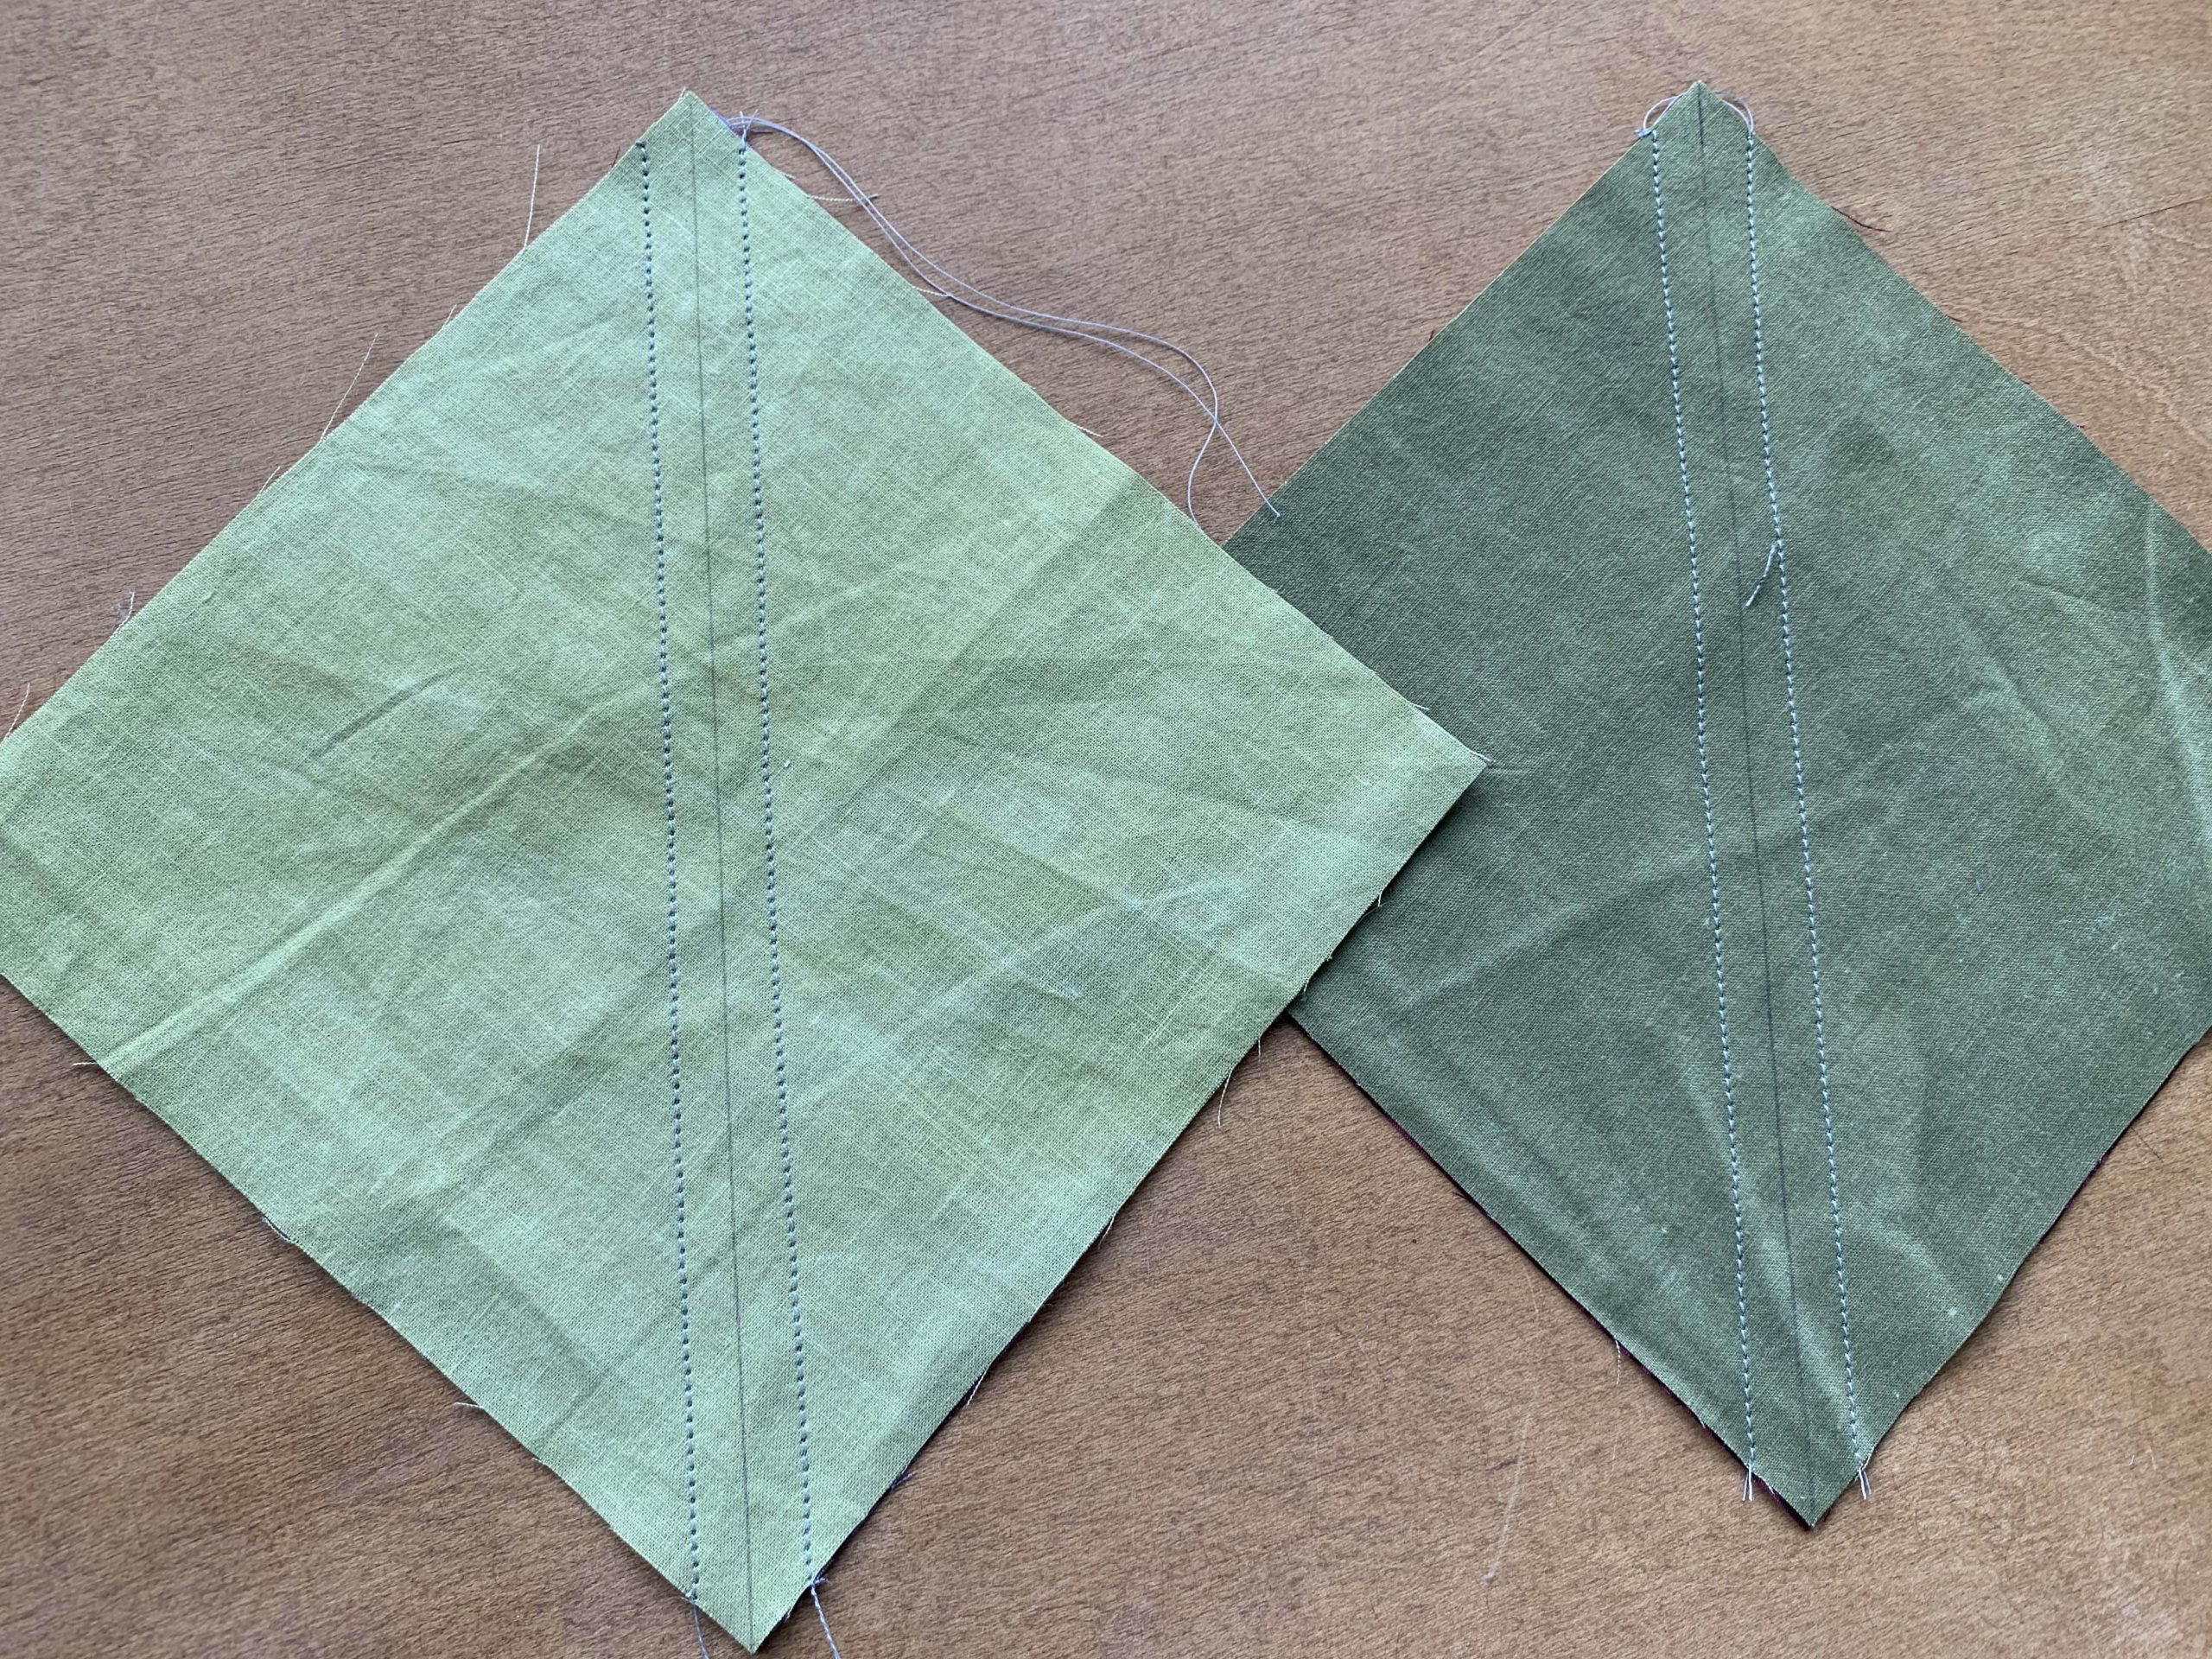
Cut on the drawn line and press the seams toward the burgundy fabric.
Don’t square these up just yet like we did with the Bear Paw block.
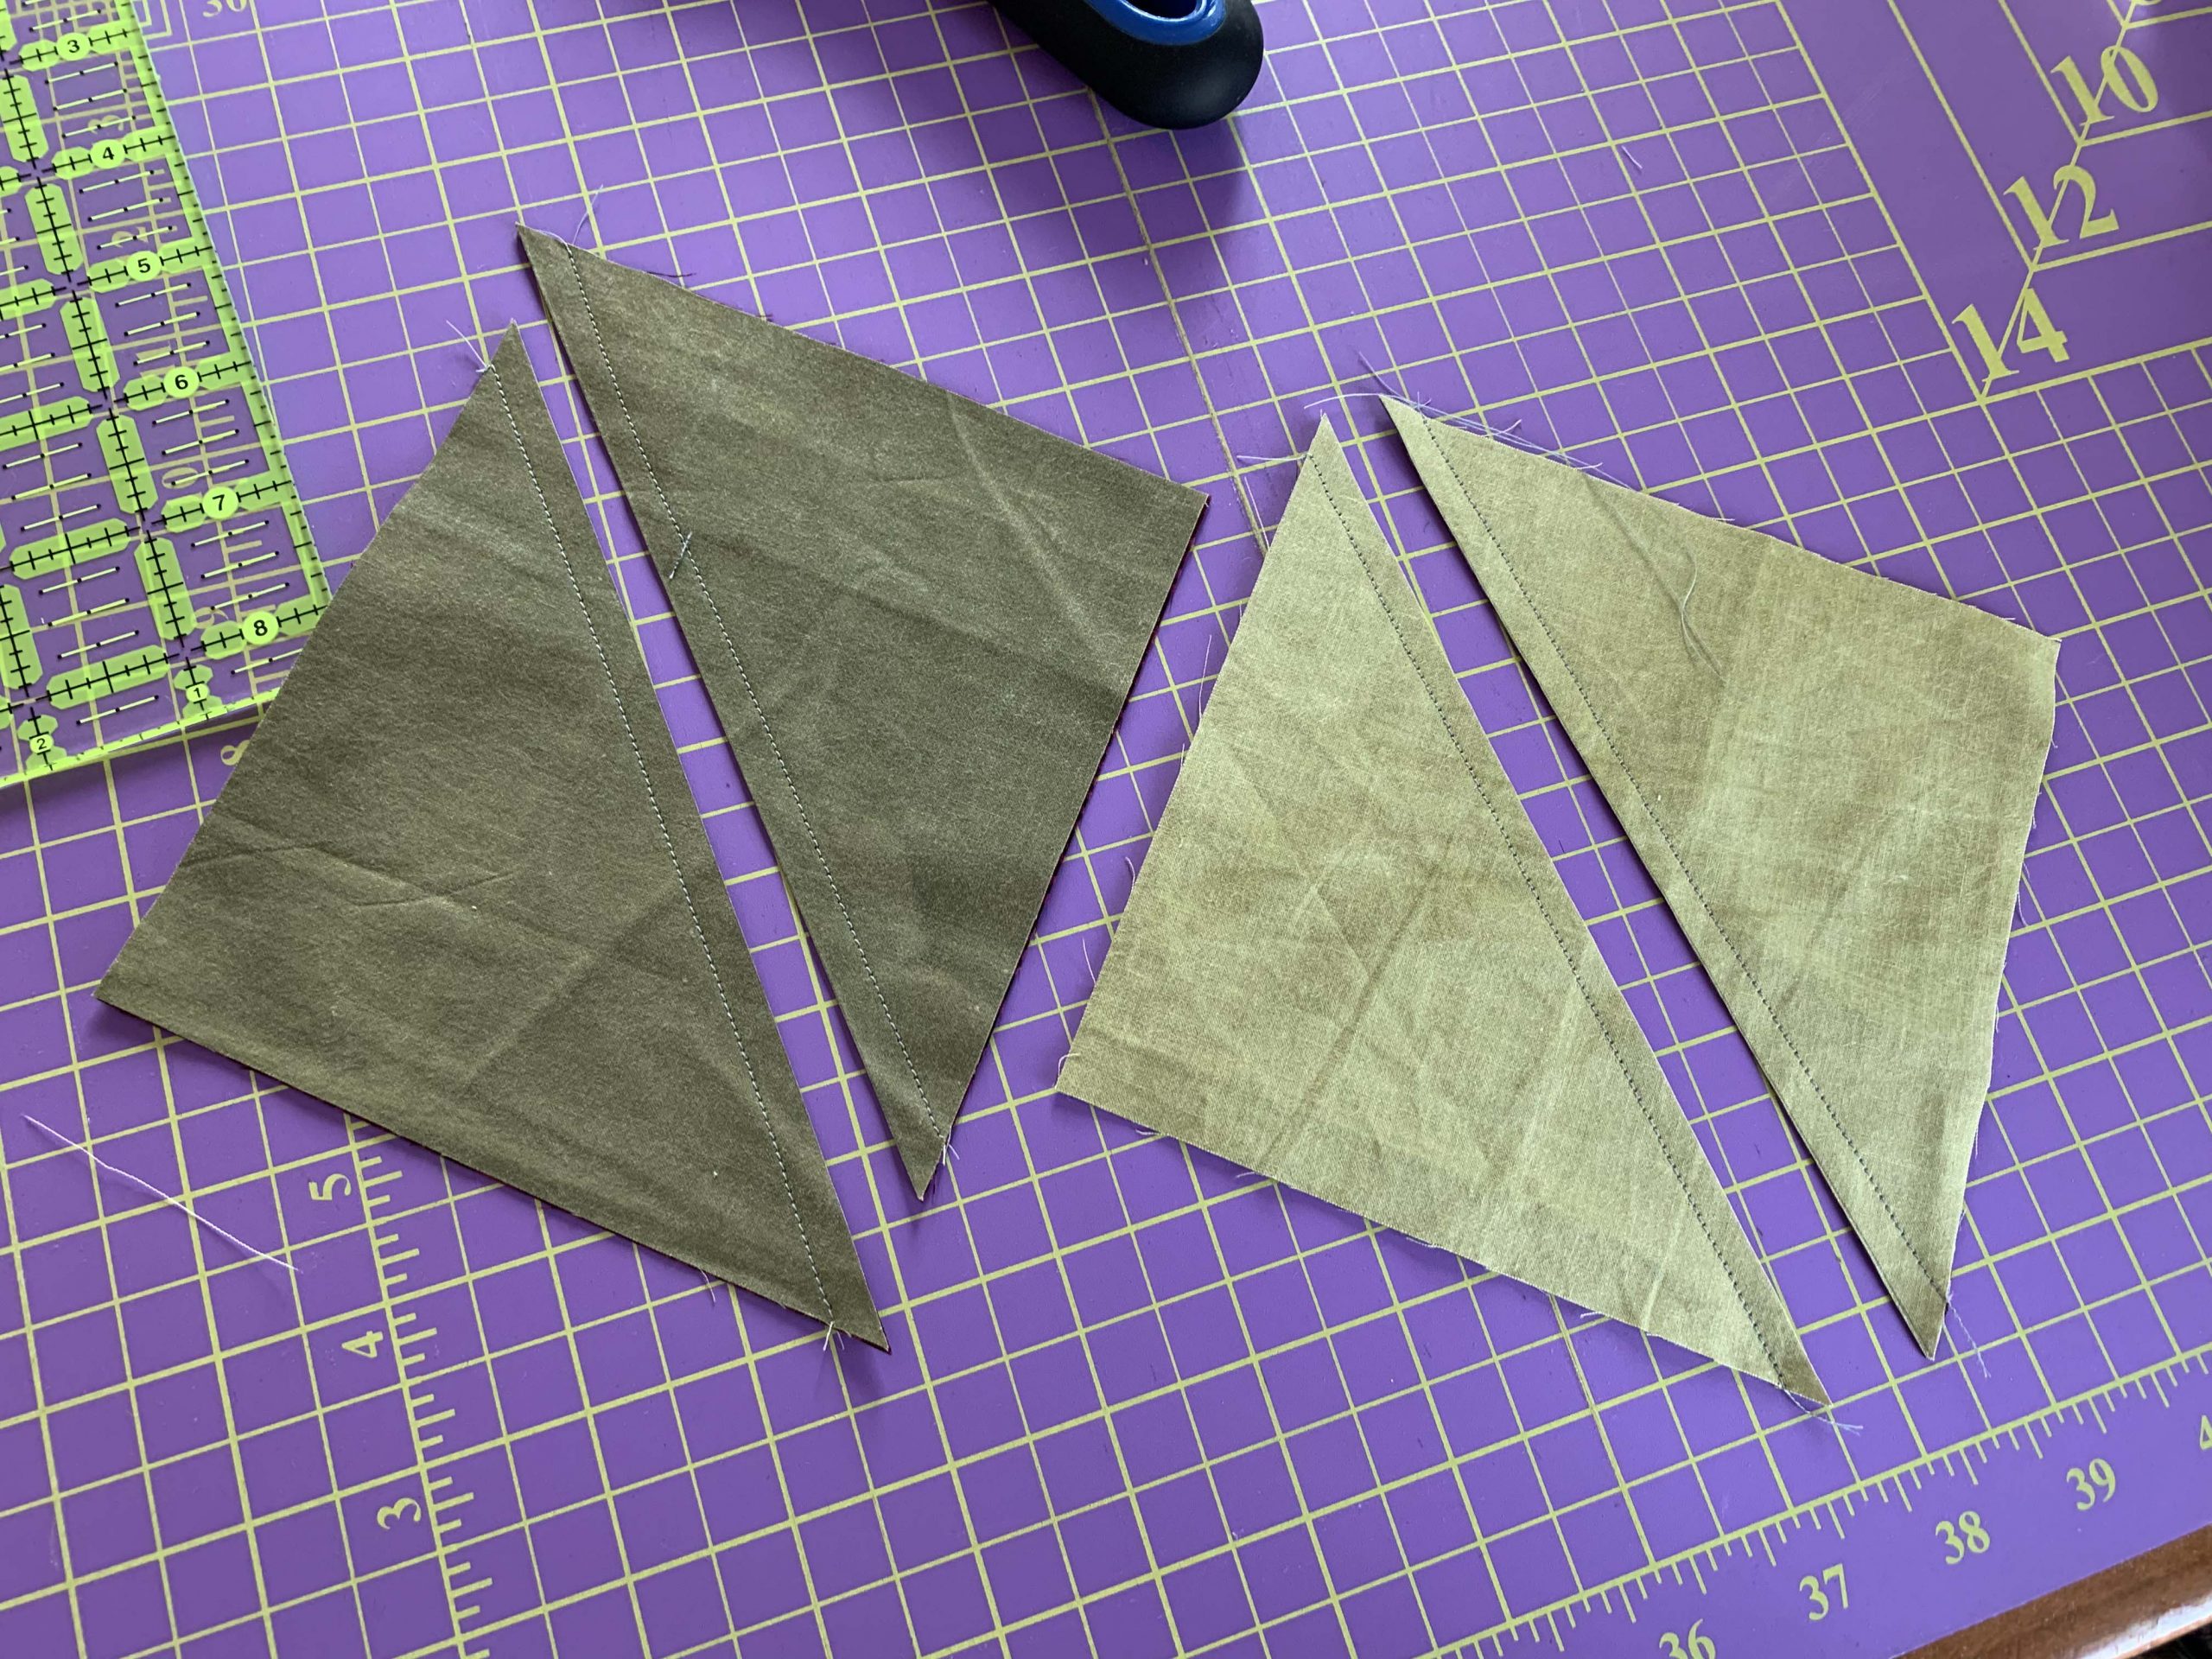
Next, you’re going to layer the Half Square Triangles, right sides together, with the seams going the say way. Burgundy fabric will be over a green fabric.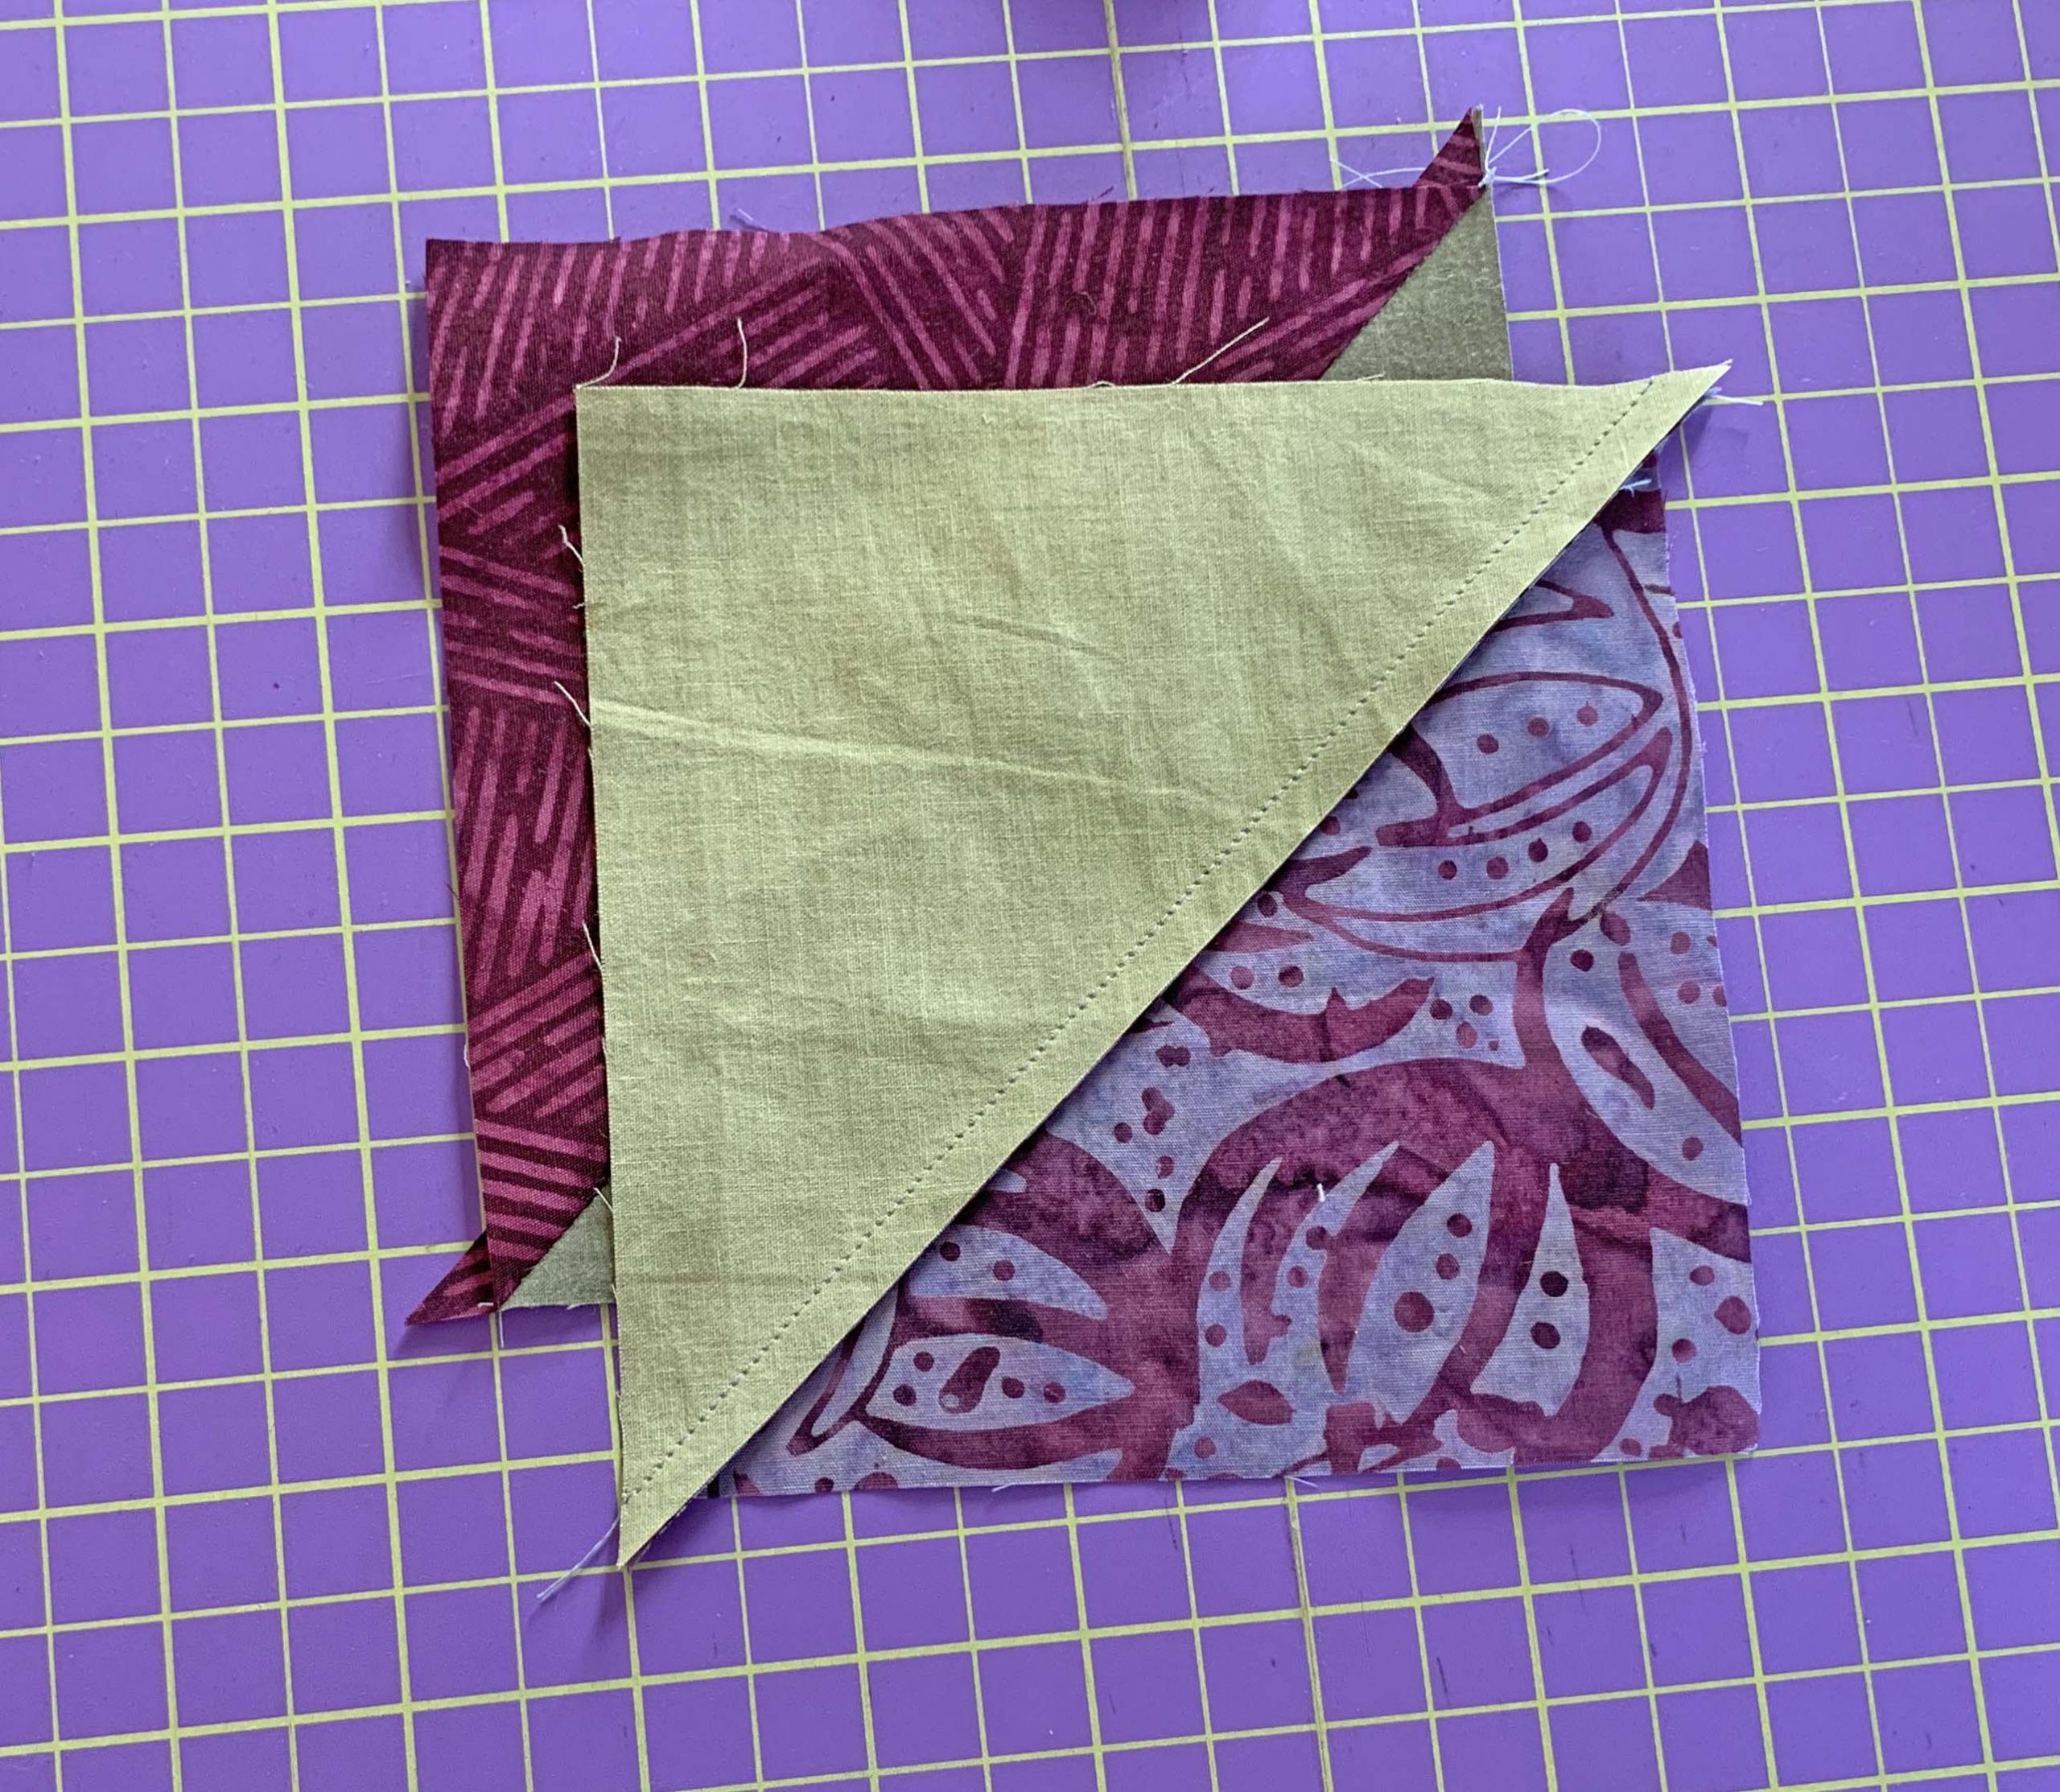
If you pressed the seams toward the burgundy fabric then the seams will “nest”, or fit snuggly together.
Draw another line corner to corner in the opposite direction than the seam.
Sew a quarter inch seam on both sides of the drawn line. 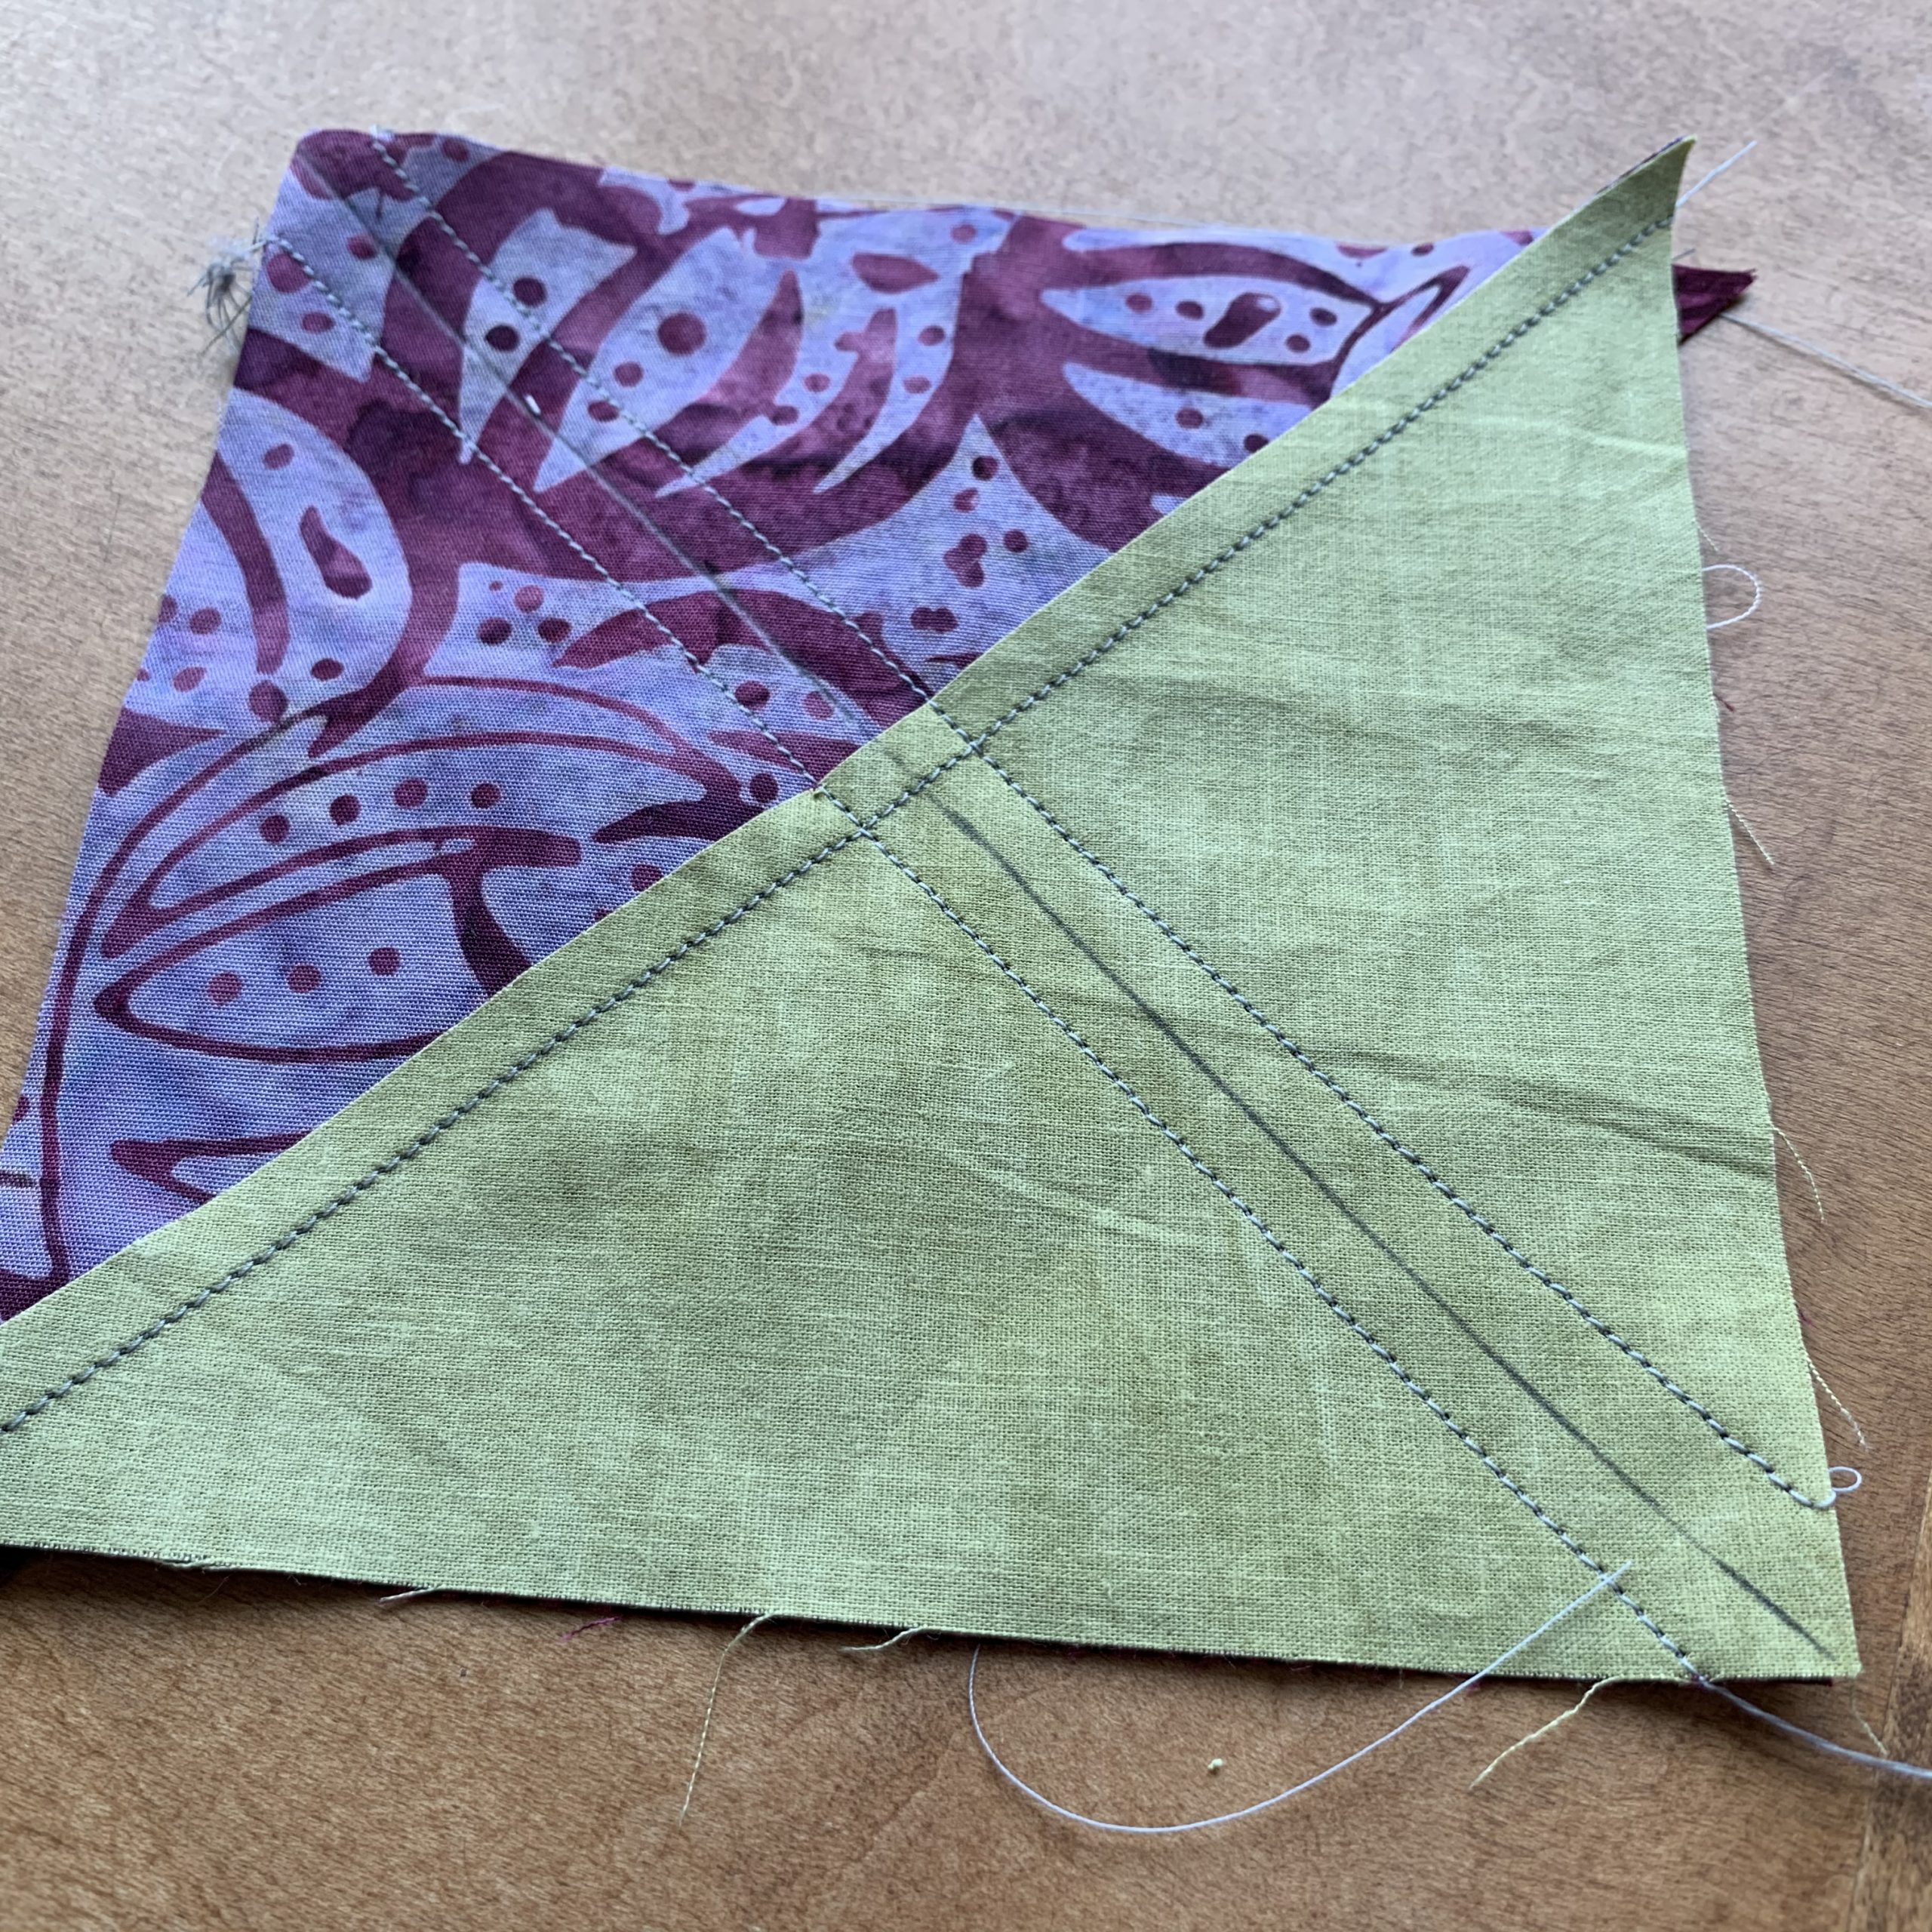
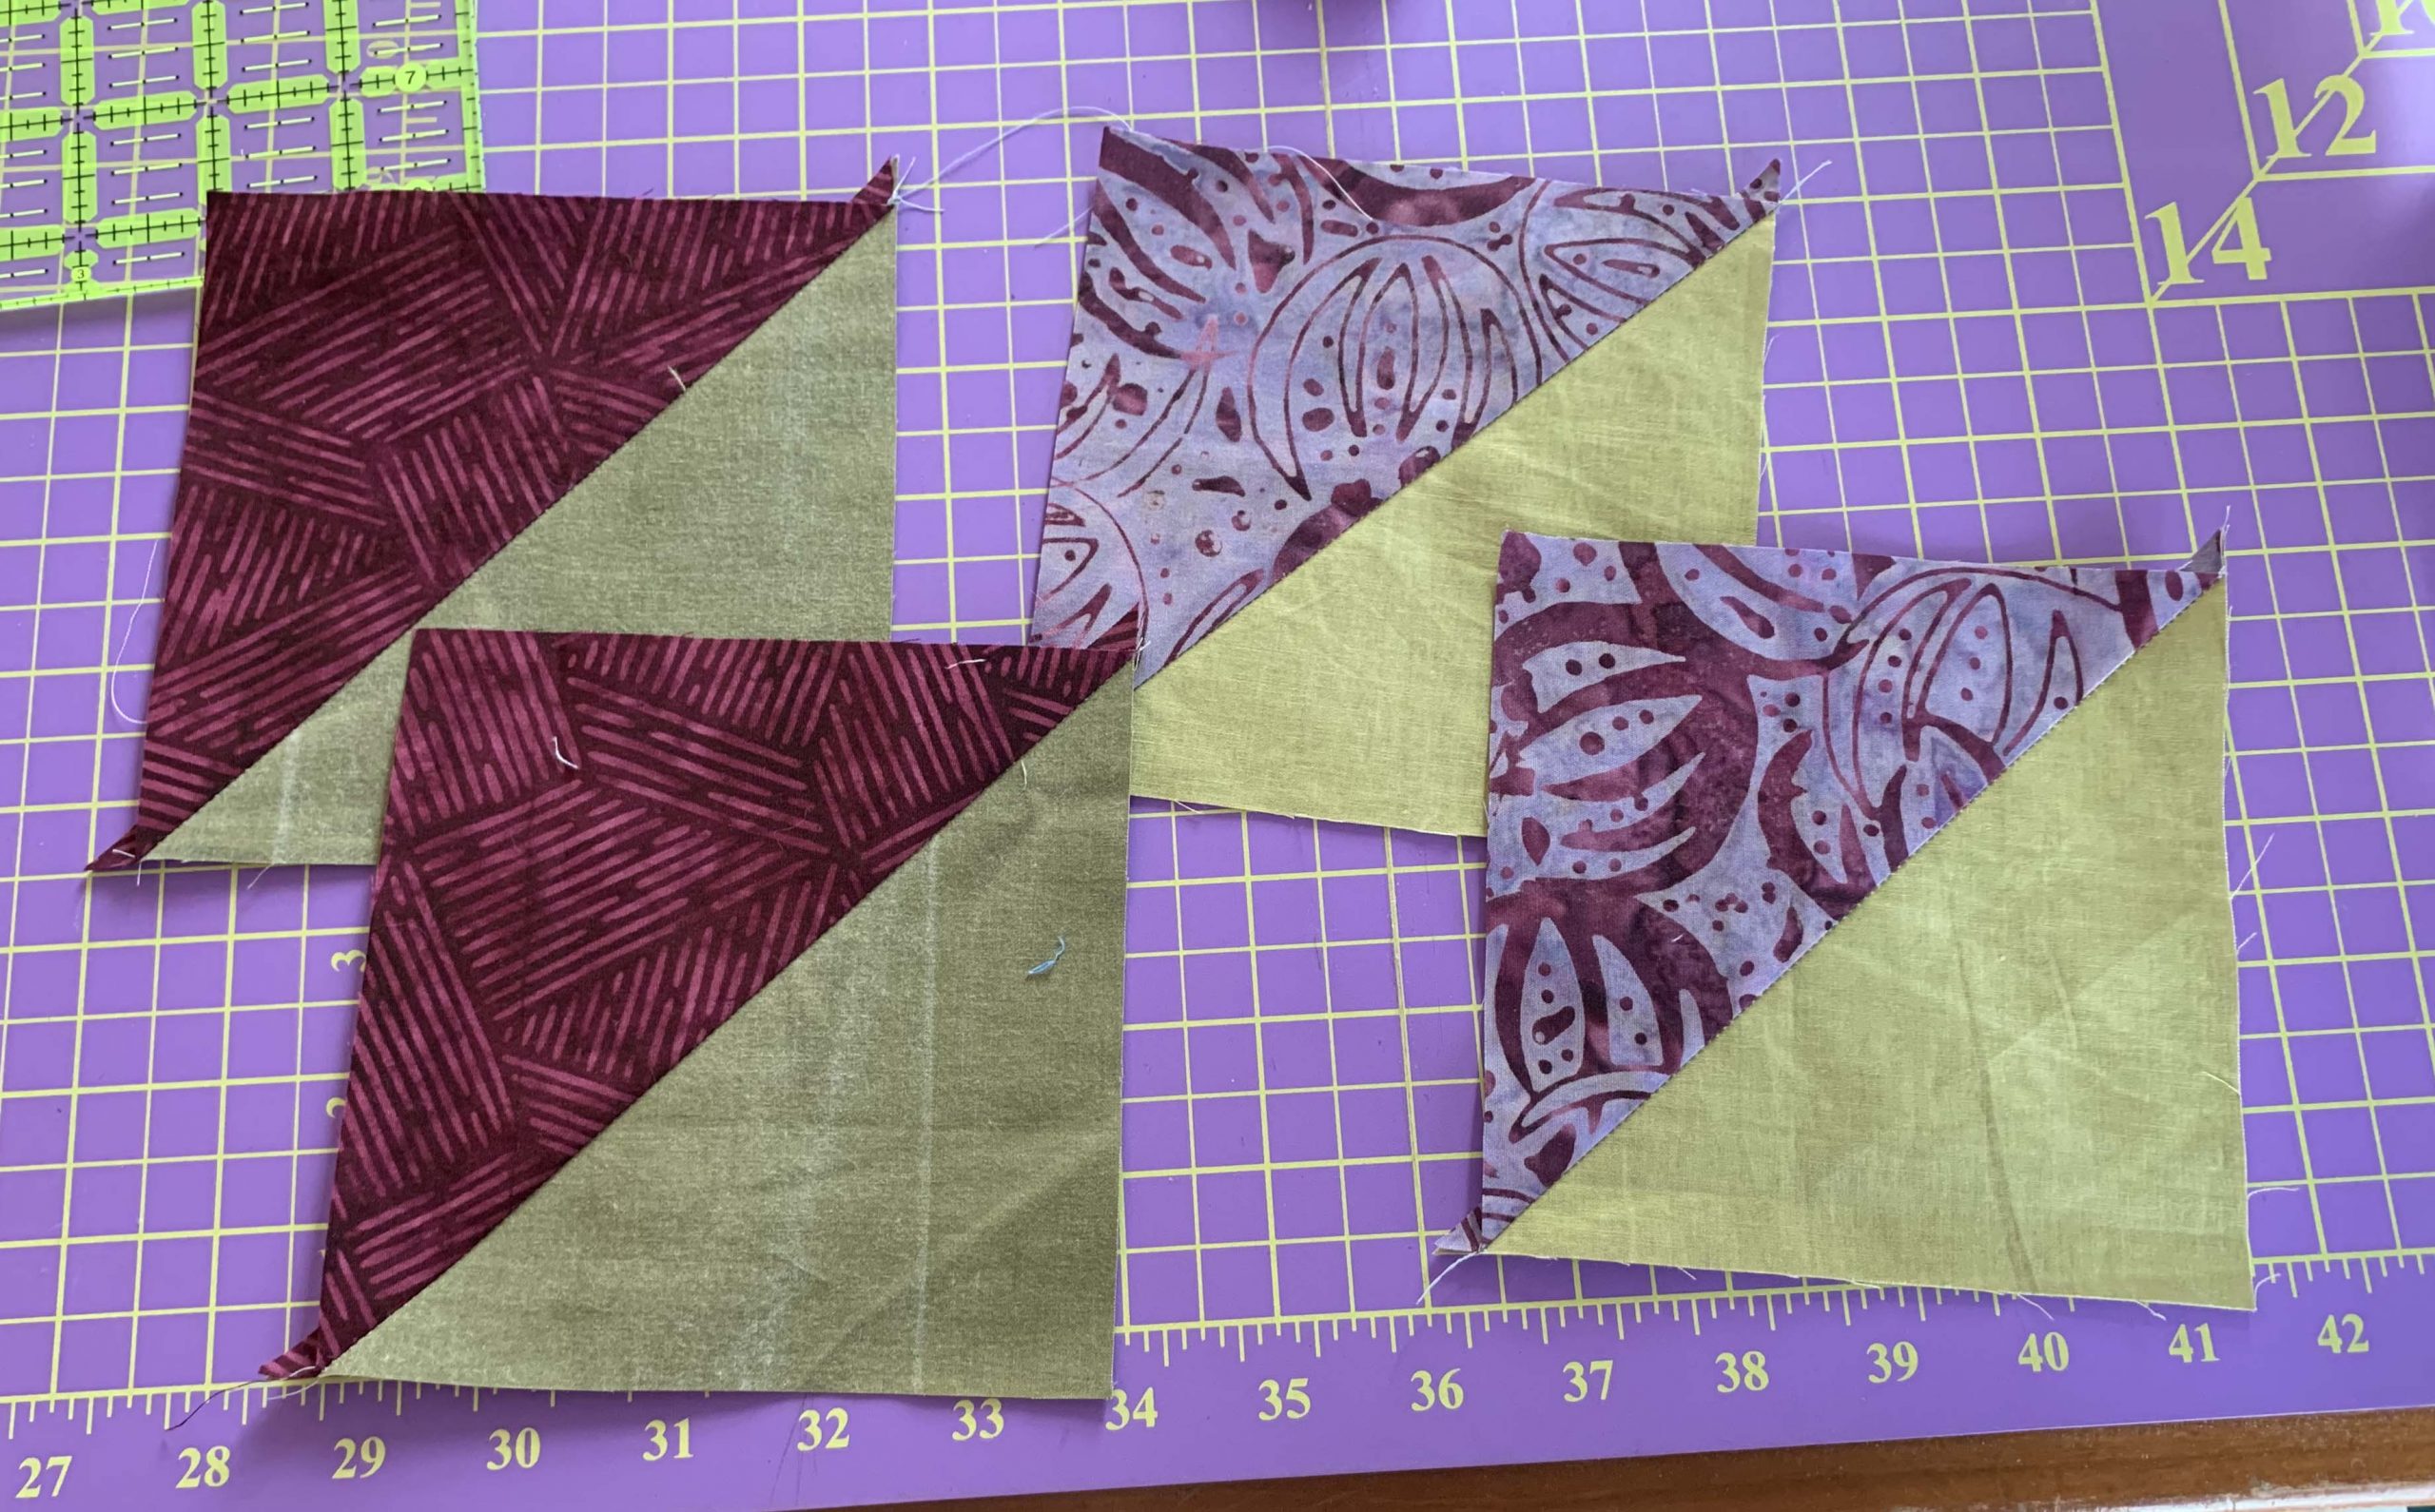
Cut on the drawn line and by magic you have four Quarter Square Triangles without having to sew a single triangle.
The last thing to do is to square them to 4 1/2″. Be sure to align the diagonal line of your square along the diagonal seam. You’ll be trimming less than a quarter inch. Split the different and trim a small portion off two sides. Flip the block around and finishing trimming the other two sides for a final cut at 4 1/2″ with diagonal seams aligning in each corner. You only need three QST for this block. You’ll have one extra.

This month allows you to work ahead if you want. You will need six of these QST blocks for the entire quilt. Repeat the cutting and piecing instructions to make four more QSTs. Assemble three QSTs in the same manner for Month 12. You’ll end up with two extra QST block.
The bandit appliqué block will be assembled the same way you did the sleeping fox block. Create your appliqué using the pieces on page 12. Position in numeric order so the layering is correct. Fuse, top stitch and you’re done. By the way, don’t sew the QST units to the left side of the Raccoon appliqué. That unit actually gets sewn to the left side of the Bear Paw and Bee block.
Great job!
 February, Month 6
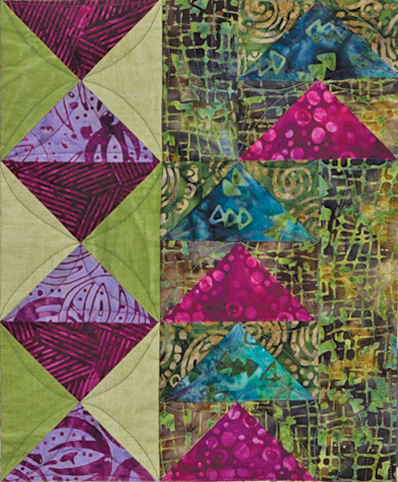
Summer Winds Block
Summer Winds block is one of my favorite bocks. I’ve put this pretty block in a couple Block of the Month patterns! The piece work is pretty straight forward. You’re making four identical HST units, four identical Flying Geese units, plus the center square. Nothing you can’t handle. Easy Peasy, right?
Trouble shooting: if your points aren’t lining up, review the four elements to accuracy. Cutting, Alignment, seam allowance and pressing. But, there is one other item that might be messing up your block. Did you remember to square up your HST by trimming them to 2 1/2″? It is in the last line of step 1. Pay attention to the pressing arrows and your seams should all nest nicely.
Good work!
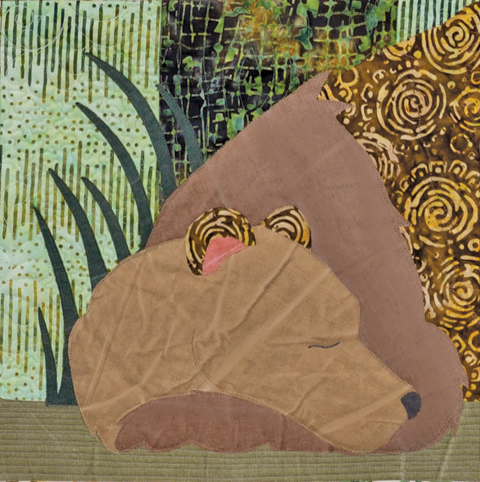 March, Month 7
Slumbering Bear Appliqué Block
You’ve already learned all the techniques for this block in the previous months. The only thing I can think of to tell you is that the Teal batik that is used as part of the background, is just a filler fabric. The green was used so much that I worried you’d run short of the green and didn’t want to waste any behind the bear. We have plenty of the Teal. However, if you don’t want to hide that beautiful Teal fabric behind the bear, use a scrap of whatever cotton you have lying around!
Have fun! I’ve been in Shelter in Place. I’ve been enjoying plenty of quilting time.
 April, Month 8
Snuggling Love Birds Appliqué block
The size of this one is awkward. It is suppose to be 14 1/2″ wide by 12 1/2″ tall. I know, our brains want to make it 12 1/2″ square, but don’t trim it. It will all fit perfectly.
The only little trick in this block is the nest. In one place it is behind the branch and in another place, it is in front of it. Just tuck and layer as the instructions show.
You’ll appliqué the Love Birds on the pieced background. After you have topstitched the appliqué, you’ll add the FG unit to the right.
Looking good!
 May, Month 9
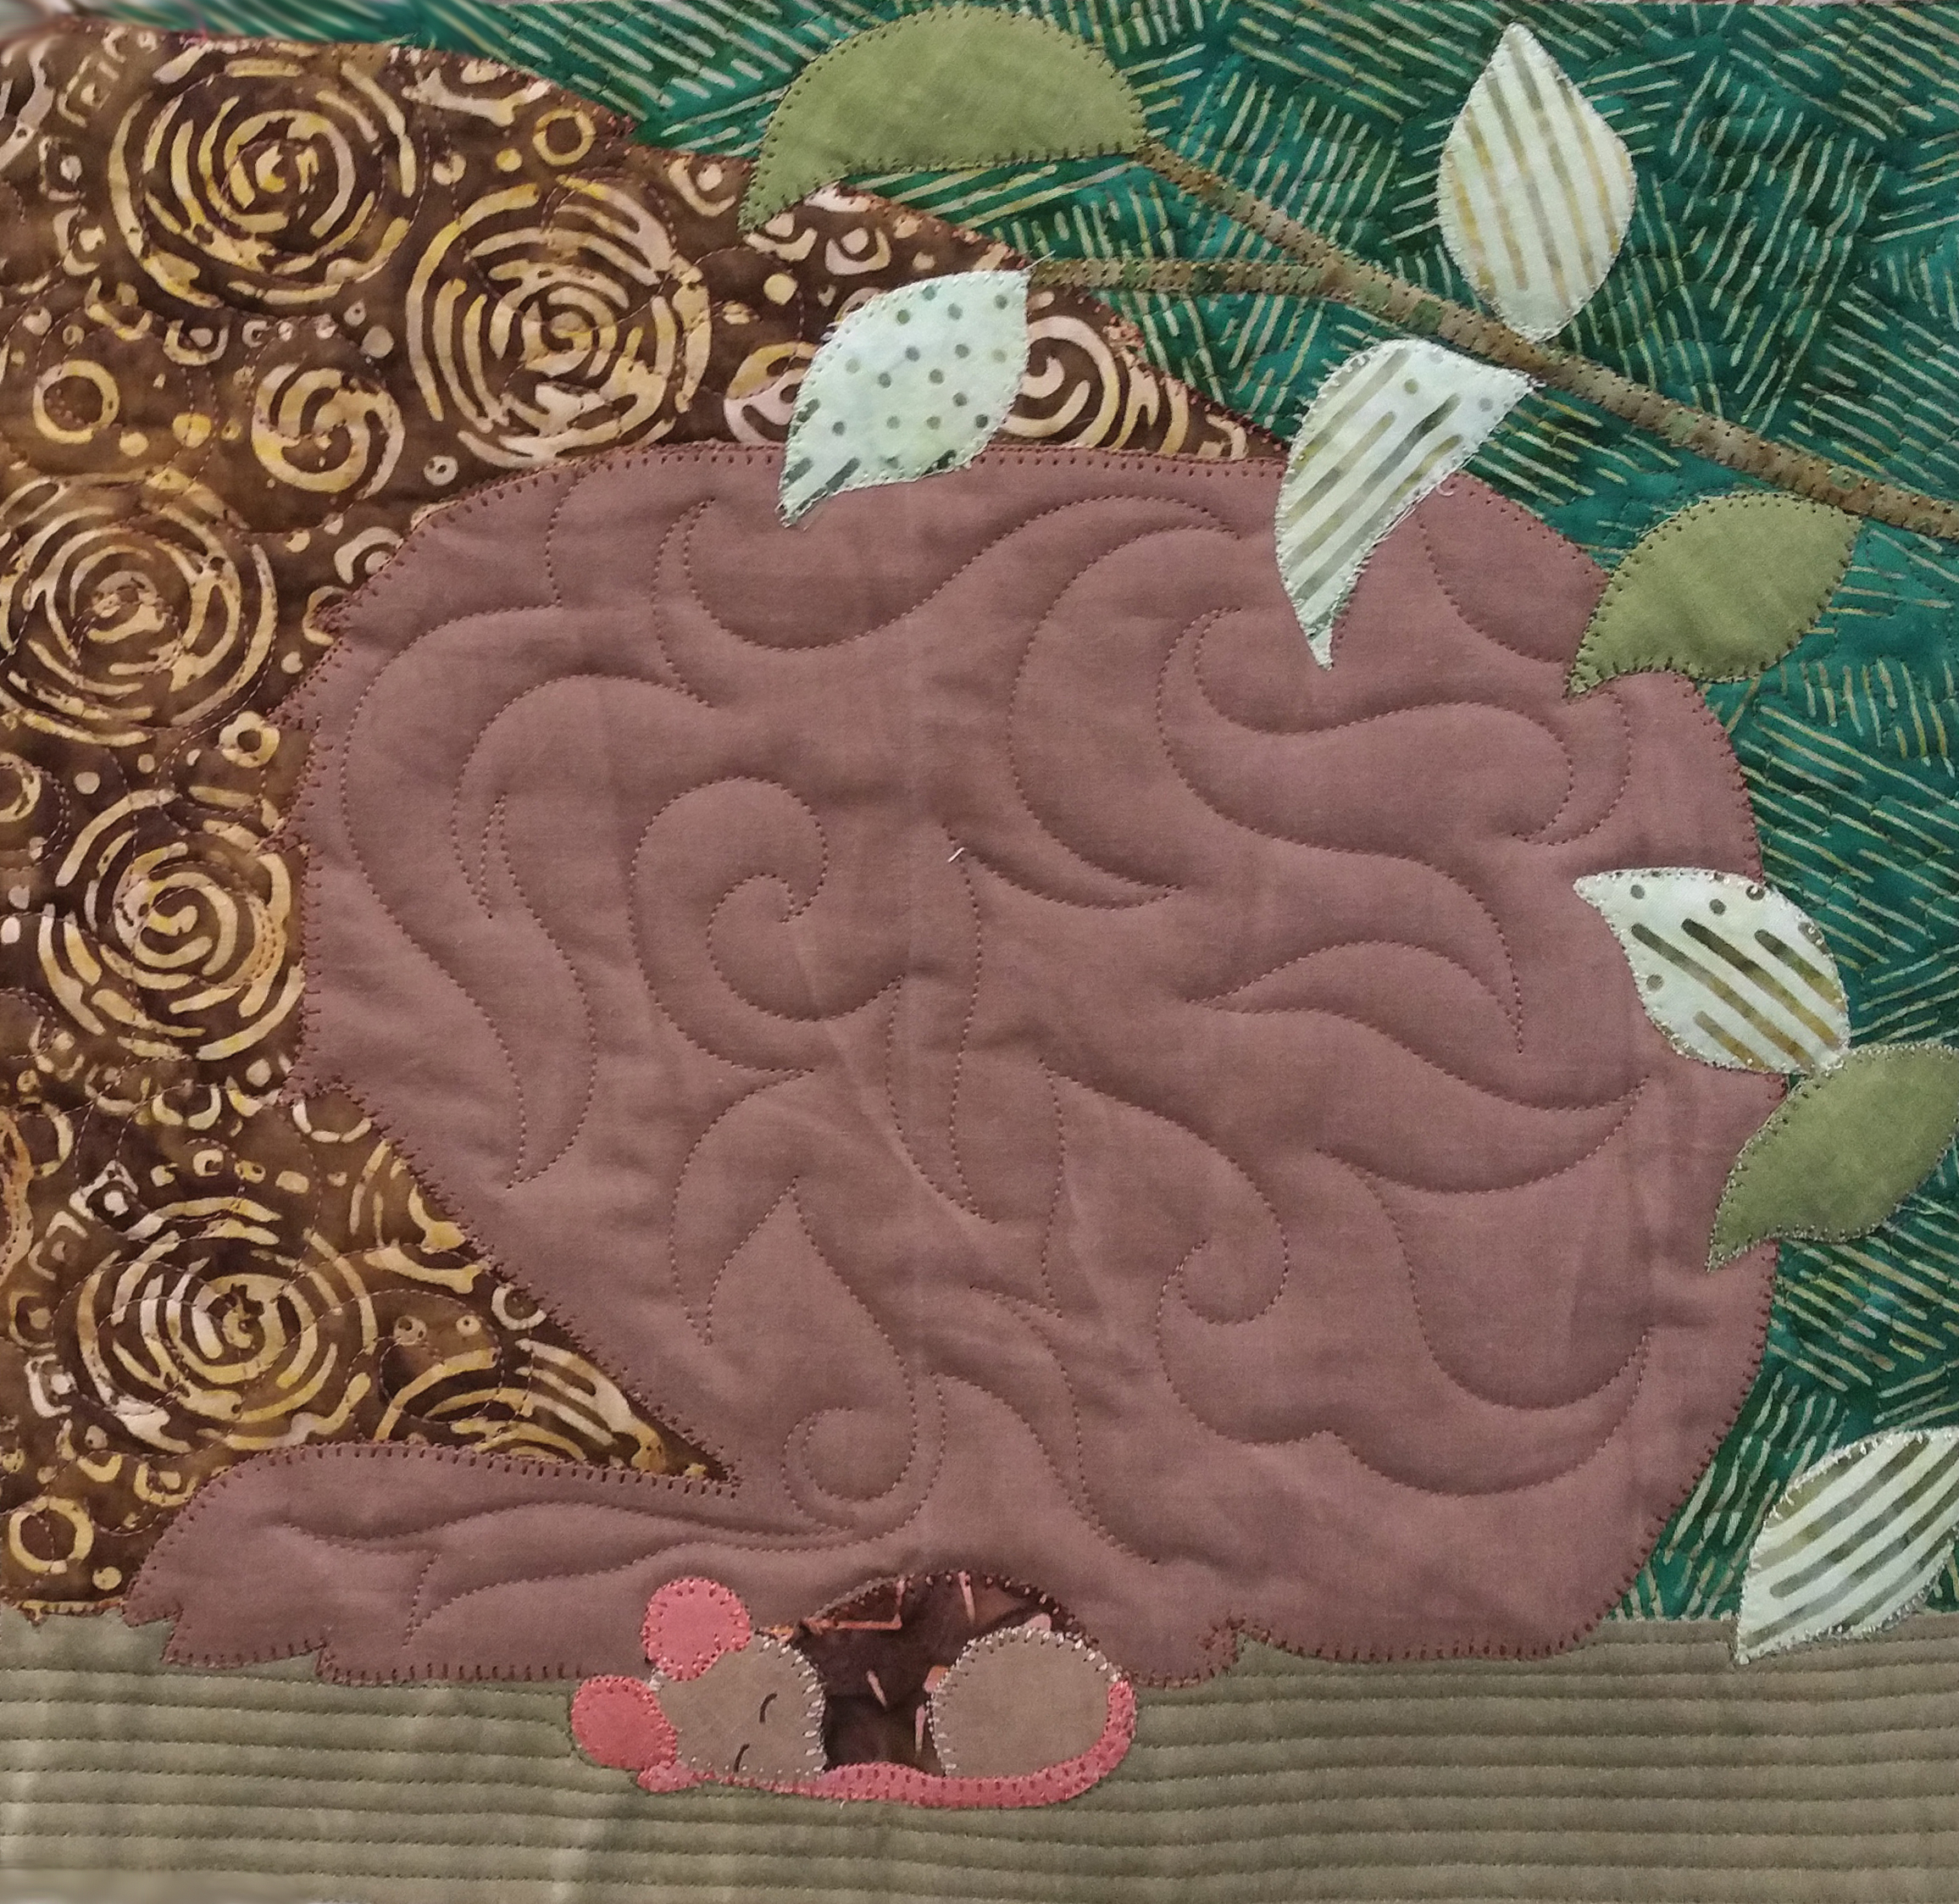 New York Beauty or the Bear’s Backside
You get a choice! I love the New York Beauty. However, my test group groaned so much about it, that I thought I better have mercy on you all and give you another option for the bear’s second half!
If you choose to paper piece the New York Beauty, Hoorah! I’m so proud of you for embracing the challenge. Paper-piece the templates just like you did with the fireflies in month 2. Arcs are not hard! Just pin, pin, pin. If you’re not confident in what you’re doing, change your sewing machine’s stitch to a long basting stitch. Sew. Looks good? Resew with a smaller stitch right on top of your basting stitch. Don’t like it? Try again. The basting stitch will slip right out. You can do it!!
If you the New York Beauty block is not your cup of tea, not a problem. That’s why I included a second option for you. It uses the same fabrics so it won’t affect your fabric amounts. When trimming your block to 12 1/2″ x 12 1/2″, remember to align the base seam at 2 1/4″. This way when you sew the bottom row together, the ground will be even.
 June, Month 10
Snoozing Squirrel Appliqué block.
You’re a pro at this now. The block has a couple Flying Geese. Piece together the background and appliqué the sleeping squirrel. When trimming the block to 12 1/2″ x 12 1/2″ be sure the center seam is at the 6 1/4″ mark. Tah-dah! You’re in the home stretch.
 July, Month 11
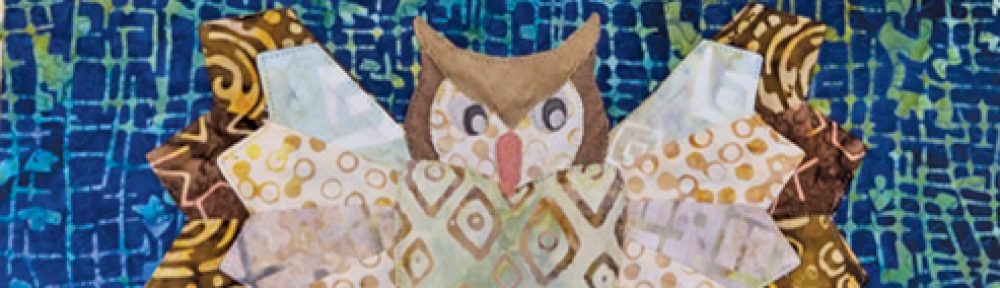
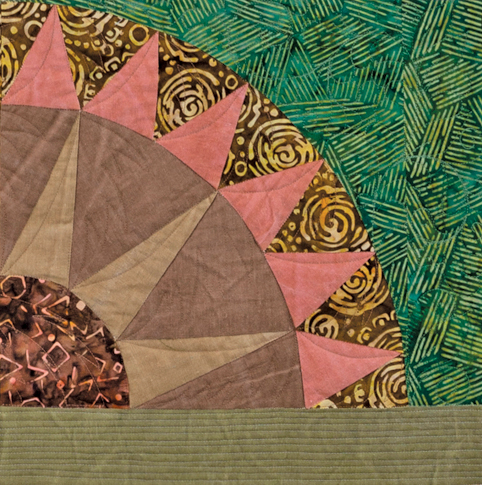
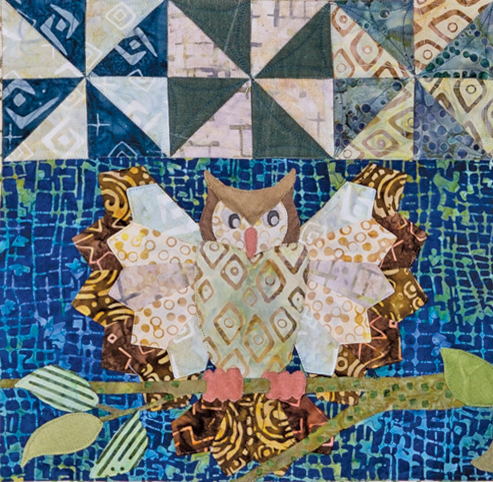
The Night Watchman Appliqué Block
Isn’t he too cute?! You’ll start off by making the three pinwheel blocks. But don’t sew them the the owl’s background just yet.
The owls background will be a little large. Once the owl has been top stitched, you’ll trim the appliqué block to 8 1/2″ x 12 1/2″ and it will fit the pinwheel unit just fine.
When creating your owl, you’ll do the standard fusible appliqué method for the leaves, branches and his head and body. But before you fuse the head and body down, you’ll need to create his wings and tail. The wings are made up of two layers of two size Dresden Petals. Dresdens Petals are fun to make. If you’re a visual learner and having a hard time wrapping your head around the graphic images, check out this youtube tutorial created by one of my co-ambassadors to Michael Miller fabrics, Teresa Downunder.
https://www.youtube.com/watch?v=0bqP_hyrx-Q
I used fusible tape to stick my layers of ‘feathers’ together. You can use a dab of appliqué glue or hold together with pins. Stitch the feathers in place along with the other fusible appliqué pieces. In my second Night Watchman quilt, I chose not to stitch the ends of my “feathers” down but stitched about a 1/2″ inch from the ends sot that they were more 3D. Have fun with it!
 August, Month 12
Last block is the Trunk Block and the Quilt Top Assembly. This block is piece-work. All the pieces you’ve done in previous blocks so it will be a slam dunk for you.
The quilt top instructions begin mid-way on page 33. Not all block have sashing between! Some blocks will sew together and ‘pretend’ to have been one block unit. A final leaf will be appliquéd between Month 10 and 11. The sashing strip will be sewn on the right side of Month 10.
You’ll also make four more pinwheel blocks for the pieced outer border.
Pat yourself on the back! It is time to Celebrate! You did a great job!