
Congratulations on embarking on a Trip Around the Sun Block of the Month quilt. In this program you will use several different quilting techniques. Don’t worry! The quilting community is one of the best communities to belong too. If you need a little help, reach out! My name is Lisa. My sister, Lora, and I will be sharing tips, tricks and helpful hints and video tutorials to help guide you through this fun quilt.
This Block of the Month pattern is broken into four parts: winter, summer, spring, and autumn. You may start this pattern in any season and follow your Trip Around the Sun per your calendar start.
Since the pattern has Winter Month 1 as the first chapter, that is where our tutorials will start. But first, an overview.
 Winter
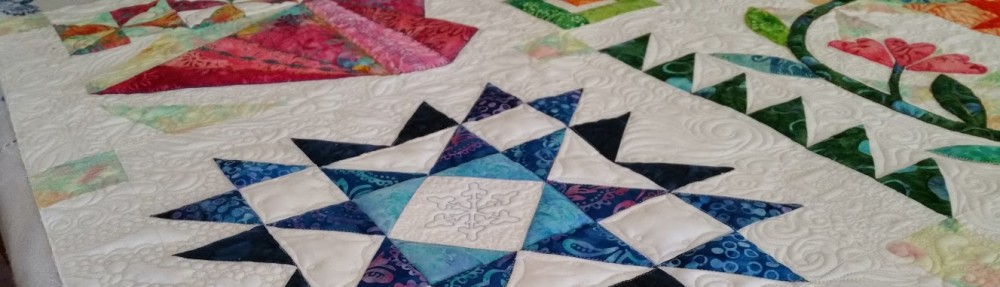
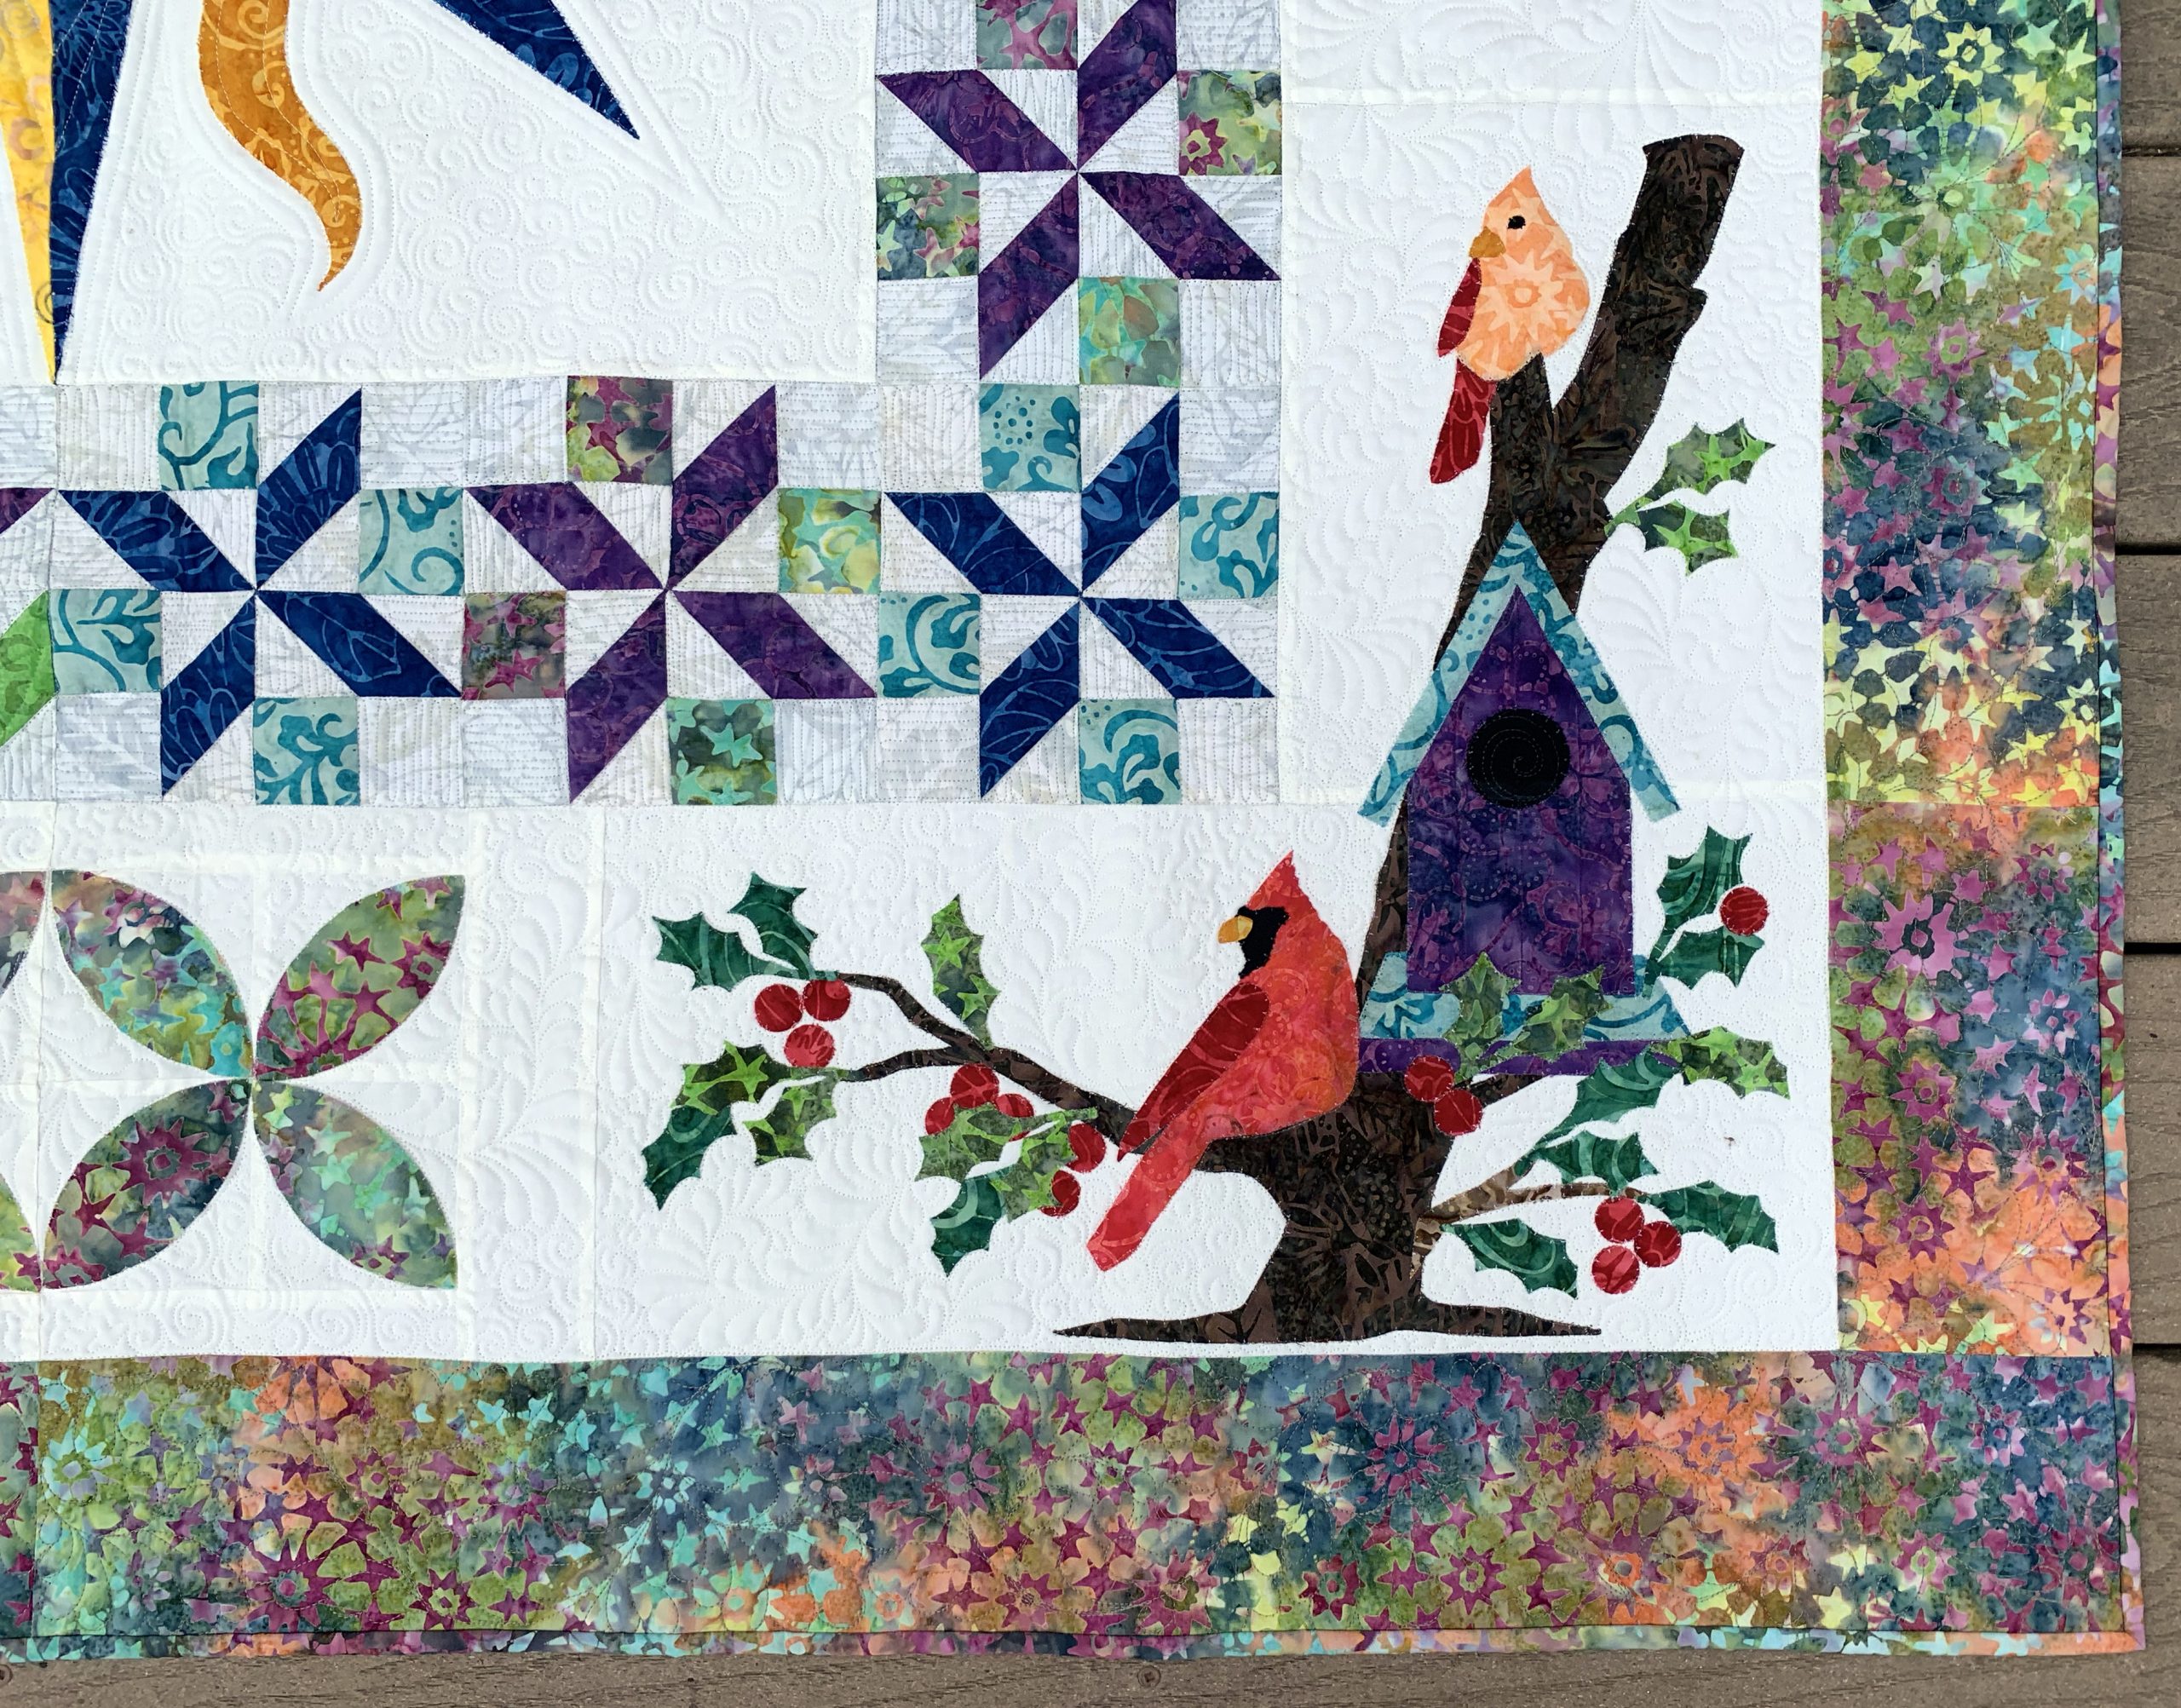
Month One – begin with the Winter Cardinal Corner Appliqué.
Month Two – have fun with piecing Spinning Snowflakes blocks.
Month Three – appliqué the Winter Sun and Peels; then piece the winter season quadrant together.
 Spring
Month One – begin with the Spring Bunny Corner Appliqué.
Month Two – have fun with piecing Tulip Garden blocks.
Month Three – appliqué the Spring Sun and Peels; then piece the spring season quadrant together.
 Summer
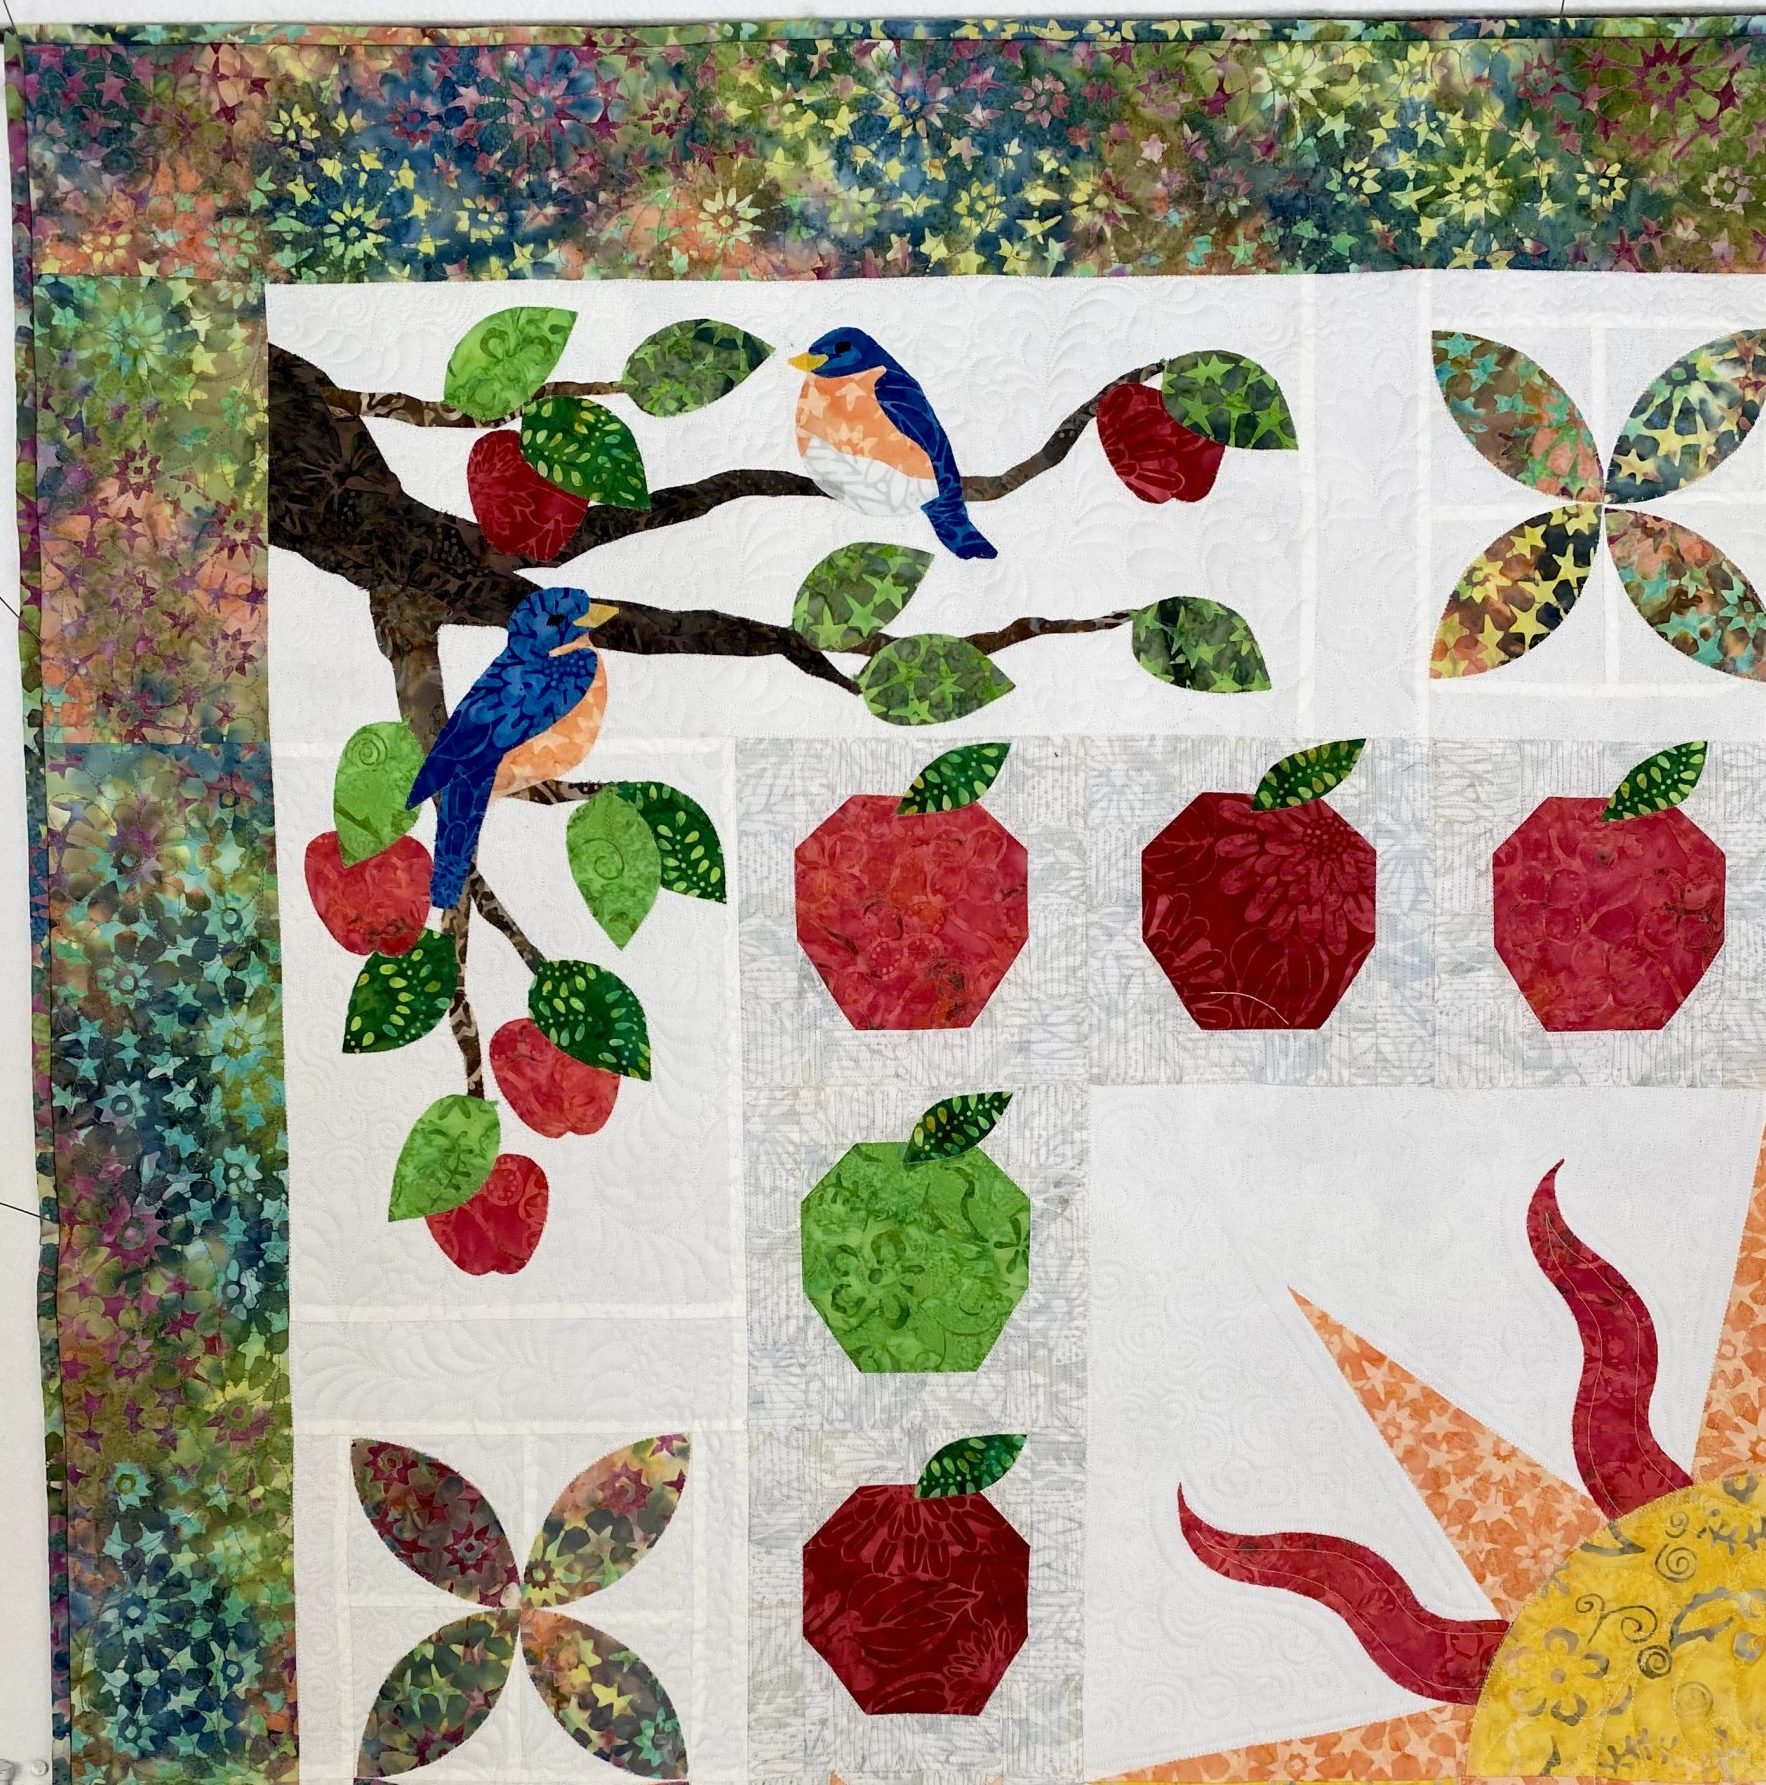
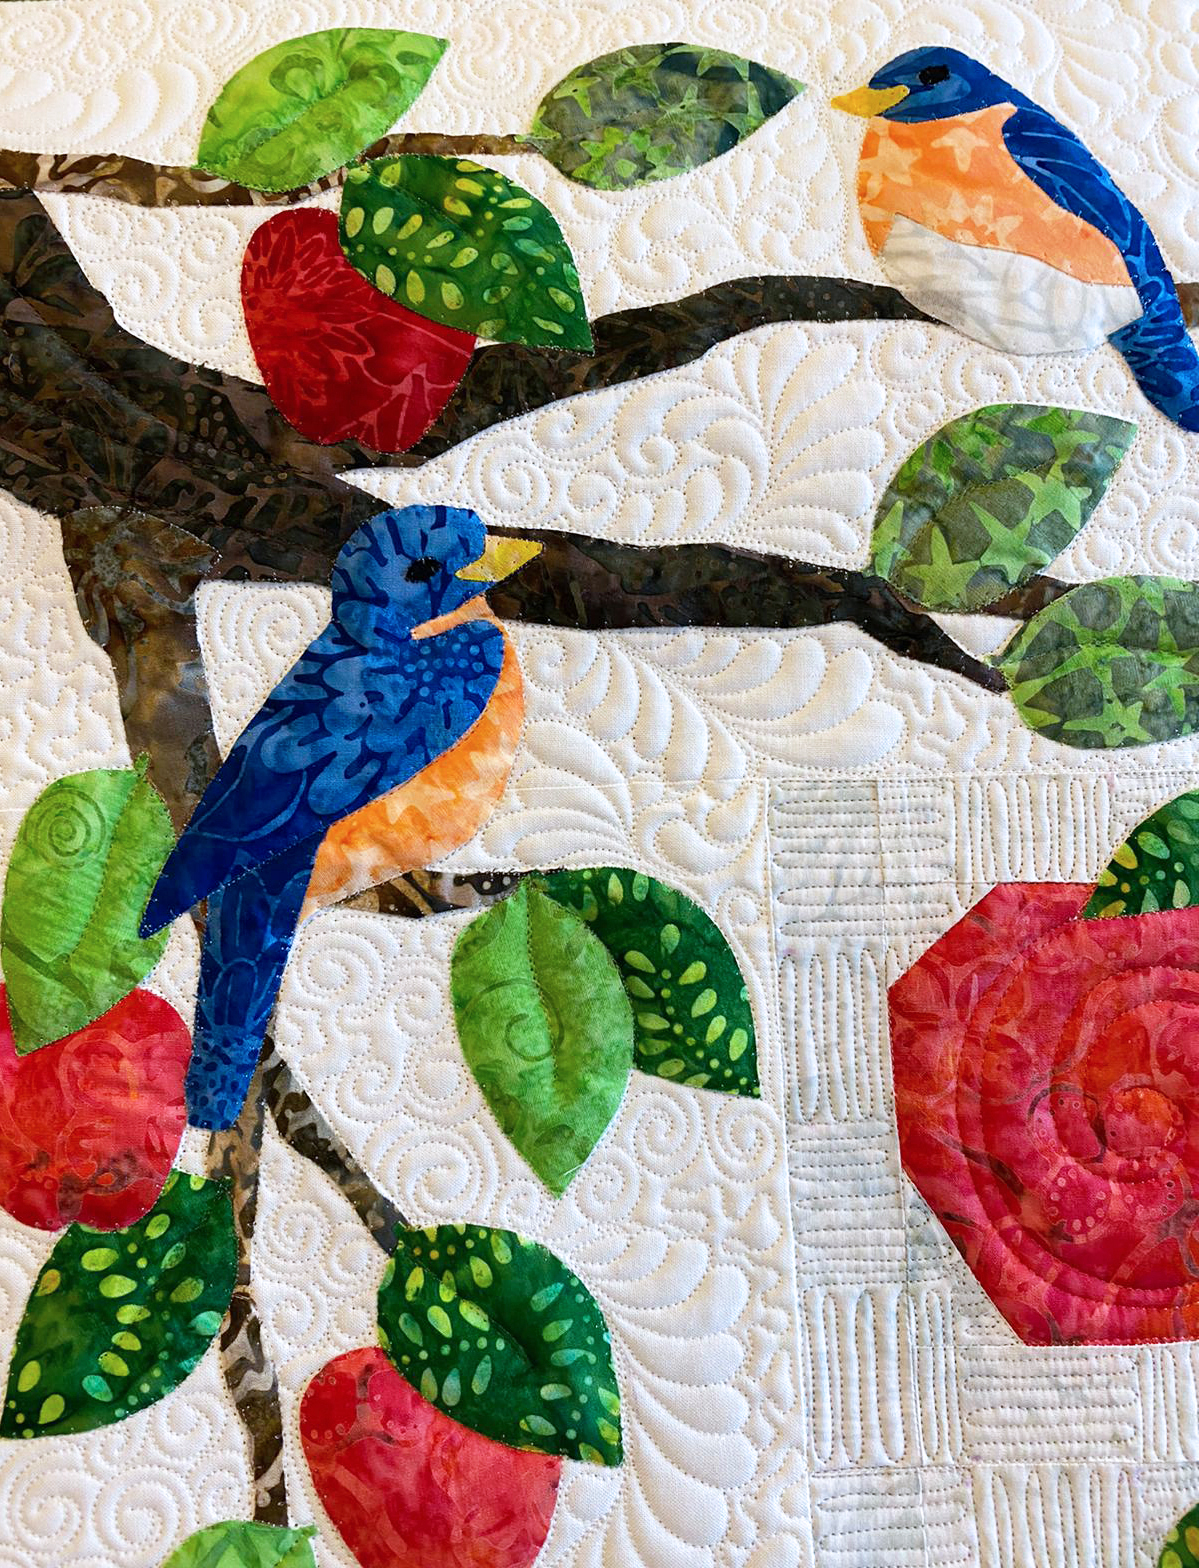
Month One – begin with the Blue Birds Corner Appliqué.
Month Two – have fun with piecing Tasty Apples blocks.
Month Three – appliqué the Summer Sun and Peels; then piece the summer season quadrant together.
 Autumn
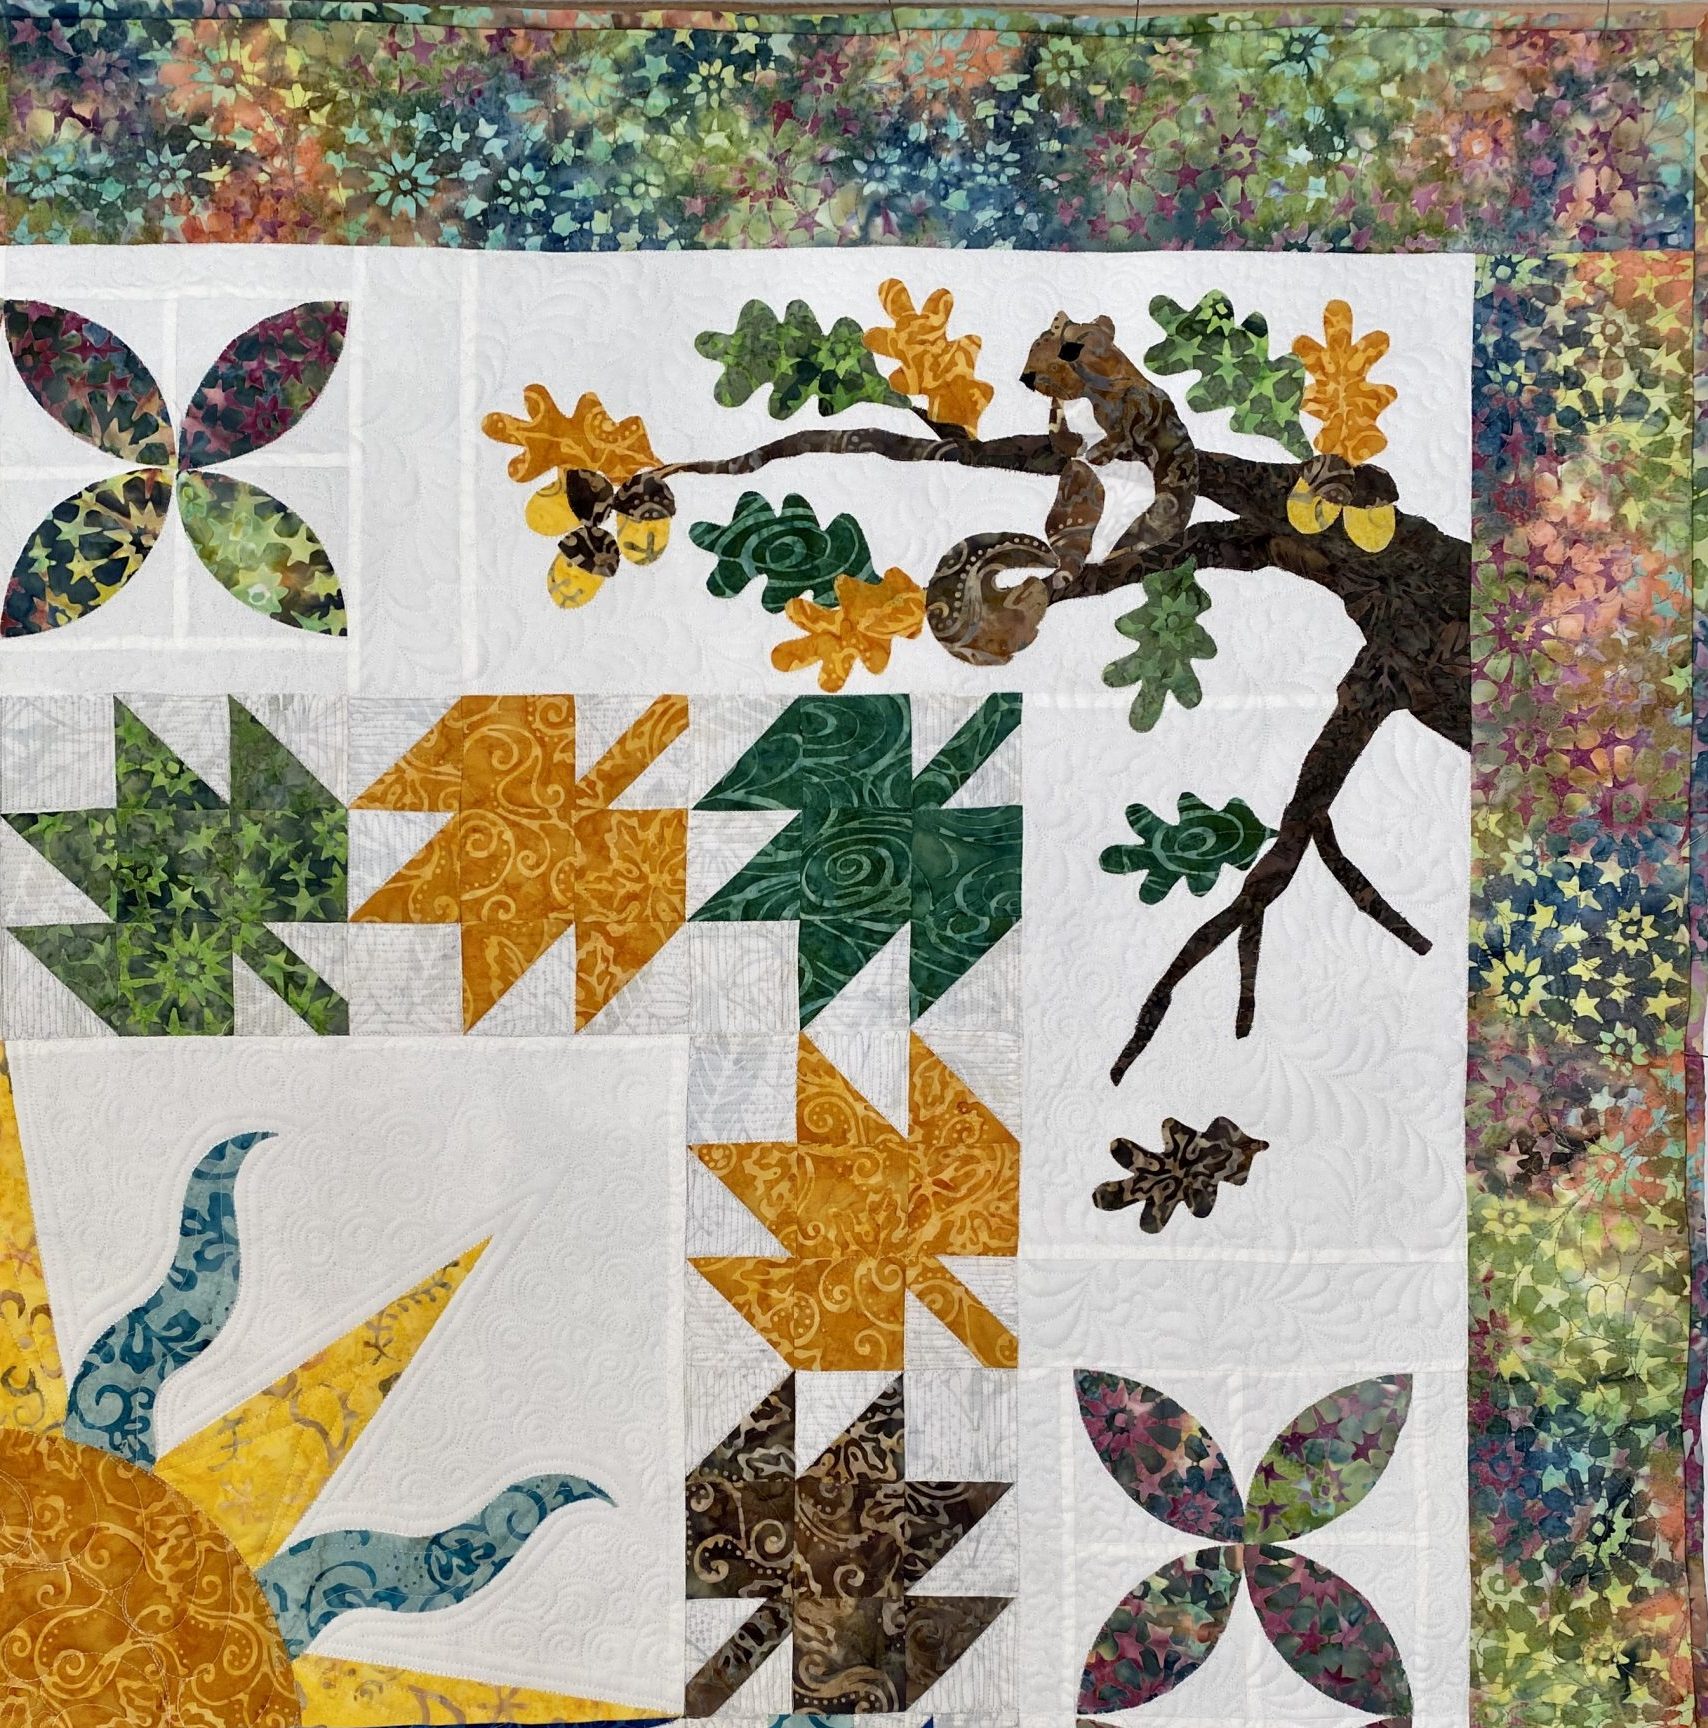
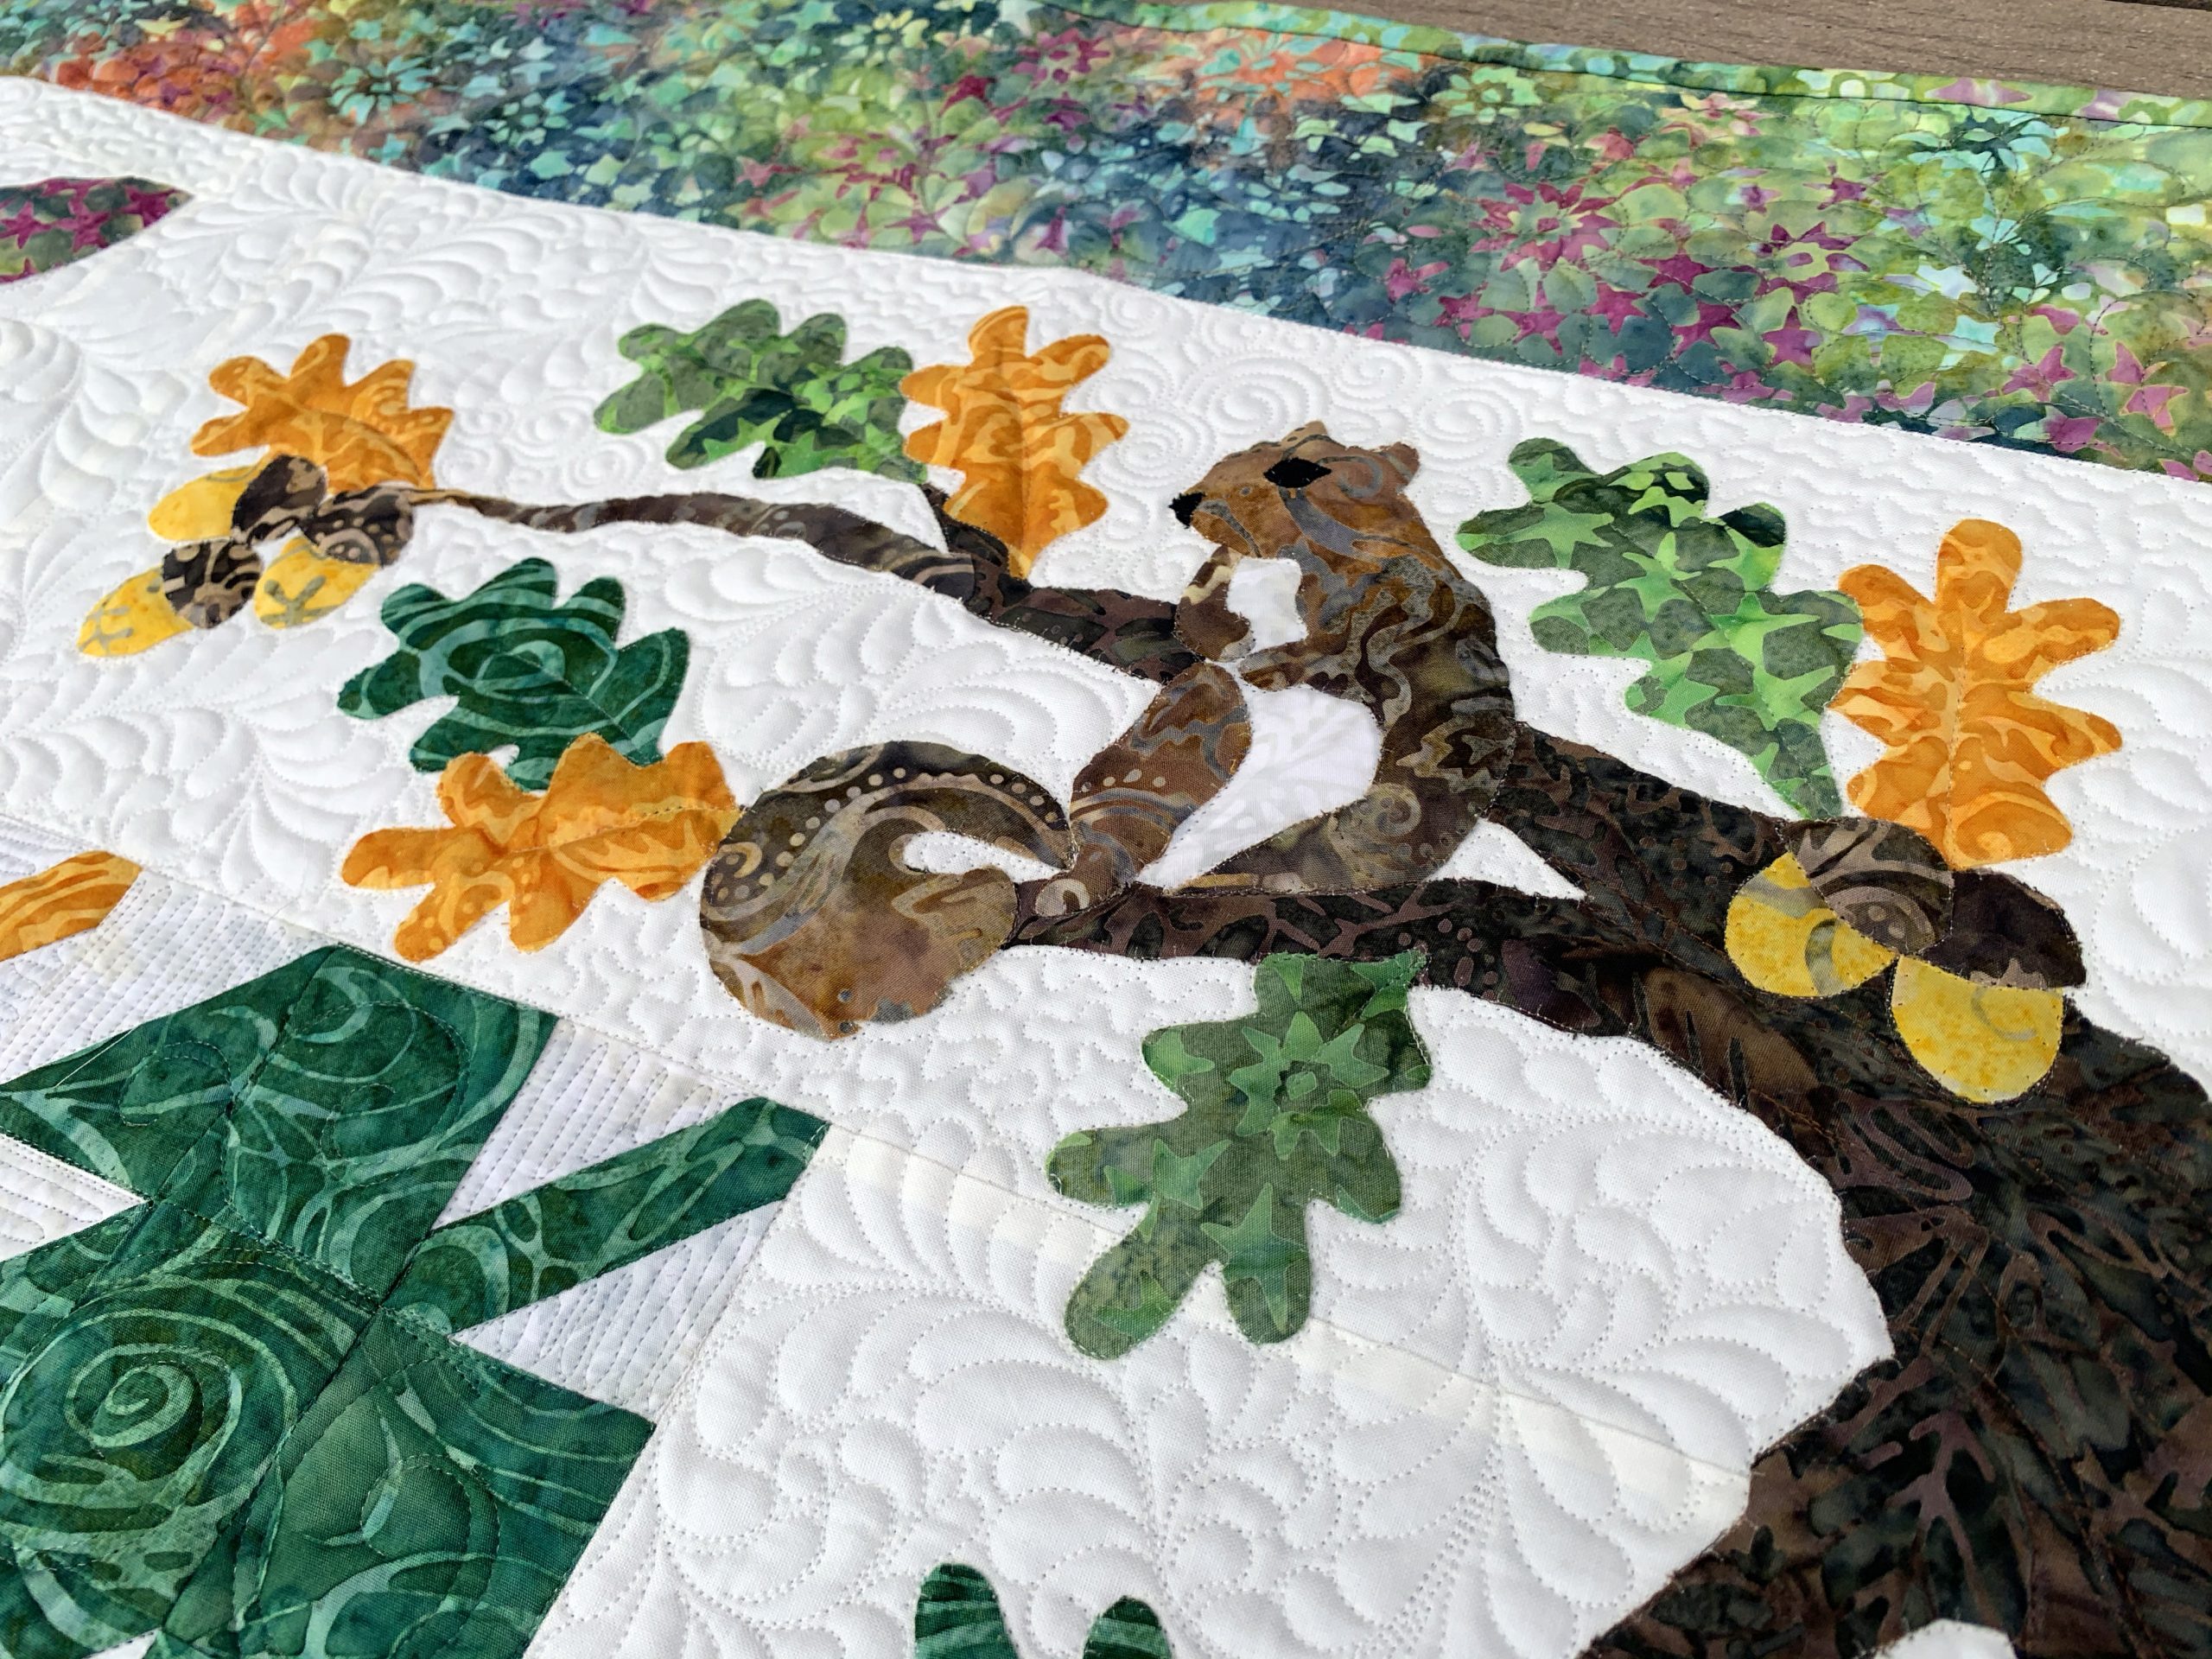
Month One – begin with the Squirrel Corner Appliqué.
Month Two – have fun with piecing Falling Leaves blocks.
Month Three – appliqué the Autumn Sun and Peels; then piece the autumn season quadrant together.
Finish up your Trip Around the Sun by sewing the quadrants together and adding a pretty border.
Whether you bought a Block of the Month and are having your fabrics sent to you each month, or you purchased a kit, or you bought the pattern and are working out of your stash, the following directions can help you when you get stuck.
If you’re working out of your own stash, download a swatch sheet to help you stay organized. Find the Swatch Sheet at The Good Stuff tab in the header above.
Let’s Get Started.
Winter Month 1: Winter Cardinal Corner Appliqué
Lora and I filmed these while in Shelter in Place. They are home grown! We kept the videos short so it would be easy for you to hop through. Each video acts like a photo reference if not being played. Enjoy our silly antic. See us plop our hands down on the table surface and shake the camera. And our dogs! Can they stay quiet? Lora, watch your head… One, two, three, Action! Brought to you by the letter A and the number 2.
Sewing the Corner Background for the Appliqué
Simple. Start at your 1″ dot and sew to the end. Don’t forget to check your 1/4″ seam before you start. Seam accuracy is important.
Tape your template sheets together.
Appliqué images are already reversed. Trace or copy with an inkjet printer using HeatnBond Ez Print Lite or other similar product.
Watch how to Window Pane the larger appliqué pieces. Fussy cutting is a method where you choose a specific element of the fabric to enhance the appliqué piece.
Fuse the appliqué and listen to Lora’s cutting tips.
Create fusible appliqué using a teflon sheet. Fuse the pieces together as one unit before fusing to the background!
What thread to use for the Applique´ top stitching?
Learn how to test your stitch and tension adjustments for monofilament thread.
Remember to just go slow and pivot with needle down. Get into the rhythm of the stitch so you can anticipate where that needle is going next.
It takes a lots of time to top stitch. Just remember to give your self a break so not to strain your eyes, neck, and back!
Did that not turn out too cute?! I’m ready for Winter Month 2. How about you?
All Seasons – Month 2
First, bare with me while we review piecing basics. I know, I’m preaching to the choir for most of you, but there just might be a tip that will help with your piecing. When I teach a class, we always start off checking the seam allowance. The seam allowance is usually blamed when the block doesn’t turn out the correct size. However, there are four elements to making the block the correct size.
- Cutting
- 1/4″ seam
- Alignment
- Pressing
Cutting your fabric. Be sure you iron out all wrinkles and folds (steam is fine). Have good lighting, wear your pretty glasses, and have a sharp rotary blade. Stand when cutting, if you can. Sitting is convenient but standing over your ruler allows for better accuracy. Cut once away from your body and avoid see-saw back and forth cutting. If your blade is skipping or you’re having to cut several times, treat yourself to a new blade. If your ruler is sliding, try non slide grips on the back. Anchor your pinky finger on the non-cutting side of the ruler. Avoid the spider hold on the ruler (using just your finger tips). Flat palm on the ruler will keep it from sliding. Spider hold is my bad habit and it will slip on me every time! I truly am the reigning queen of the mis-cut.
Your 1/4″ seam needs to be accurate. Most modern sewing machine come with a programmed setting for piecing. It is marked by a P. I can’t count how many students I helped find the correct setting for their 1/4″ seam. They’d been using tape when all along their sewing machine had a perfect setting for them. Be sure to know your machine’s settings and have the proper foot. Measure that 1/4″ before you start.
Alignment is so important. Some people sew like it is a race. I confess, I’m guilty too, especially if I’m sewing with my super-fast sister. None of us like to be last in the class room. But it isn’t a race and accuracy is more important than finishing first. Take your time. Align that fabric perfectly. Take time to pin. Pinning prevents the “under tow”. Thats when the bottom fabric is worked away from the top fabric by the feed dogs. Ask yourself, “What’s the point?” When sewing points, be sure to align the ends of the point. If the fabric is slightly long or short at the other end, it isn’t going to matter as much as getting your point to be at the 1/4″ seam.
Pressing Matters. Press first with the seam closed (no steam). Open the pieced item and from the wrong side of the fabric, knock the seam with the side of the iron, the direction the arrow shows in the instructions. You’re just knocking it over. Then from the front do the same, making sure the seam hadn’t folded over on itself. When pressing, I hold one side of the fabric taunt while pressing with the iron – not tight enough to stretch the fabric but to enough to press the seam well. No steam in my iron unless I want the piece to grow! I learned my pressing technique from Eleanor Burns.
If your block is turning out too small, be a detective. Many times it isn’t the seam allowance that is the culprit. I have found that pressing is usually the guilty party!
Let’s SEW!
Winter Month 2: Spinning Snowflake Blocks
Measure every step of the way. Check the Four Steps to Accuracy if your block is not measuring up. Make adjustments to Cutting, Alignment, 1/4 seam, or Pressing. It is important that your blocks finish at 6 1/2″ square. Each piece contributes to the blocks fitting together at the end.
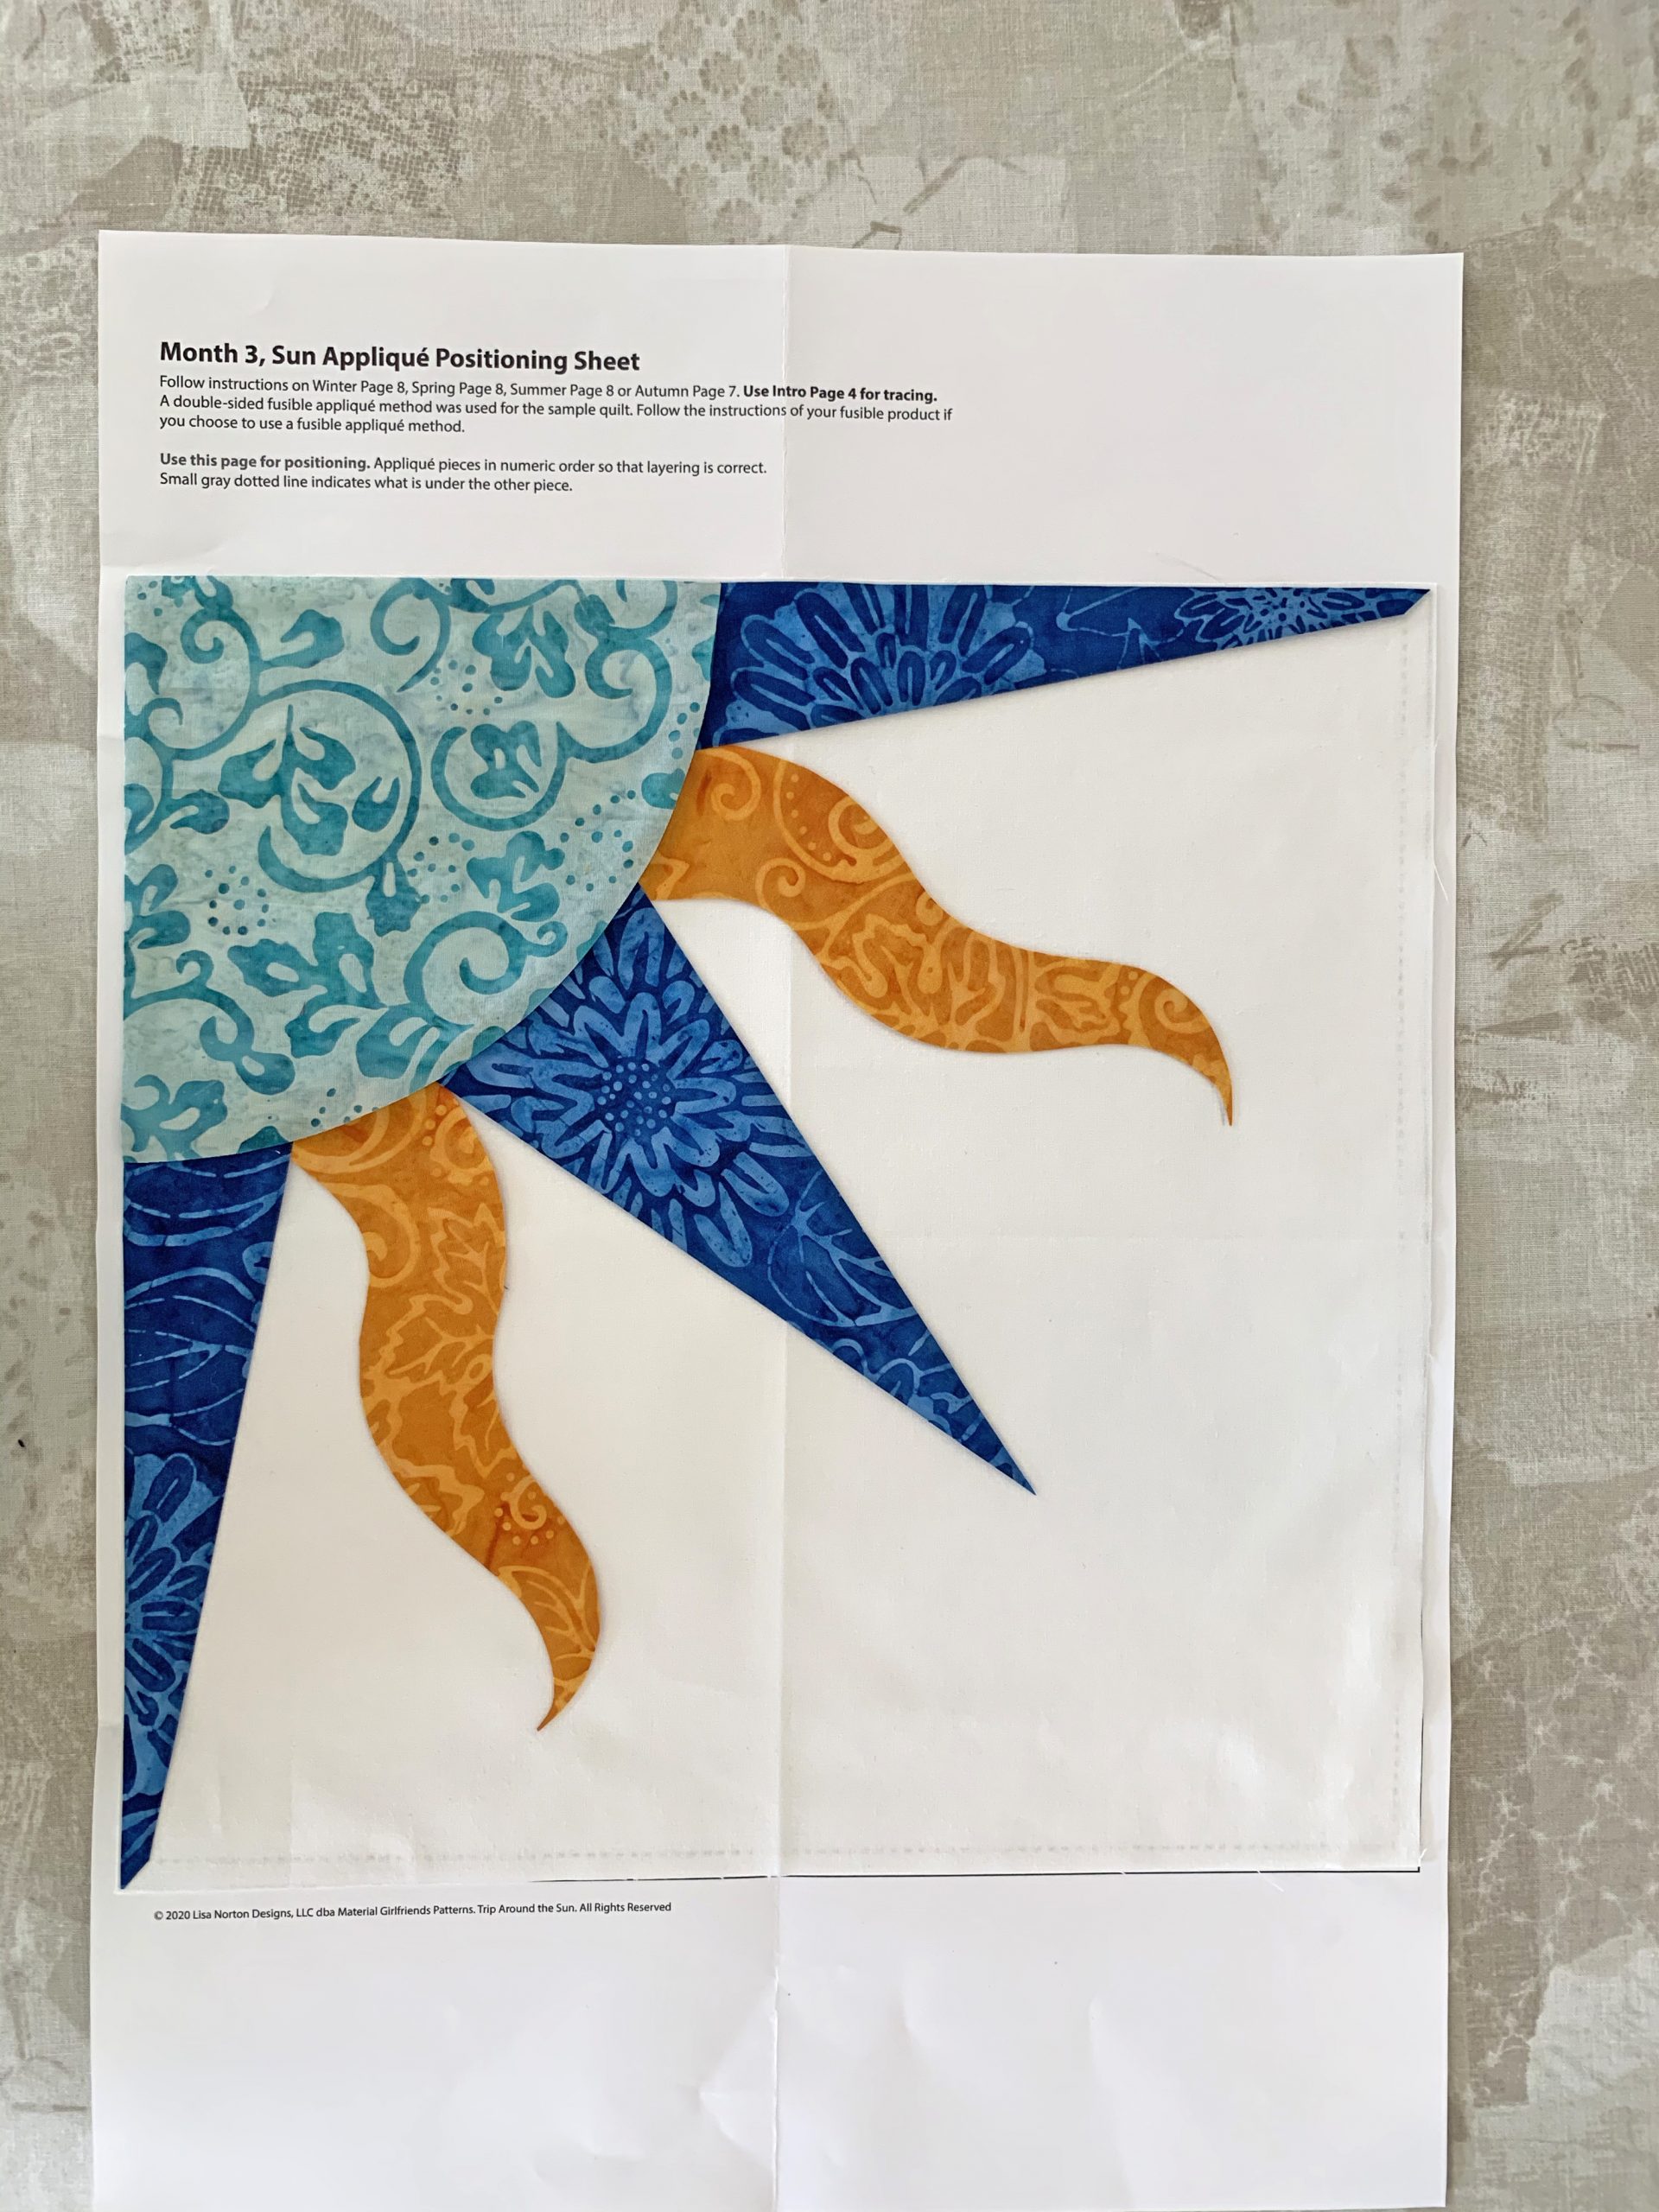
All Seasons – Month 3 Center Sun Appliqué and Peels
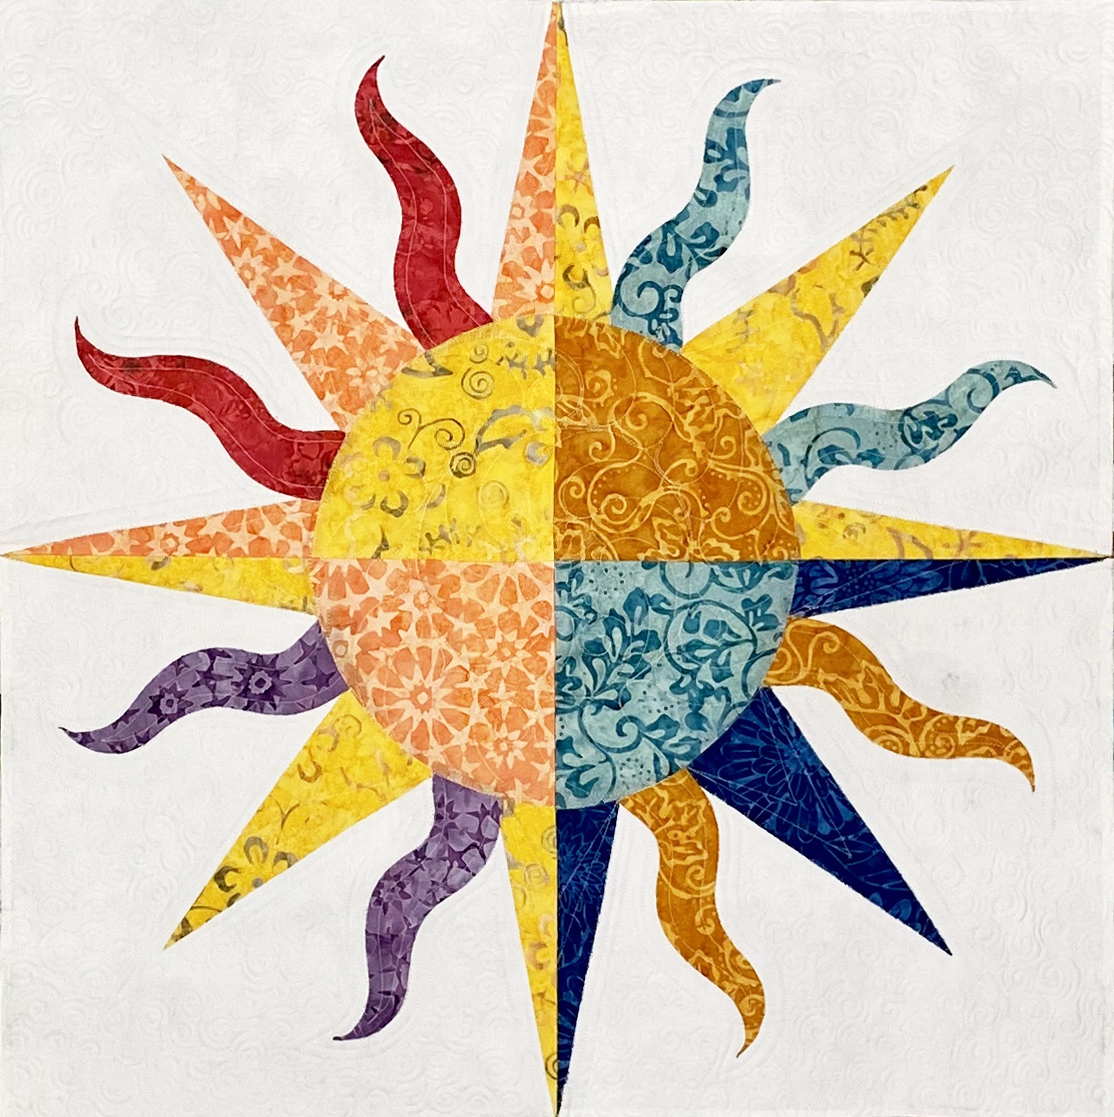 The sun template and instructions are the same for each quadrant. The only difference will be the fabrics used for the sun. We carefully selected the fabrics for each sun quadrant to reflect the ‘temperature’ of the sun. The cooler tones are used for autumn, greatest emphasis of cool colors in winter, with the colors warming for spring.
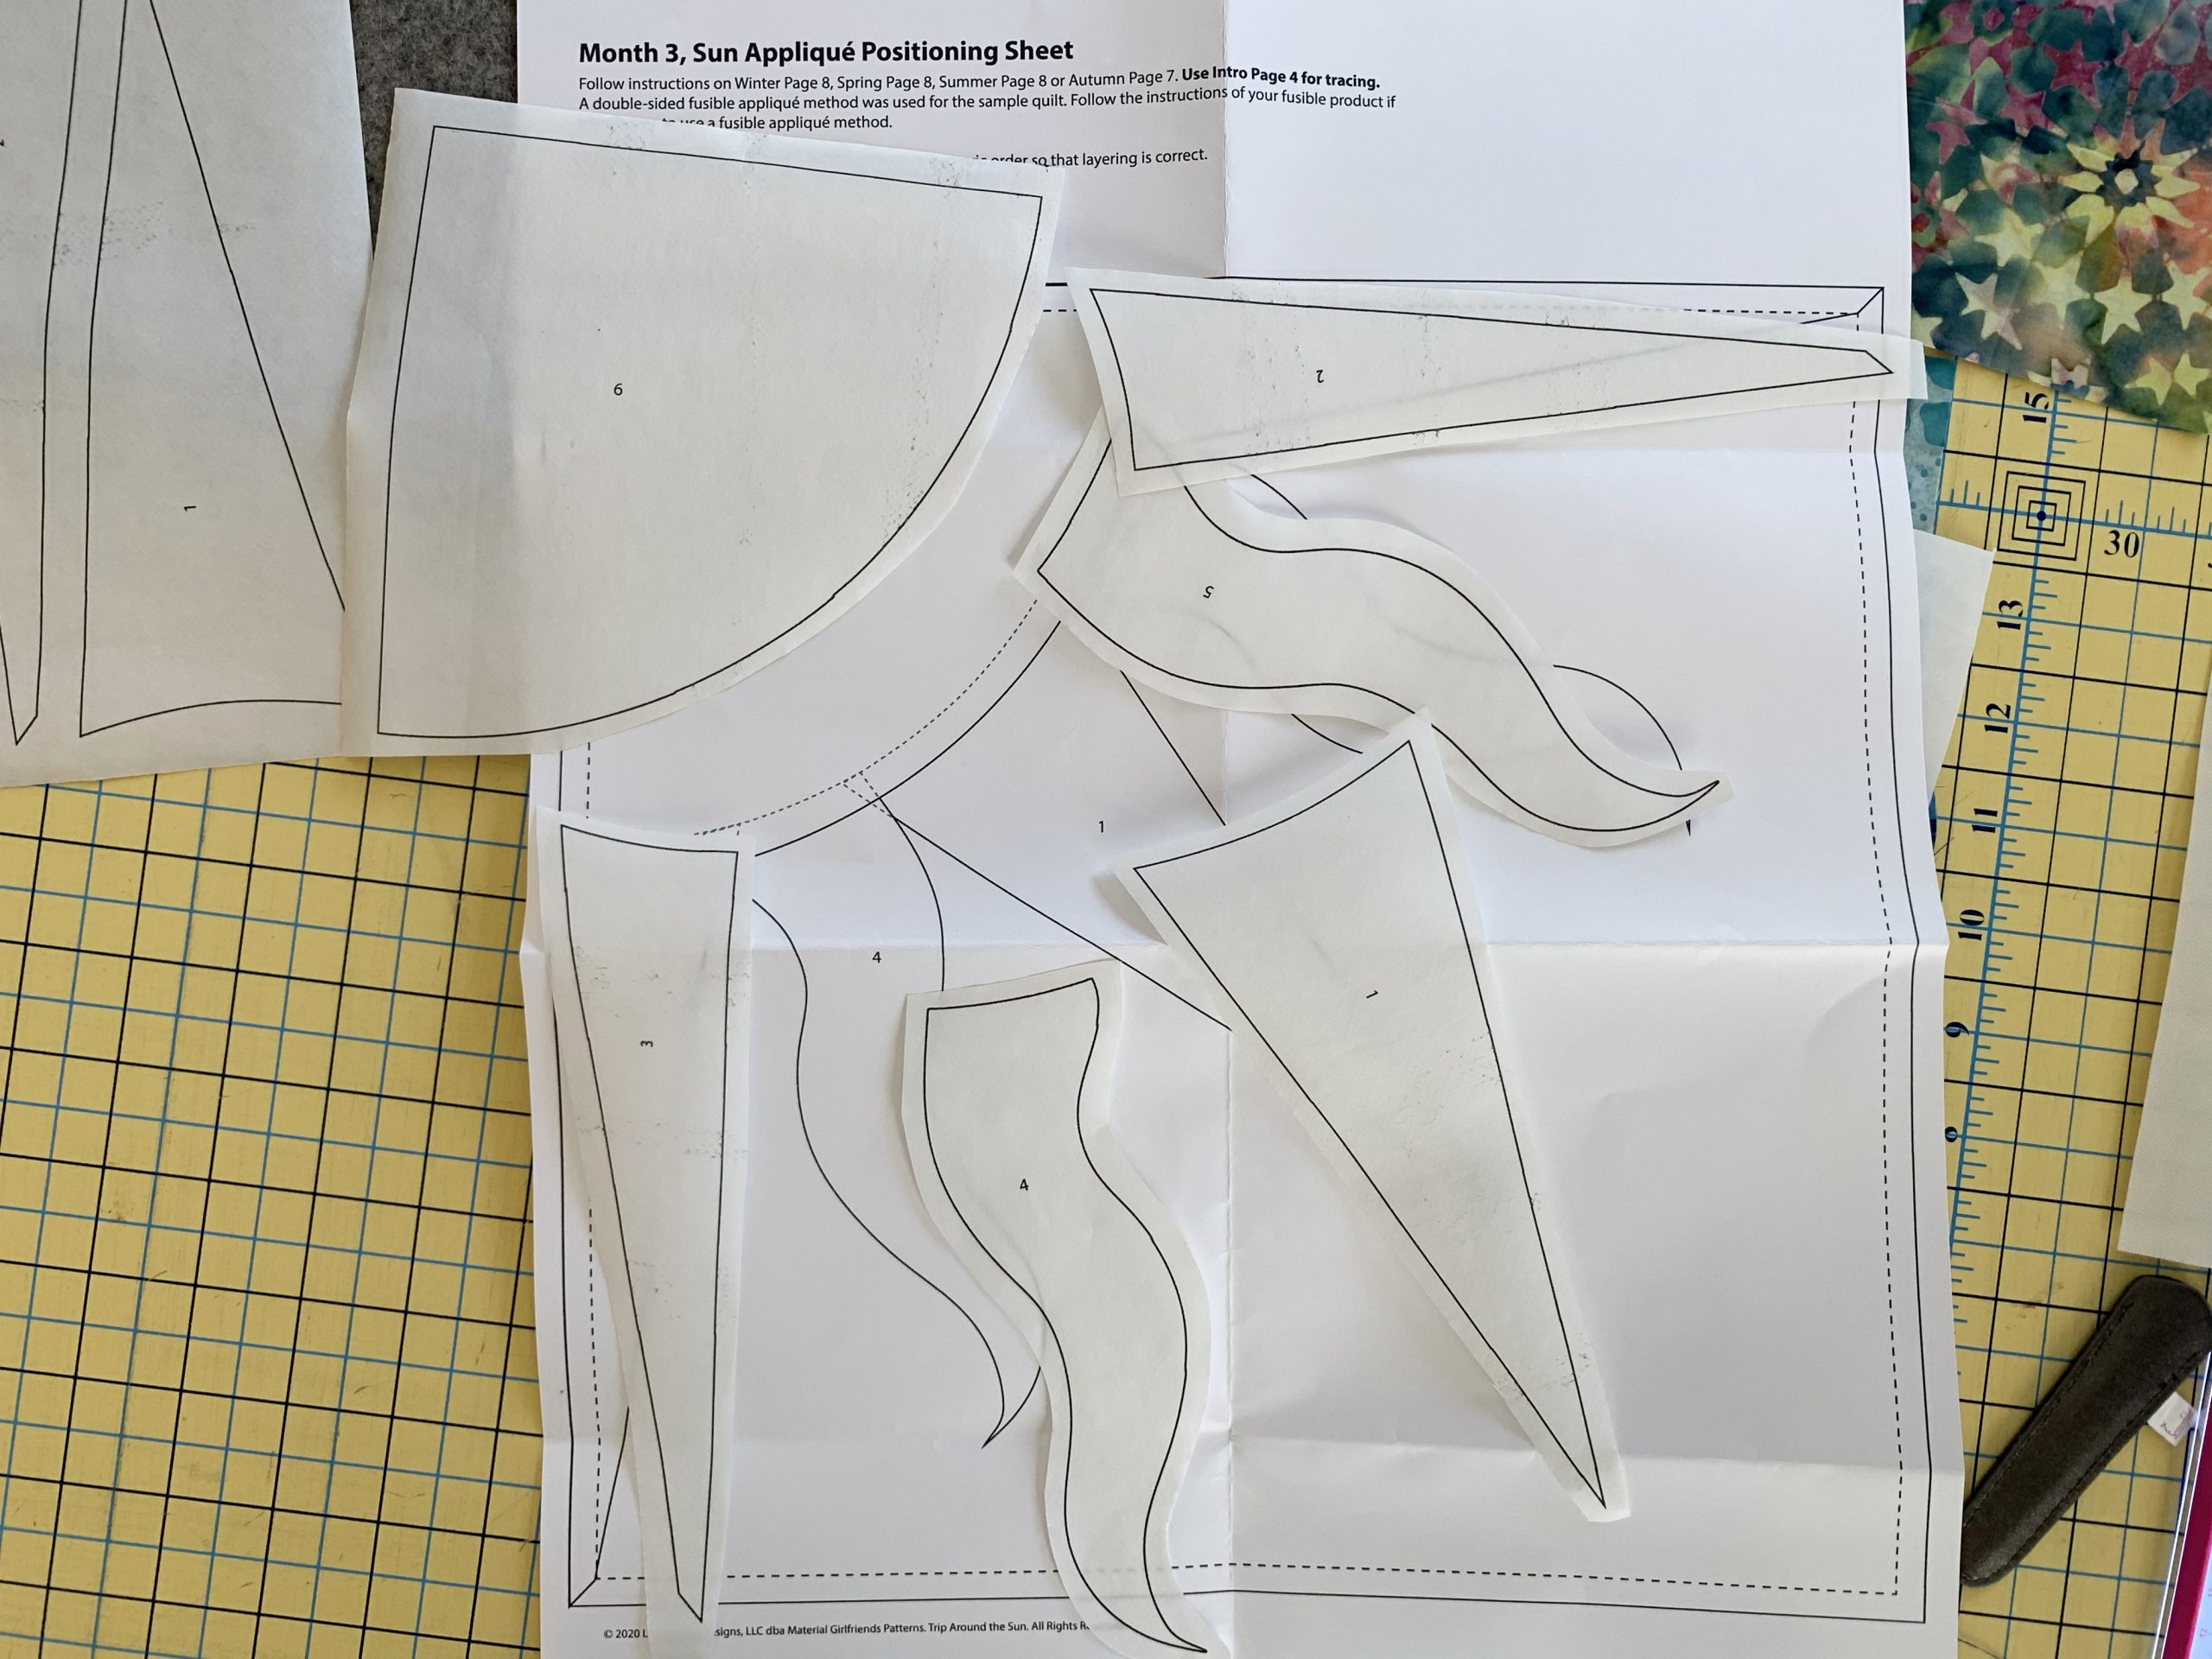
The reversed template images for the sun are found on Intro Page 4, as well as in each quadrant, Month 3 around page 7 or 8, depending on the season. Trace or copy the templates. Use Lora’s Window Pane method demonstrated in Wntr M1 Video6 above.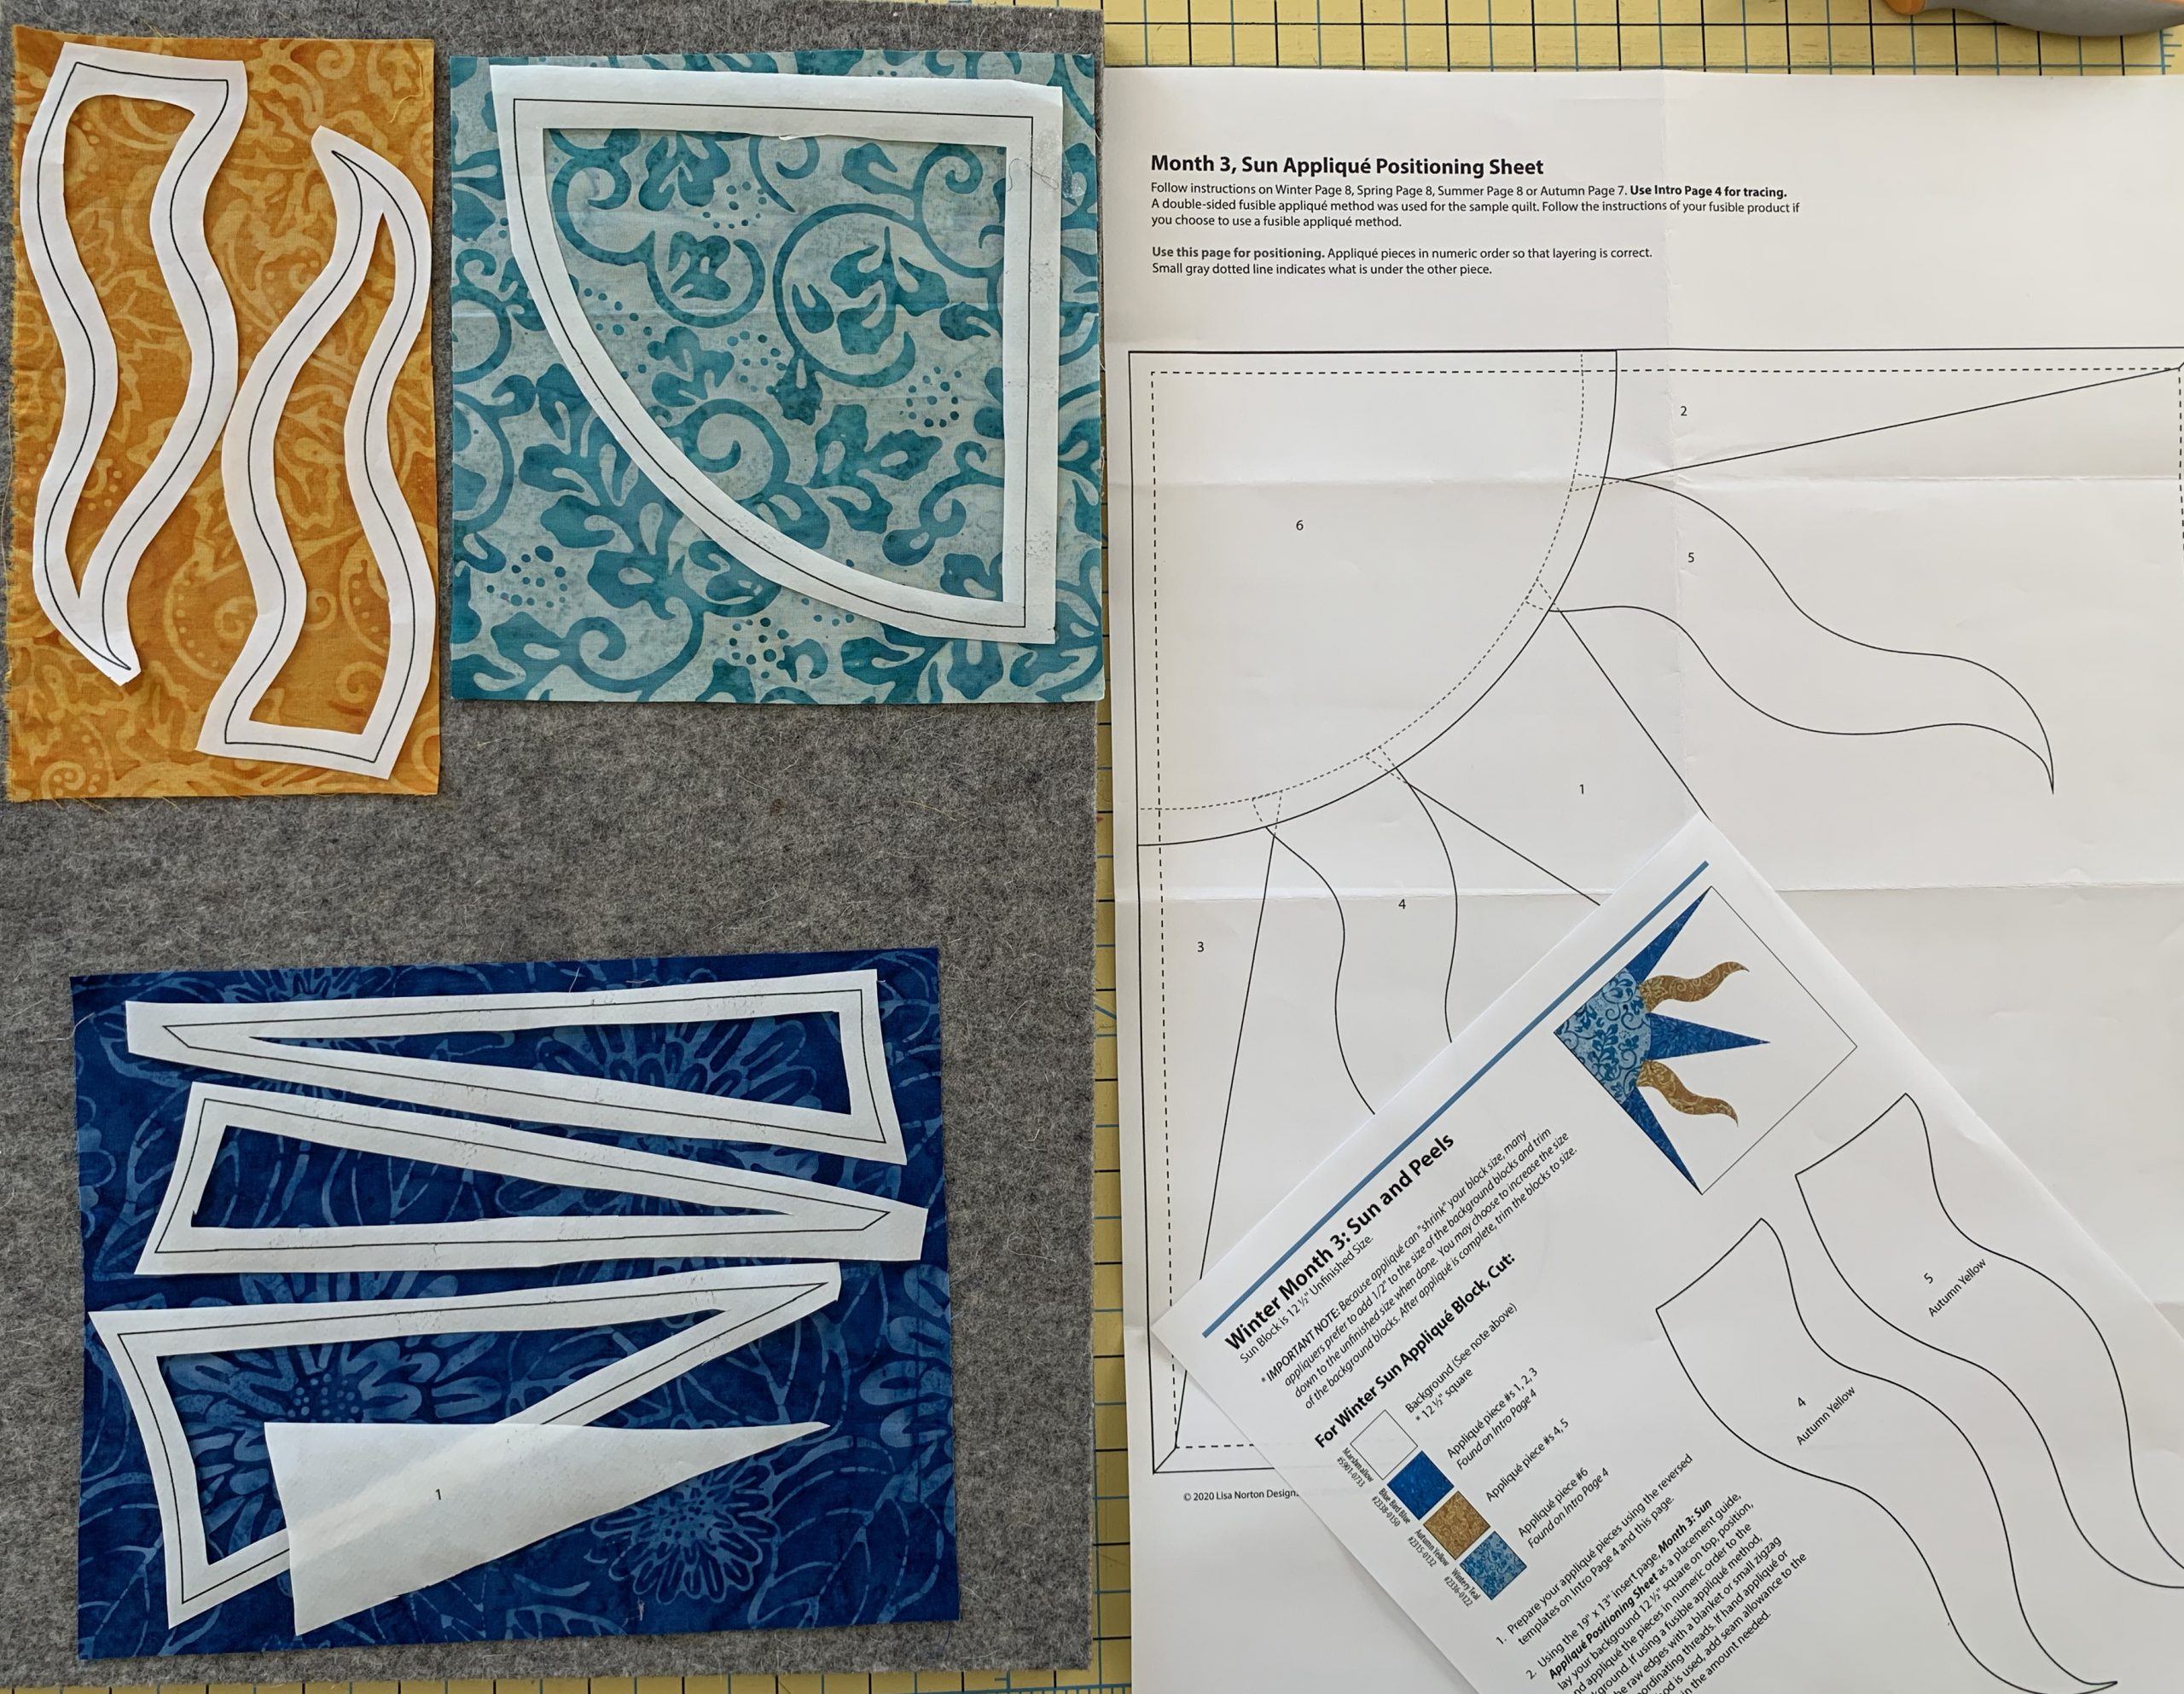
Rough cut out your pieces, window pane the centers, then fuse to the wrong side of the fabric. I agree, it is tough to figure out the ‘wrong side’. If a one side looks slightly more faded, call it the wrong side. The nice thing about batiks, if you make a mistake and fuse to the incorrect side, no one would ever know! I used my appliqué scissors to trim the curves on the sun and then used my rotary cutter and ruler on the straight sides.
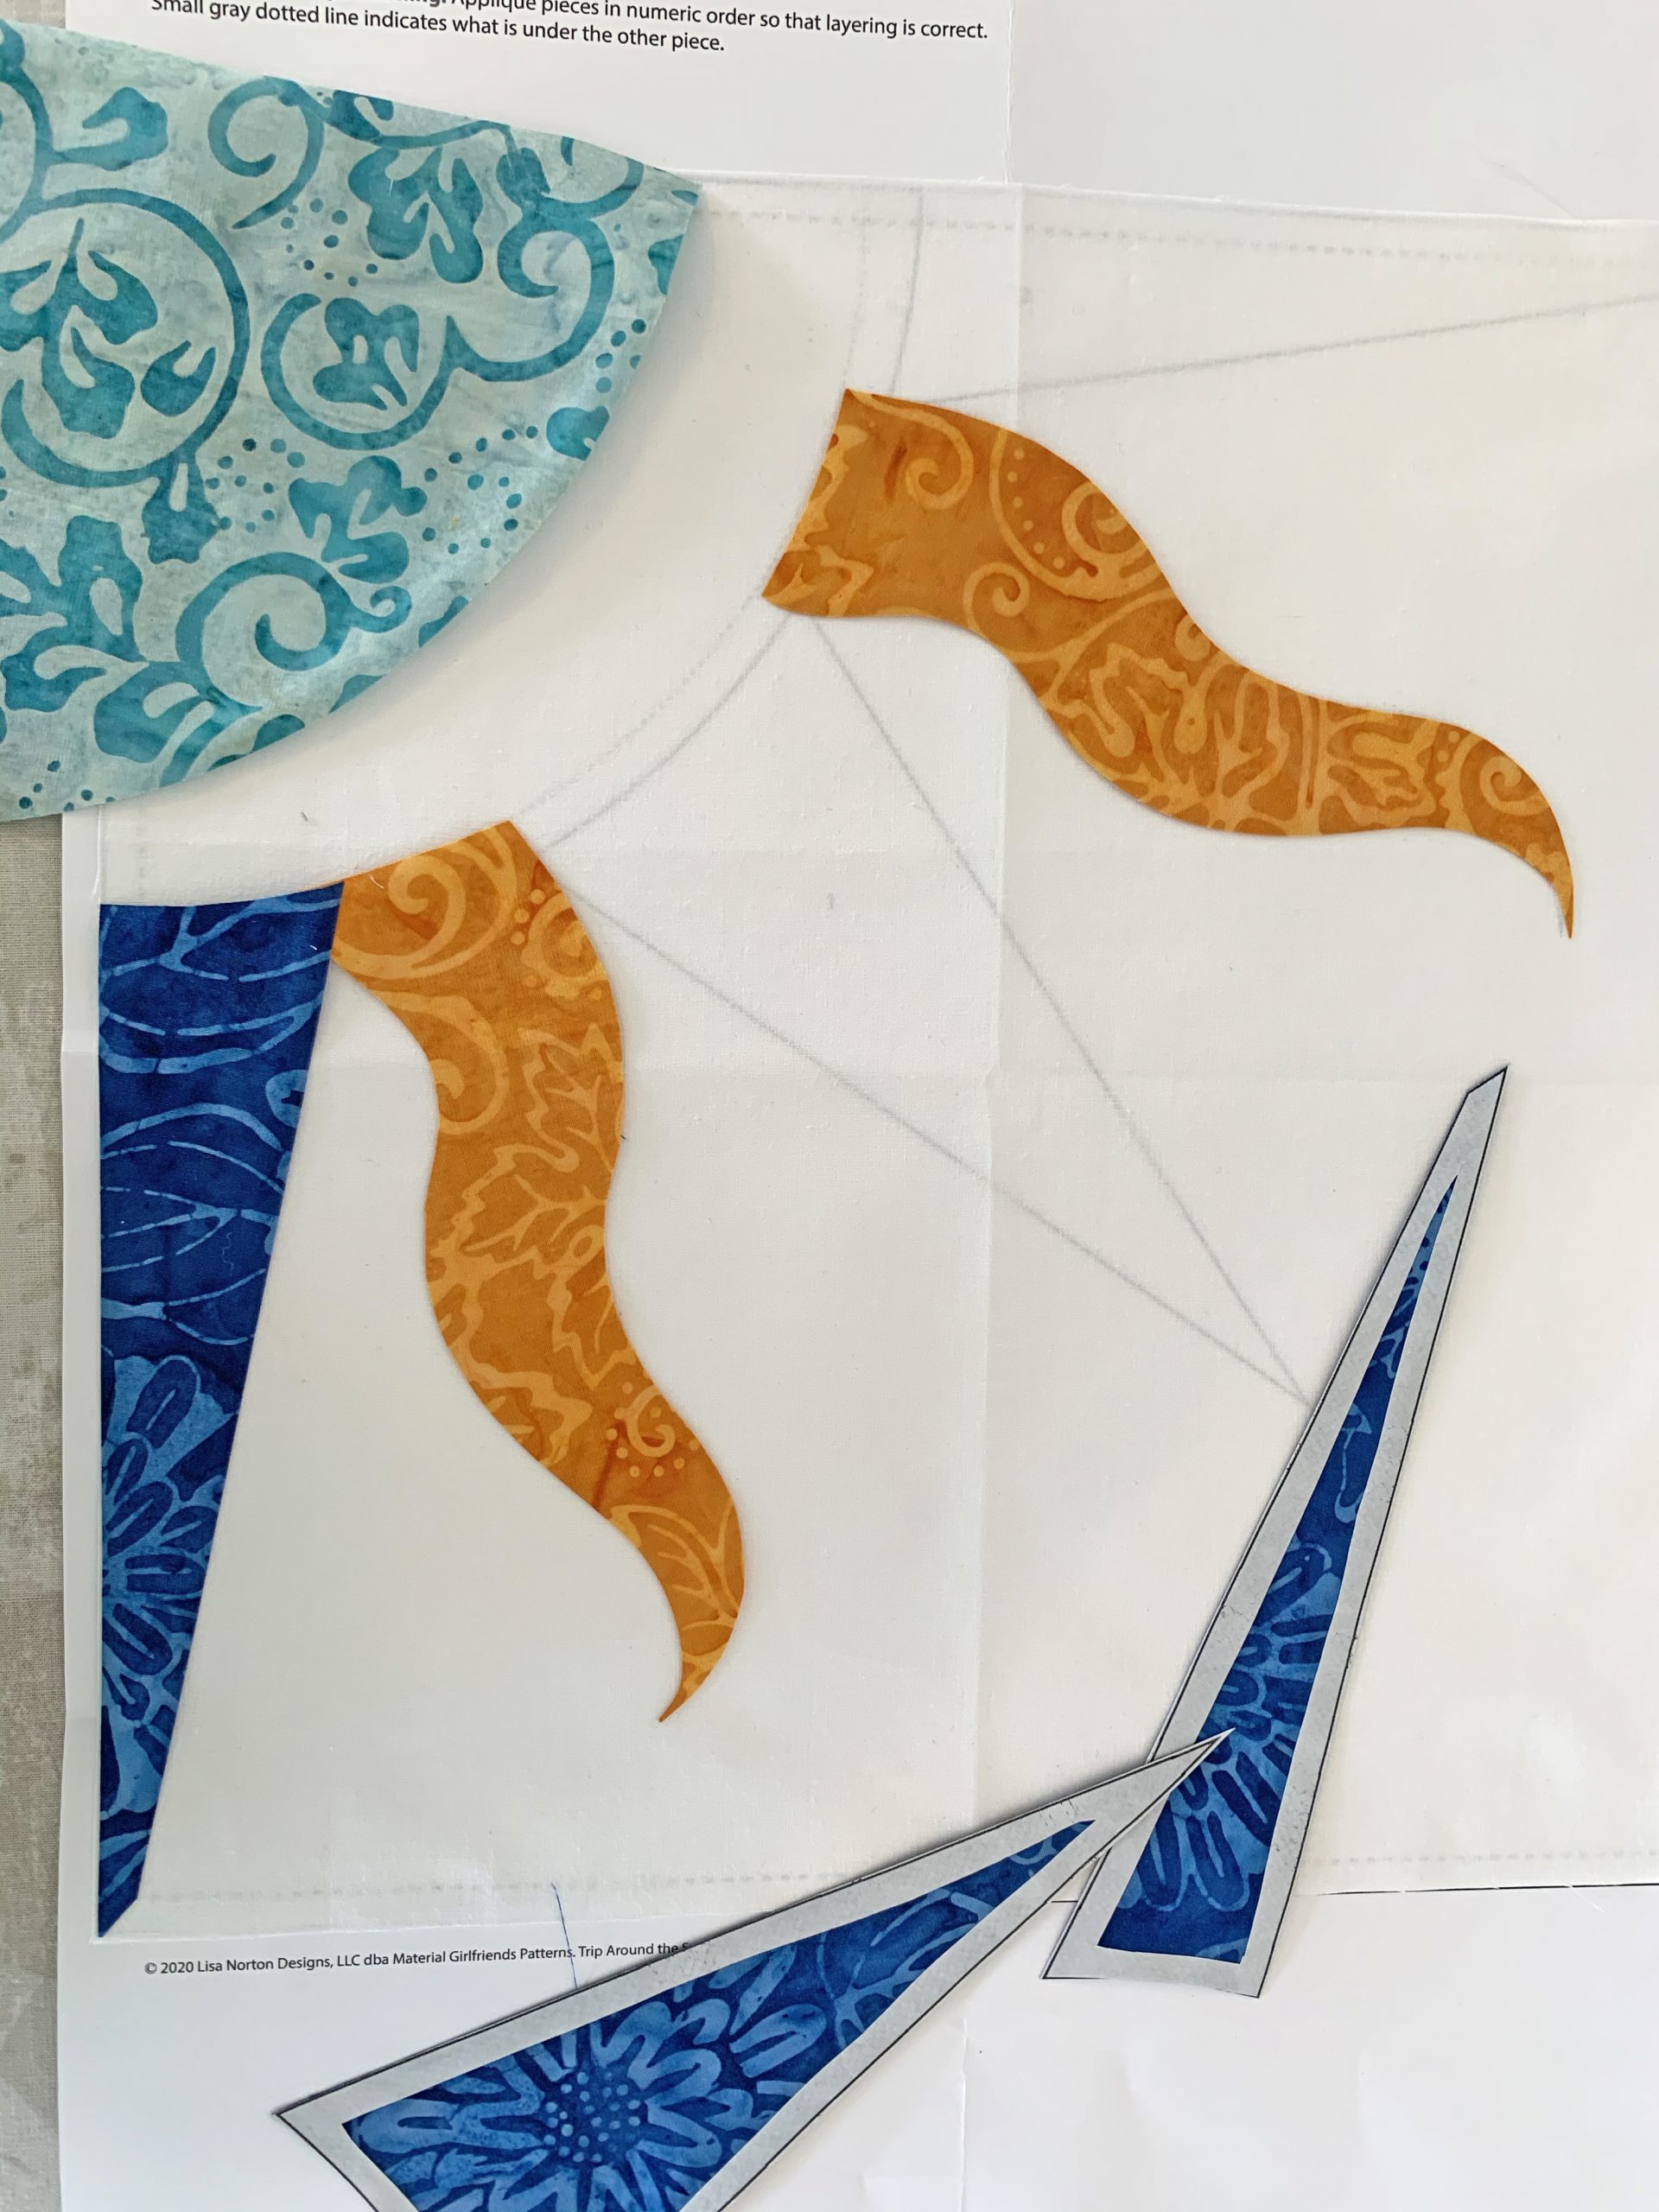
Lay your background block on top of the template sheet, on top of your ironing board. You should be able to see the outlines of the template sheet through the white fabric. If it proves too difficult to see the lines, use a light tablet or assemble the pieces on a teflon sheet as demonstrated in Winter M1 Video 8 above. Peel off the paper backing and position the pieces on the background. When satisfied with the position, gently lay a white teflon sheet over it to protect your iron and fuse in place according to the instructions of the product you are using. Wonderful!
Add a blanket stitch or small zig-zag stitch to finish the edges.
All Seasons – Month 3 Peels
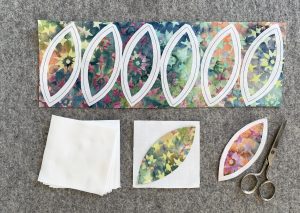
The peel template on Intro Page 3 and the instructions are the same for each quadrant. Exactly. The. Same. I copied the the template 8 times using my printer on regular paper. I made sure I was copying at 100% size. I rough cut and taped eight peels to a sheet of paper. I then laid that sheet of paper on the glass top of my inkjet copy machine and made four copies onto the fusible paper product. Done for the year. If you don’t have an inkjet printer, I’m sorry. Trace the peel 32 times for the whole year, or just 8 times per quadrant.
You’ll find the instructions on Intro Page 3. The peels are printed in in gray. My software that I use to write the patterns wouldn’t let me use a multi-color to represent the fabric. Importing fabric images can make the file size HUGE. Extra large files have more issues when producing. So, gray represent Multi-Color border print that is also used in the peels.
Use Lora’s Window Pane method to trim out the extra product. This reduces the stiffness that happens when there is too much fusible product on a quilt project. Trim on the outside of the black line. See Lora’s tutorials in Winter M1 Video 7 above.
Now that your peels are fused to the wrong side of the fabric and trimmed, peel off that paper and fuse to the white squares. But wait. Here is Lora’s quick tip on perfect alignment without having to mark the corners.
Looking good! After your peels are appliquéd, follow the diagrams and sewing instructions on Intro Page 3 to complete your block.
Winter Quadrant Assembly
Follow the instructions and diagrams on Winter Page 8 to assemble the quadrant. First, lay out your blocks, then follow steps 1 and 2 to sew the Spinning Snow Flakes to the Sun Appliqué.
Arrange the Peel blocks in the correct positions and sew to the top and left sides of the corner appliqué. Looking good! No the tricky part. Remember when you had to leave 1″ un-sewn from the corner? Or you may have just basted it? Time to un-baste that 1″. If you’re wondering what in the world I’m talking about, you might have missed that step 2 Winter page 1. Just seam rip 1″ from the inside corner.
Roll the bottom rectangle back so it is out of your way. Align and pin the left upper portion of the corner appliqué to the right side of the Spinning Snowflake/Sun unit. Align, pin, and sew. Press the seam toward the Snowflake blocks. Align, pin, and sew the bottom of the Spinning Snowflakes to the top inside of the corner appliqué. Press well. The quadrant should measure 26 1/2″ square. Congratulations! One quarter of your quilt top is done!
Spring Month 1: Spring Bunny Corner Appliqué
Now that you have that Winter Corner block done, this will be the same song, second verse. But wait. Are you starting in the Spring and not the Winter quadrant? No problem. ALL the techniques used to create the Winter, Spring, Summer, and Autumn Corner Appliqués are the same. Follow the steps in the pattern and refer to the instructional tutorials in the Winter Month 1. The difference will be the position of the 8 1/2″ x 10 1/2″ rectangle sewn to the 8 1/2″ x 18 1/2″ rectangle. Enjoy this pretty corner appliqué. We’ll connect again with Month 2.
Spring Month 2: Tulip Garden Blocks
This month we have Parallel Flying Geese. No worries. You did that in the Winter quadrant. But don’t get tricked! These Parallel Flying Geese are Mirror Images. Pay close attention to the positioning of the 2″ square to the 2″ x 3 1/2″ rectangle.
The next trick is to create the Stem unit. Your 2″ Spring Green square will be larger than the rectangle it is sewn to. The rectangle is 1 3/4″ x 3 1/2″. Again, you’re sewing Mirror Images so pay attention to the position of the square and the diagonal stitch! I had to seam rip a few. Now, because the square is larger than the rectangle, the diagonal will not go to the corner as it does with Parallel Flying Geese. The little portion hanging off will be trimmed and the seam ends at 1/4″ inch from the bottom of the unit. See the diagrams at the bottom of Spring Page 6.
Spring Month 3: Center Sun Appliqué and Peels
You passed it! Scroll back up until you get to All Seasons Month 3: Center Sun Appliqué and Peels. There are instructions and a video tutorial.
The instructions on the Quadrant Assembly are the same as well. It is just in a mirrored position from the winter quadrant.
Summer Month 1: Blue Birds Corner Appliqué
Now that you have the Winter and Spring Corner blocks done, this will be easy-peasy. But wait. Are you starting in the Summer and not the Winter quadrant? No problem. ALL the techniques used to create the Winter, Spring, Summer, and Autumn Corner Appliqués are the same. Follow the steps in the pattern and refer to the instructional tutorials in the Winter Month 1 above. The difference will be the position of the 8 1/2″ x 10 1/2″ rectangle sewn to the 8 1/2″ x 18 1/2″ rectangle. Enjoy this pretty corner appliqué. We’ll connect again with Month 2.
Summer Month 2: Tasty Apples Blocks
This month we have paper-piecing. Yay! I love paper-piecing. It is so accurate and my blocks come out exactly the right size. Did I hear a groan? If you’ve done paper-piecing before and it isn’t a pleasant experience for you, have a look a the tutorial below. Perhaps one of the tips I share will take the struggle out of your paper-piecing process. If this is the first time you’ve tried paper-piecing, I’m so excited to get you hooked on this fun technique. This block is perfect for a beginner. There are many ways to paper-piece. If my technique isn’t clicking for you, watch a few other paper-piecing tutorials on youtube. There is bound to be a method that works with thinking process. Don’t give up.
First, pre-cut your pieces no smaller than the sizes given on Summer Page 6. Bigger is fine. Make 5 copies of Summer Page 6 at 100% size. I like using Carol Doak’s foundation paper. It is a newsprint cut at 8.5″ x 11″. It tears away easy. However, regular copy paper will work just fine. Trim away the excess so you can work with a smaller piece of paper. Don’t cut on the outside line, however. Leave yourself some extra space.
One your Tasty Apple is sewn, trim to 6 1/2″ square on the outside black line. Gently tear away the paper by creasing along the seams. Great job!
Summer Month 3: Center Sun Appliqué and Peels
You passed it! Scroll back up until you get to All Seasons Month 3: Center Sun Appliqué and Peels. There are instructions and a video tutorial.
The instructions on the Quadrant Assembly are the same as well. It is just in a mirrored position from the spring quadrant.
Autumn Month 1: Squirrel Corner Appliqué
Now that you have the Winter, Spring, and Summer Corner blocks done, this will be a walk in the park. But wait. Are you starting in the Autumn and not the Winter quadrant? No problem. ALL the techniques used to create the Winter, Spring, Summer, and Autumn Corner Appliqués are the same. Follow the steps in the pattern and refer to the instructional tutorials in the Winter Month 1 above. The difference will be the position of the 8 1/2″ x 10 1/2″ rectangle sewn to the 8 1/2″ x 18 1/2″ rectangle. Enjoy this pretty corner appliqué. We’ll connect again with Month 2.
Autumn Month 2: Falling Leaves Blocks
This month we have pretty falling leaves. We’ll be making two Summer Gold leaves, one Autumn Green leaf, one Wintery Green leaf, and one Chocolate Brown leaf. The leaves are made up of half square triangles and squares. The stem is created using a simple stitch and flip method. Watch the tutorial below to create the block units.
How about a little “nesting” and “easing” help? What do those terms mean anyway?
And that is what nesting and easing is when sewing. I’m a pro at easing. <wink>
Autumn Month 3: Center Sun Appliqué and Peels
You passed it! Scroll back up quite a while until you get to All Seasons Month 3: Center Sun Appliqué and Peels. There are instructions and a video tutorial.
The instructions on the Quadrant Assembly are the same as well. It is just in a mirrored position from the summer quadrant.
Is our Trip Around the Sun done? Boy, that was a fast year. It was definitely slow in parts but looking back, I can see all the places I struggled and over came. 2020-2021 was and will be a memorable season.
The sun comes up, the sun goes down.
This old world keeps spinning ‘round and ‘round.
Blink your eyes and it is done,
Another Trip Around the Sun.The tide rolls in, the tide rolls out,
an unchanging pattern there is no doubt.
Count your blessings, one by one
And enjoy each Trip Around the Sun.Poem Excerpt, Another Trip Around the Sun, by Billy Clyde (requested permission to use a portion in advertising)
The quilt quadrants represents some of my favorite elements of the seasons. Each appliqué corner extends and reaches to the next season. Between the seasons is an appliquéd peel block that repeats the bright multi-color palette of the Trip Around the Sun. The center sun appliqué uses warm and cool tones to represent the season’s climate change. This year, 2020, has been especially challenging and will not likely be a Trip Around the Sun we will forget. Remember to count your blessings. There is so much beauty within each season. Let go of fear and worry and hold tight to what is good and beautiful. Thank you for joining me in this memorable journey.