You did it! This last clue includes the finishing fabric requirements and four layout options. Visit www.inbetweenstitches.com to find the last Clue #5. Pat yourself on the back. For facing the “unknown” current events of our nation, you had the courage to also embrace the “unknown” of the Material Girlfriends Mystery. I feel honored that you trusted us for a fun project.
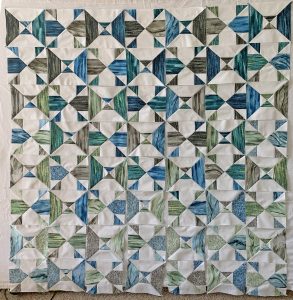
Check out these lay-outs! The first two images are from a beautiful 10″ square set from Michael Miller fabrics called Strata. I organized the blocks from dark to medium fabrics. I’m super please with how these turned out.
Lisa’s Designs
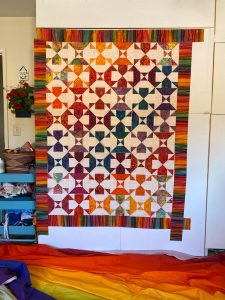
 Lora’s Designs
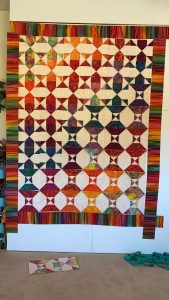
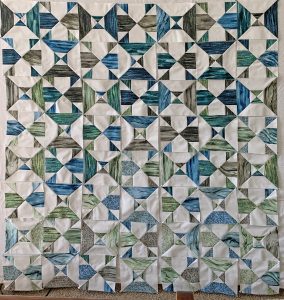
 Judy’s Designs
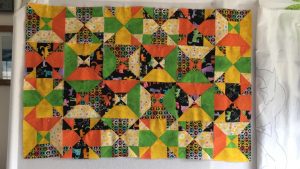 Melissa’s Design
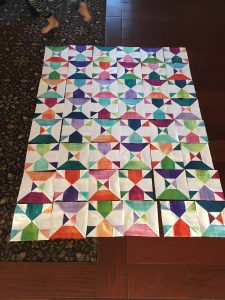 Fabrics from In Between Stitches
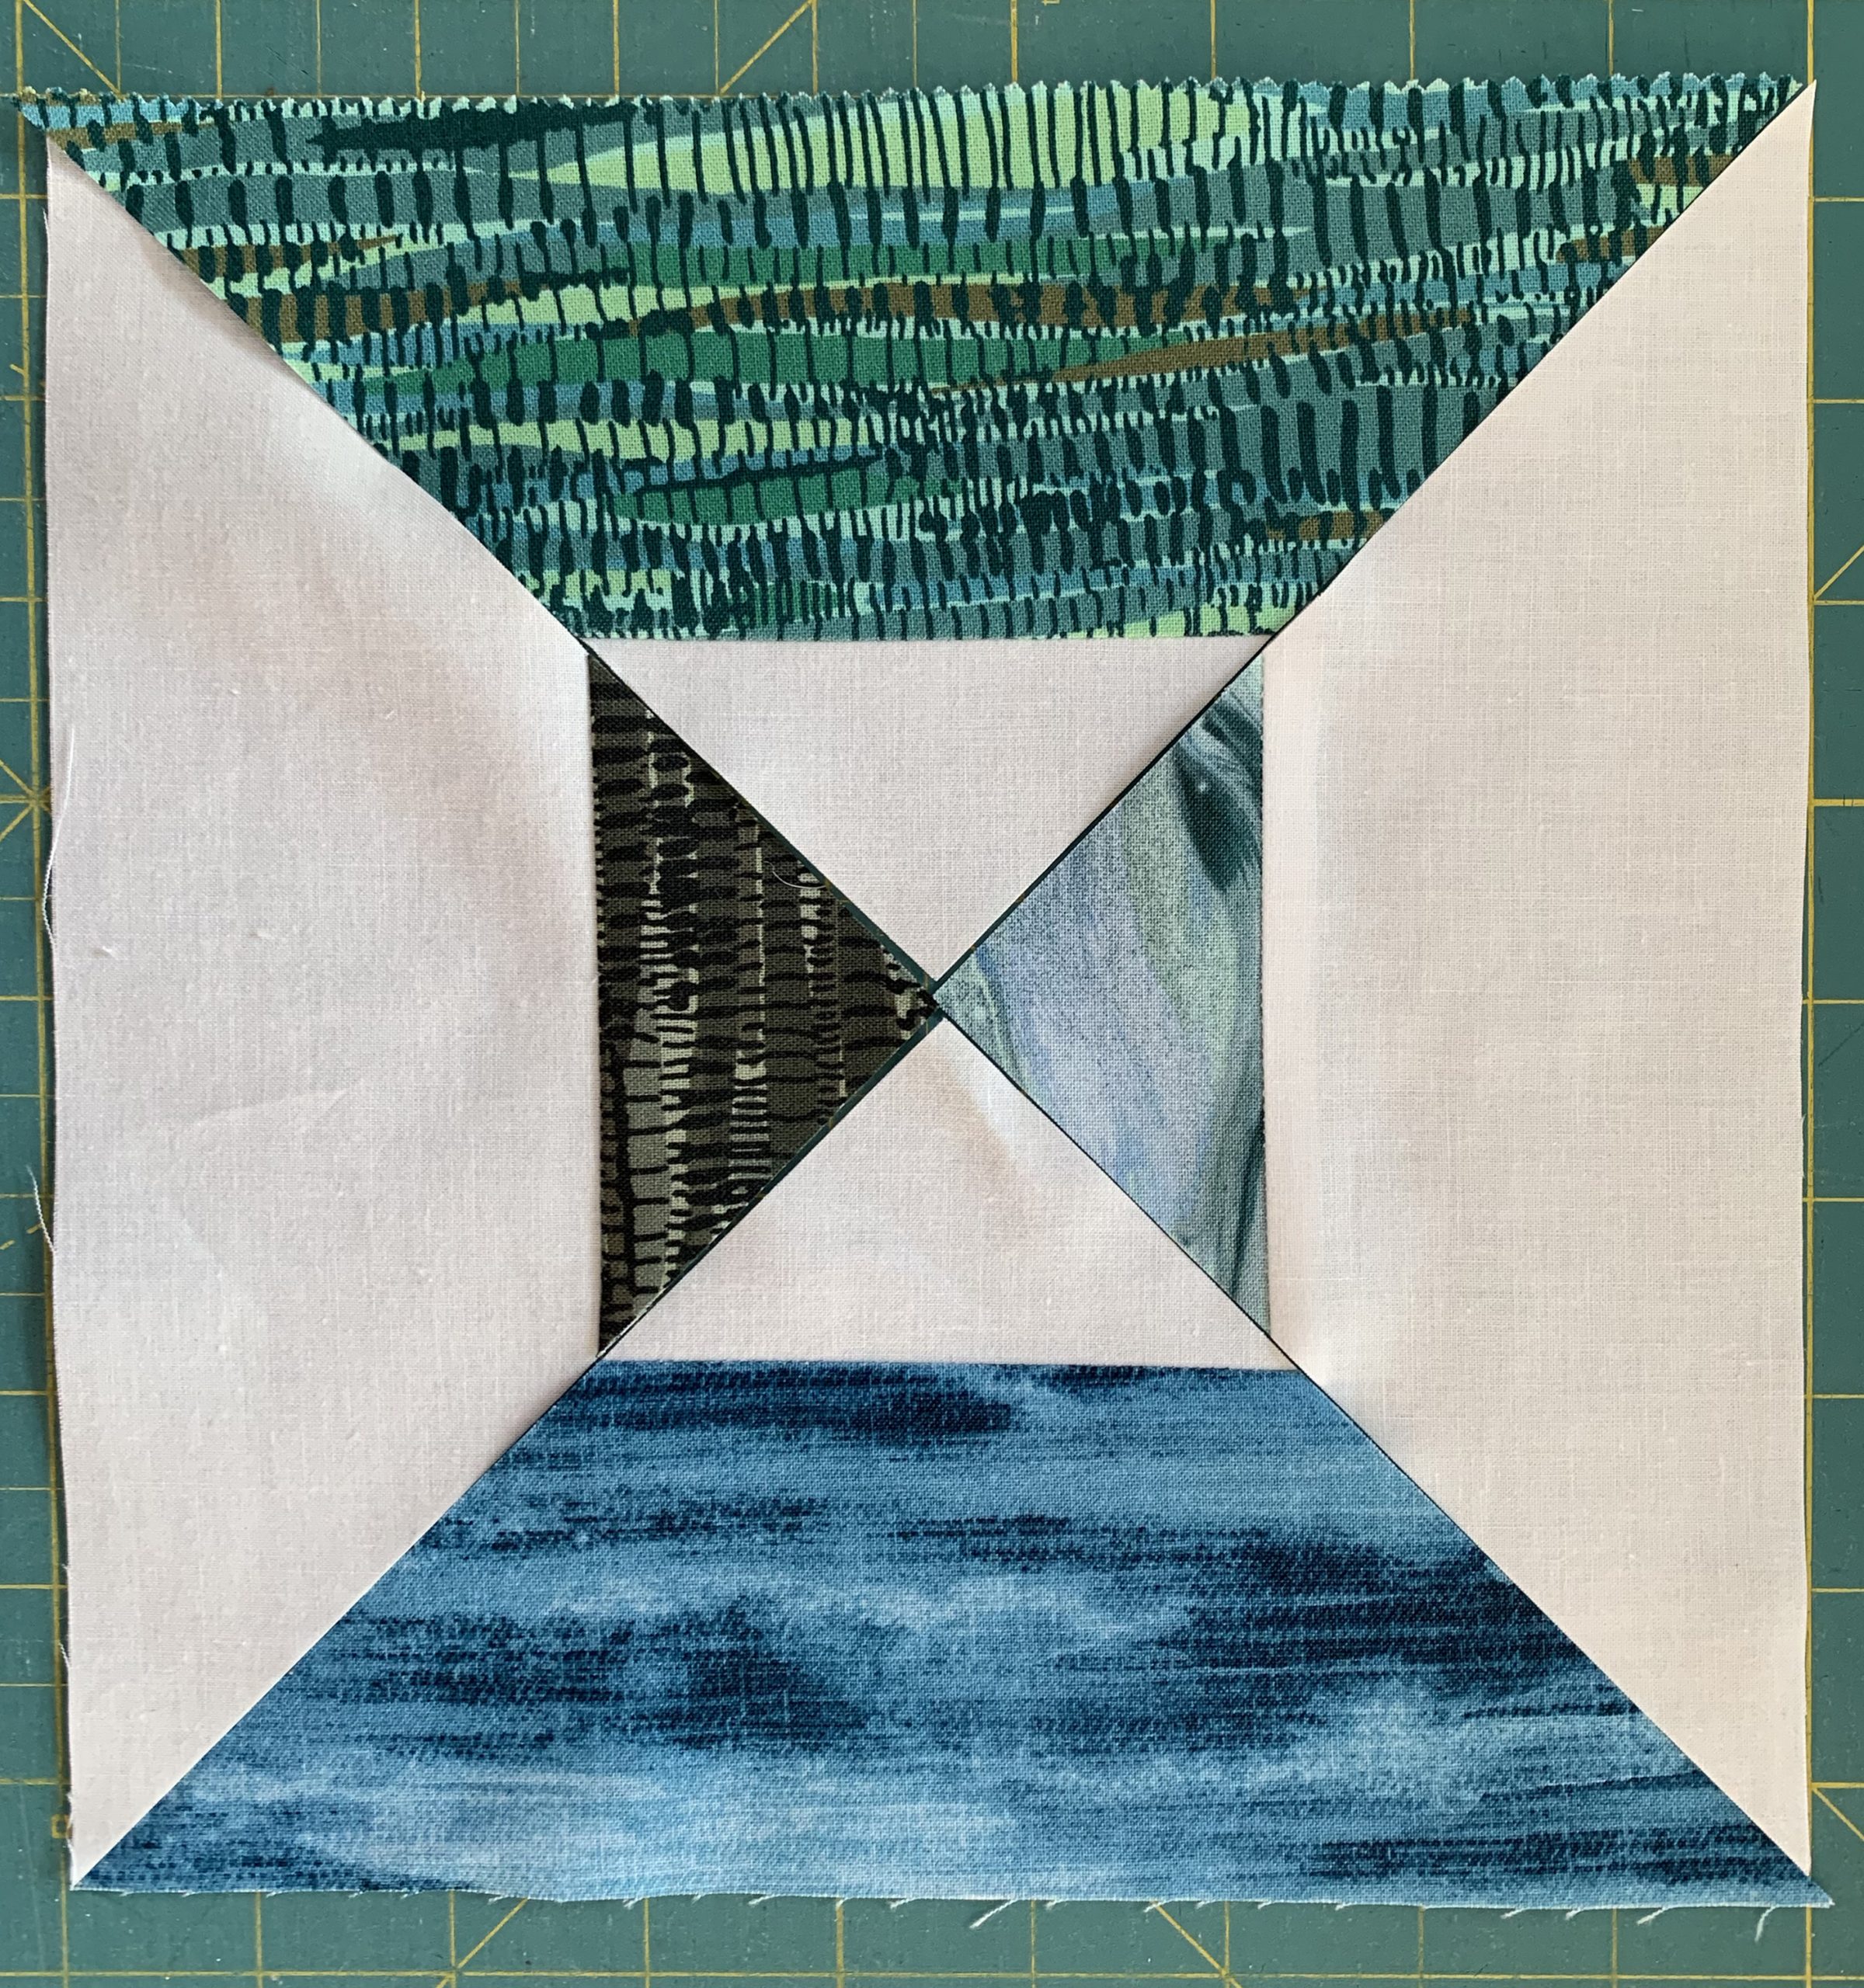
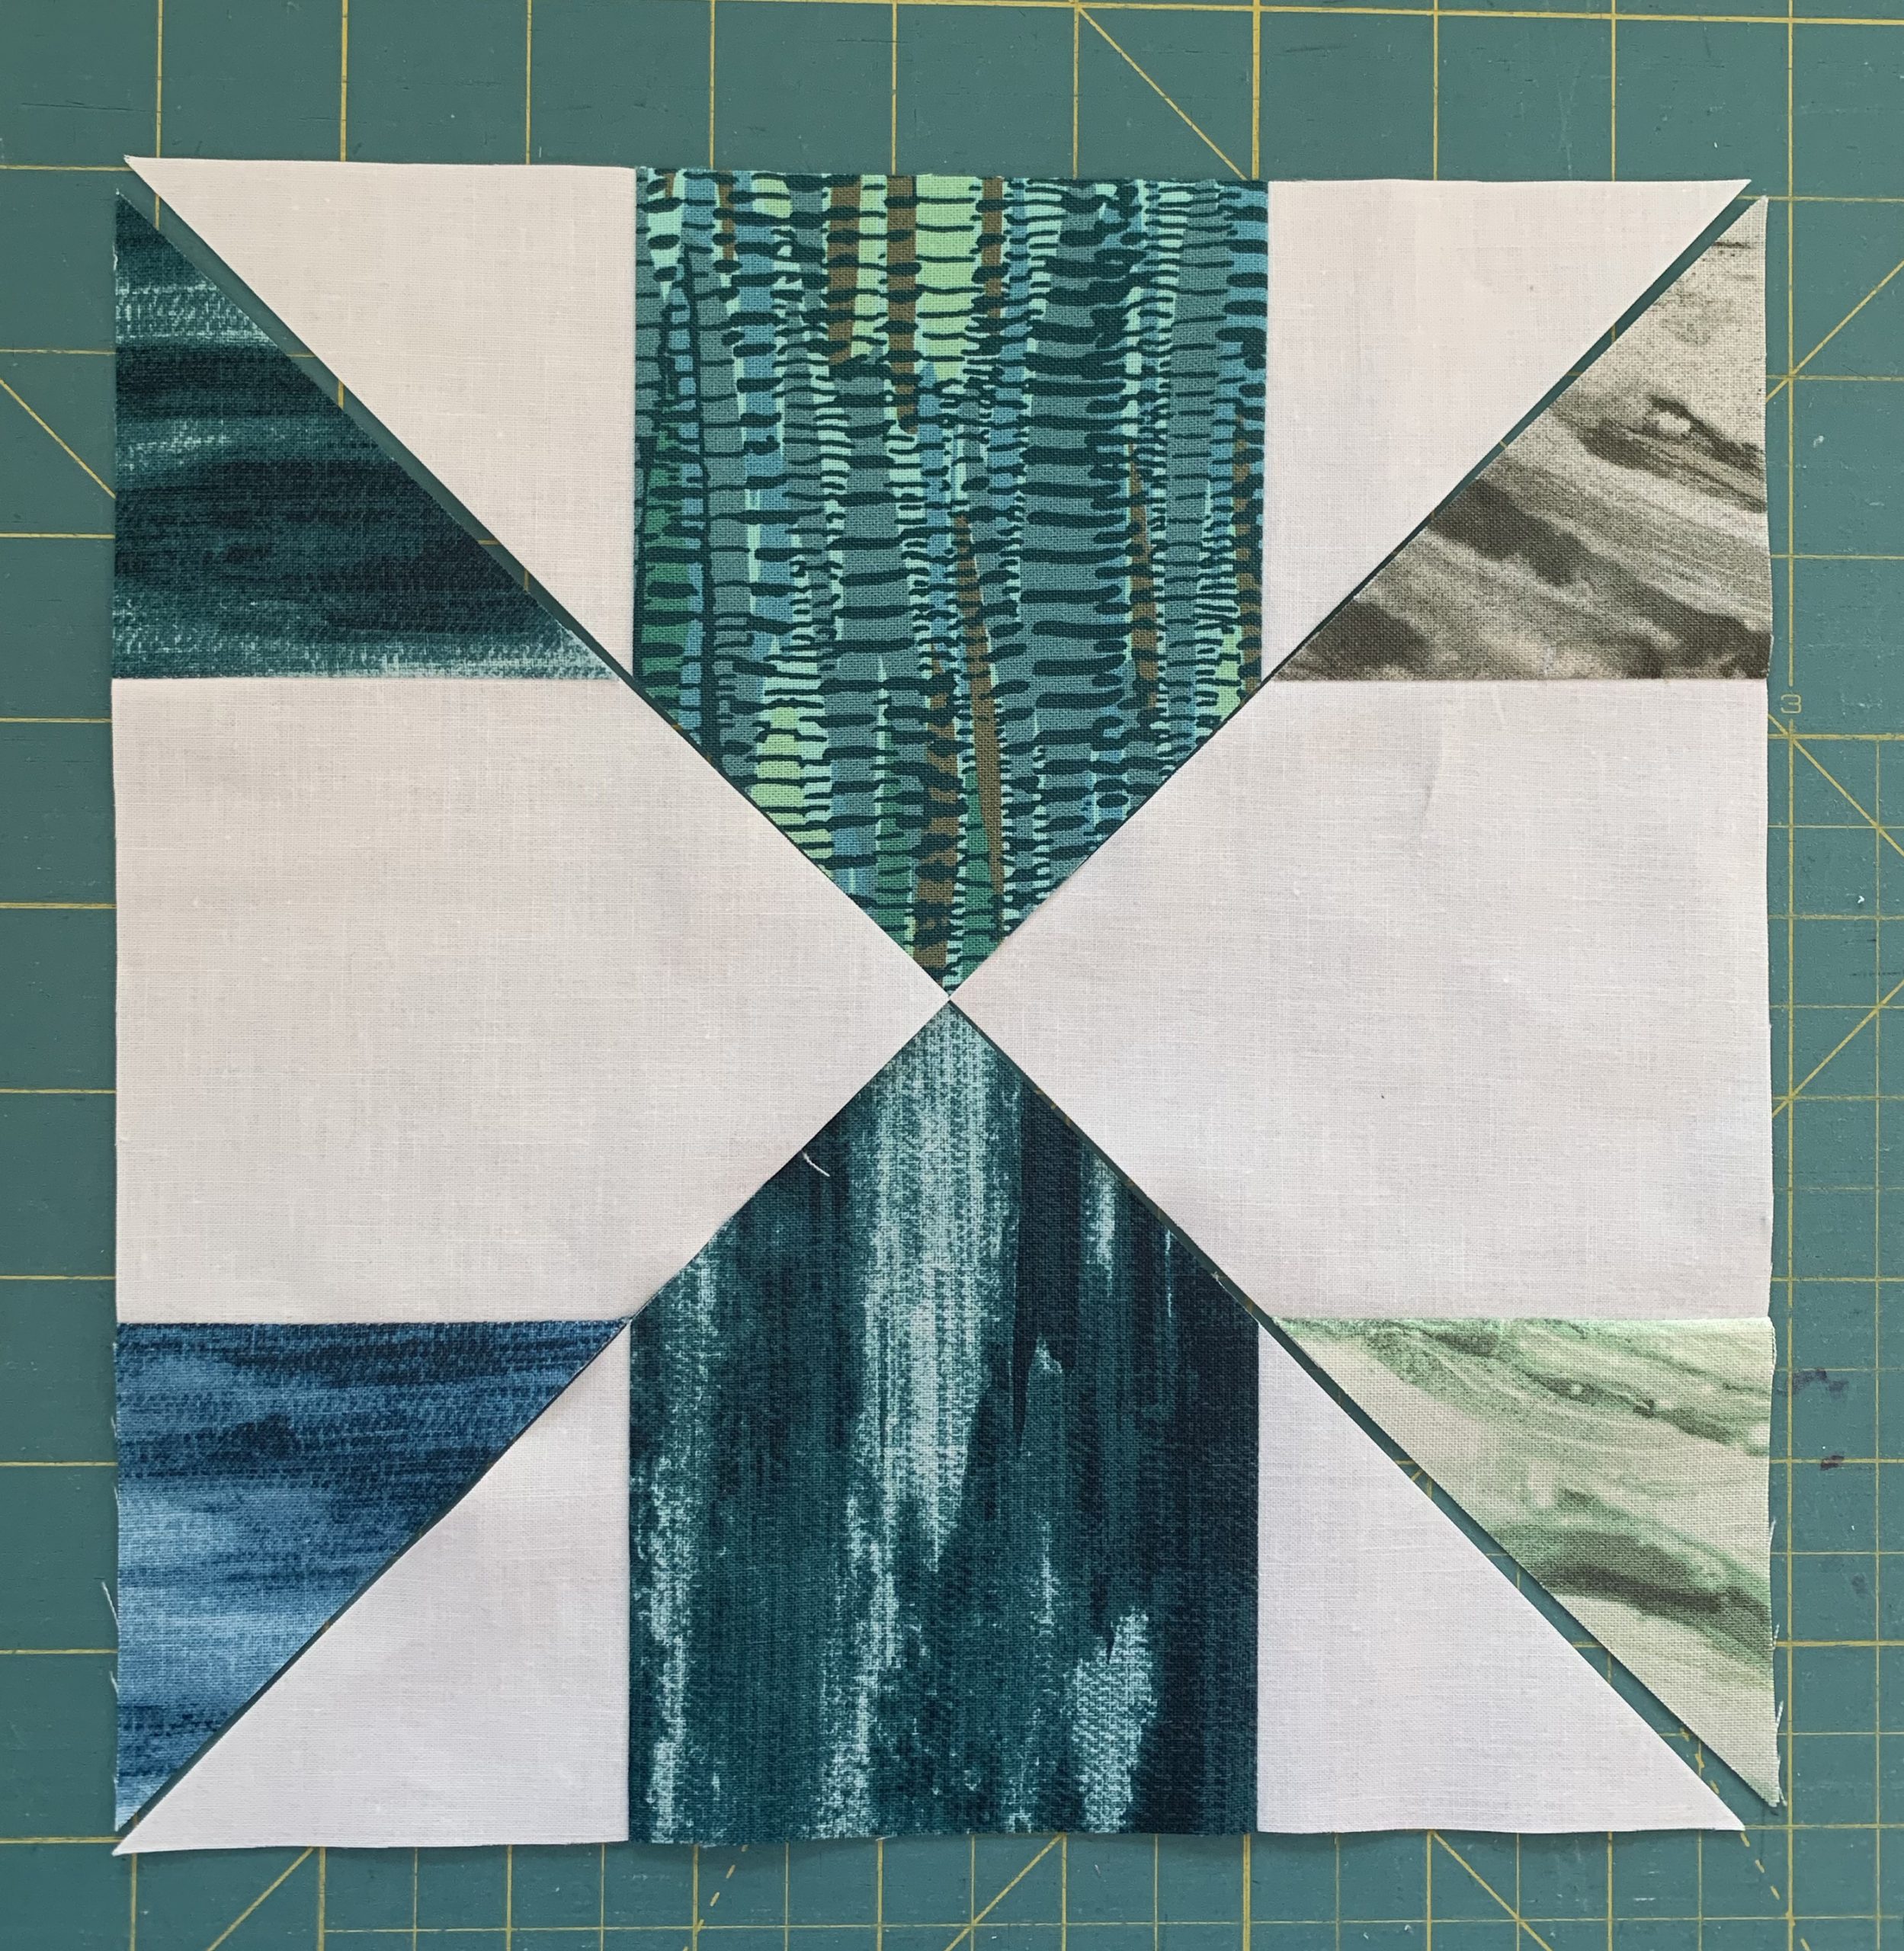
Quilt top instructions. Layout your blocks in a manner that pleases you. Sew your blocks into rows by aligning and pinning each block. Press the seams in the rows in alternate directions. Align seams, pin, and sew the rows together. Press the seams in one direction. Well done. If you did the 6 blocks x 8 blocks lay-out designs in Clue #5, your quilt top should measure 45″ x 60″.
I’m not really a border person and only add a border if I want the quilt bigger. If you love borders (Lora & Jennie) or if want to make it bigger, I’ve included yardage amounts for a 4 1/2″ (cut size) border. You need exactly 36″ so if you bought a yard and you have exactly 36″, cut your strips at 4″ instead. Otherwise, your last strip will be slightly small. If you have 36+” inches, straighten that first edge and then cut eight 4 1/2″ strips. Cut off the selvage and sew two strips end to end. Make four sets. Measure the left and right sides of your quilt top, cut two of the strip sets to that size. Pin and sew to the left and right sides. Repeat for the top and bottom border.
The clues will be a free download while we’re all in Shelter in Place. After we’re freed to roam, we’ll make the instructions available as a pattern. What should we name this pattern? I already know I’ll need to include a few more layout options. I keep seeing the creative layouts on facebook! Post your design on Facebook pages Material Girlfriends and In Between Stitches Inside the Hive or instagram #MaterialGirlfriendsMystery, #inbetweenstitches1.
Thank you Amy for finding I had a little typo. Third line should say 6 blocks x 8 blocks lay-out. I love receiving edits because I’m horrified if I have mistakes. Being slightly dyslexic, I assume I’ve made mistakes and scrub the instructions for my errors. I really believe the Material Girlfriends patterns have a great reputation BECAUSE of our proofing and testing friends (you too!). Thank you sew much!
Remember, with this Shelter in Place order, we must have physical distancing. We NEED social interaction. Stay connect. You introverts check on your extrovert friends. We’re not used to this kind of isolation and it has been a yo-yo of an emotional ride! 🙂
Have fun and I will be sitting on social media waiting to see your lay-outs!!
Absewlutely,
Lisa Norton
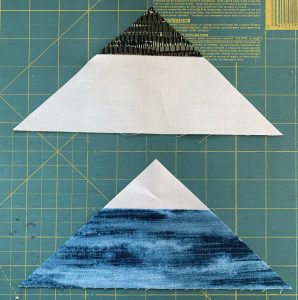 Mountain Peaks
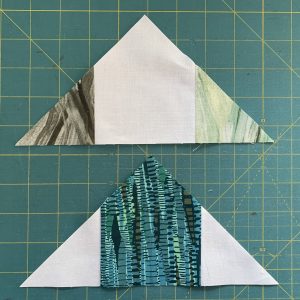 Houses