A Quilter’s New Year Resolutions

Finish UFOs. Every year, this gets added to my New Year Resolutions. A week ago, I succumbed to Judy’s peer pressure and joined the rest of the Material Girlfriends in the American Patchwork and Quilting UFO Challenge. You are to choose 12 unfinished projects and each month APQ chooses a number and you sew on that project for the month. (Check it out here.) I started by writing up my list, checking my closet for forgotten projects… Hmm. I only had 8. EIGHT. Ocho. So I doubled up on a few projects to make 12.

EIGHT unfinished projects? What was wrong with me? Basically I am finishing everything I start because it turns into a pattern. I couldn’t finish all those new patterns on my own, however. My mom, Carolyn, and sister, Lora, sew up my projects while I write. I know, it is like cheating!

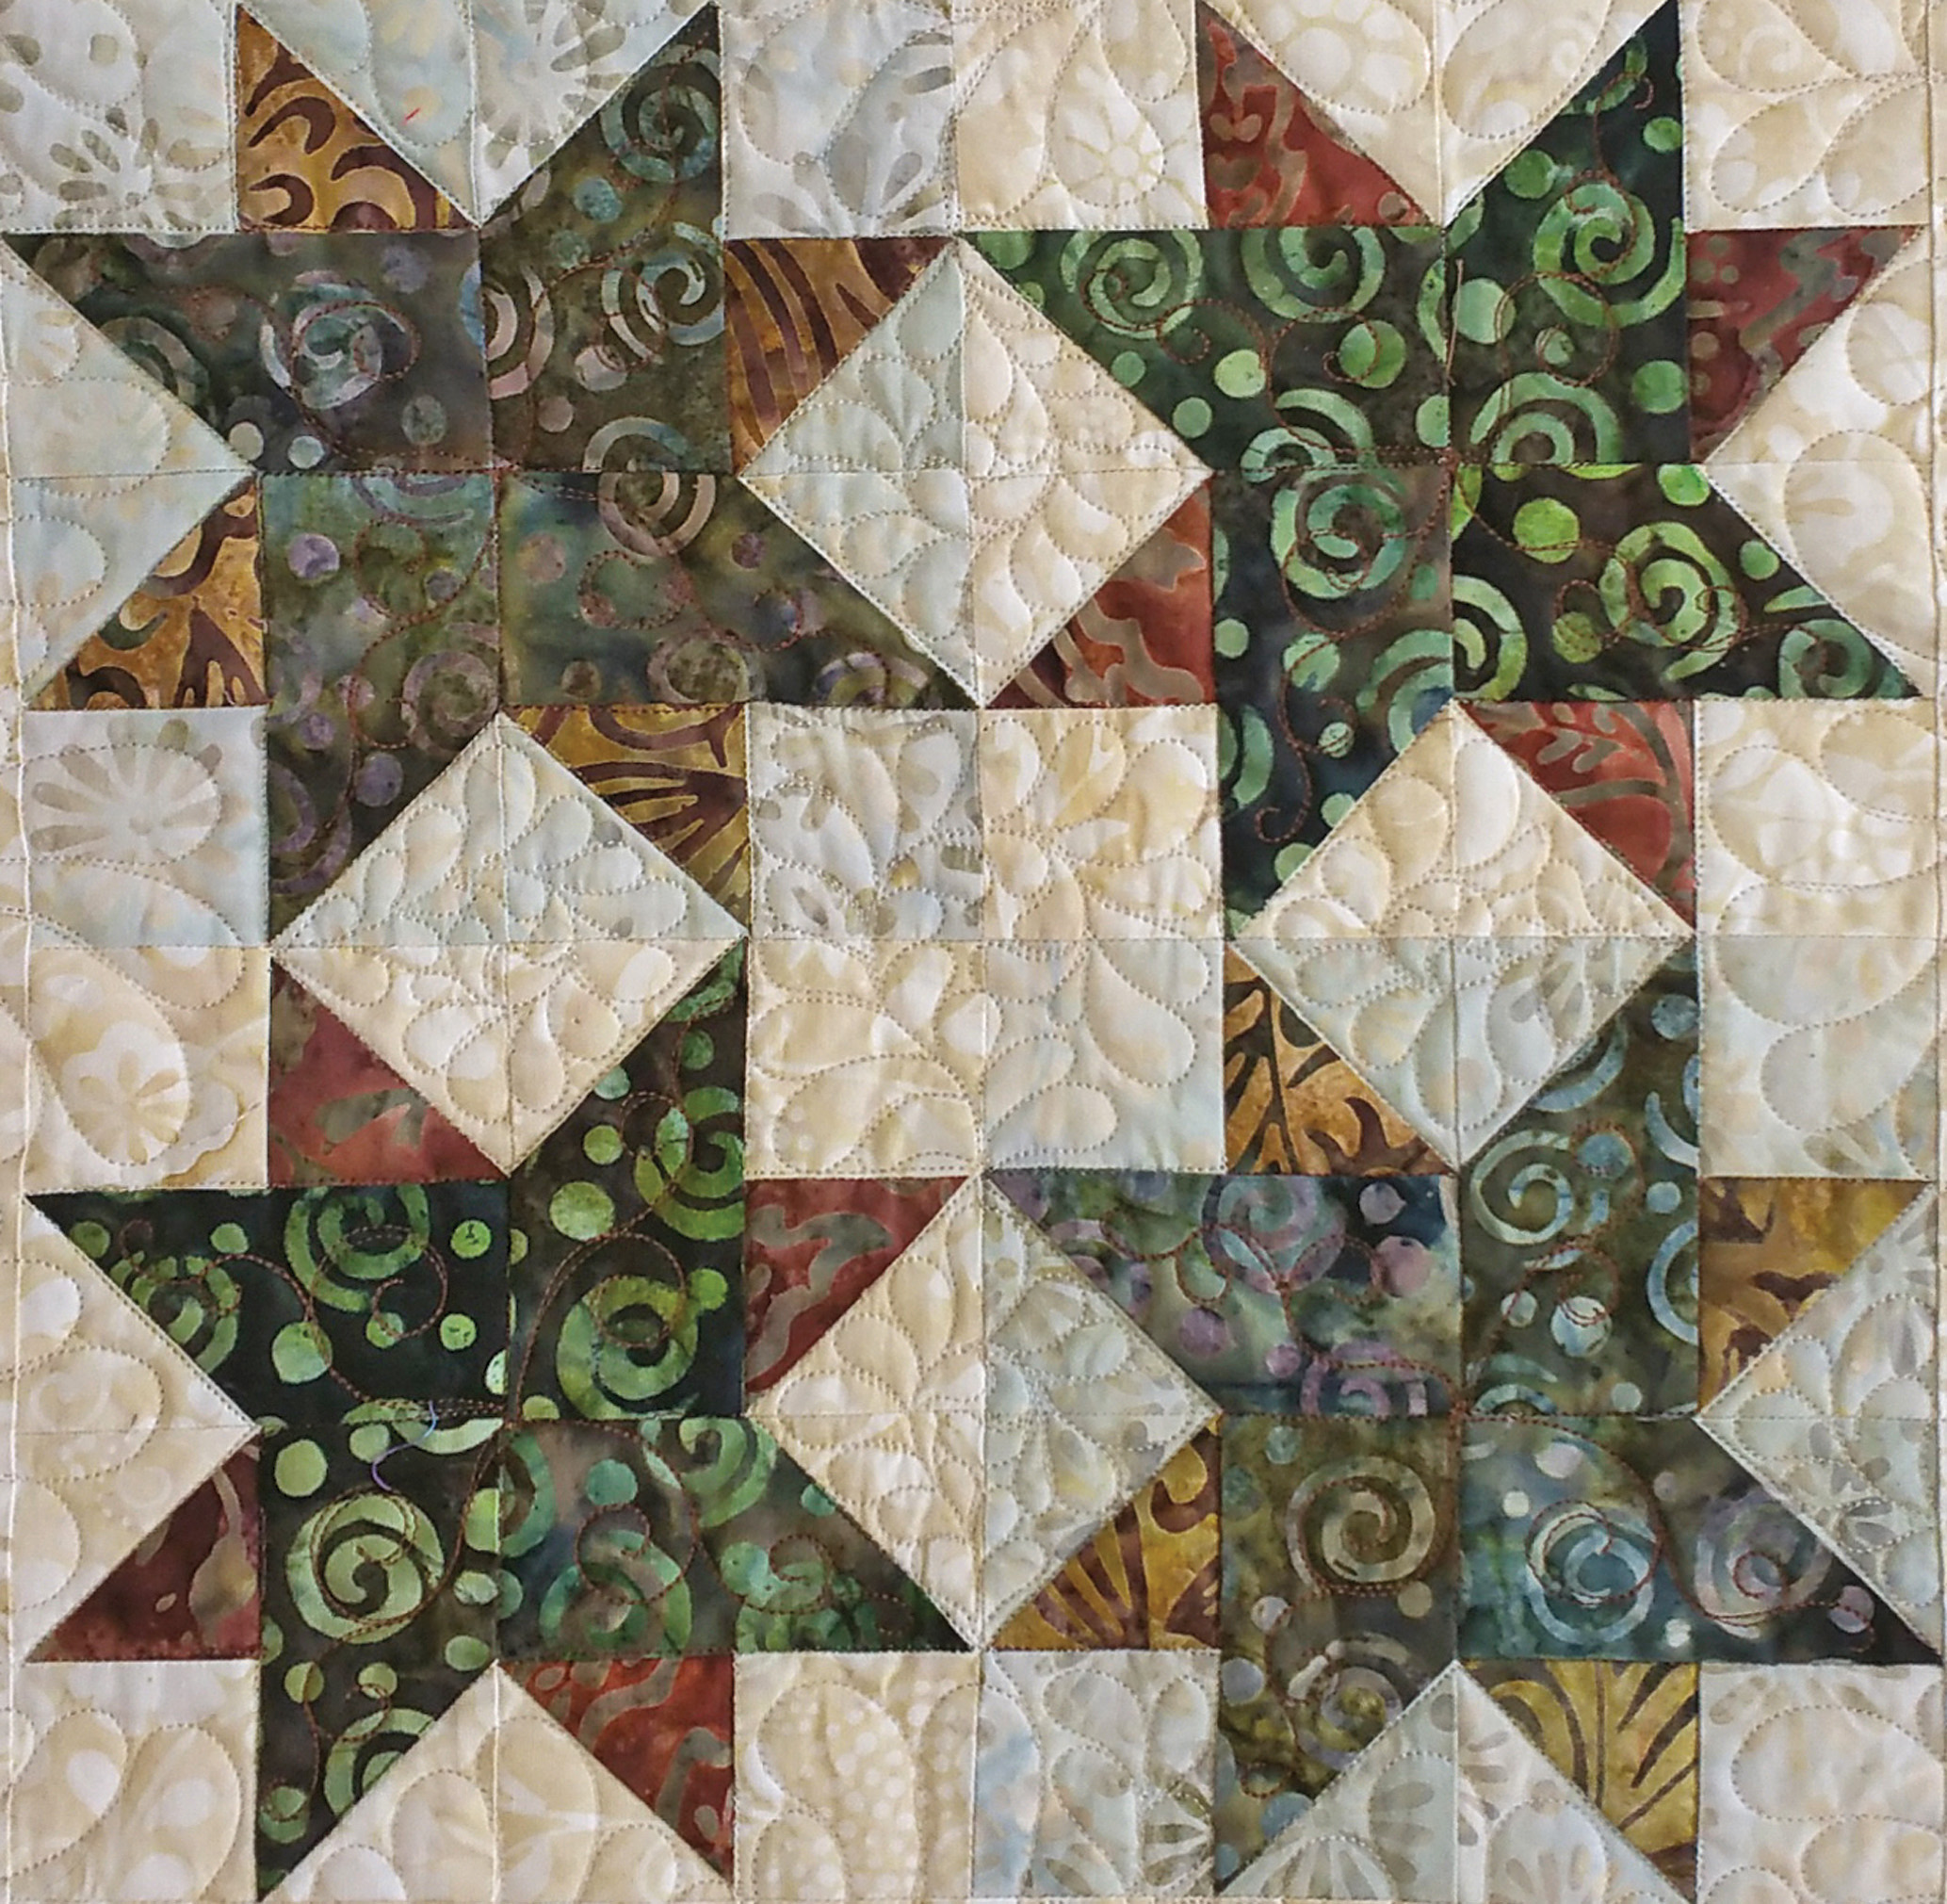
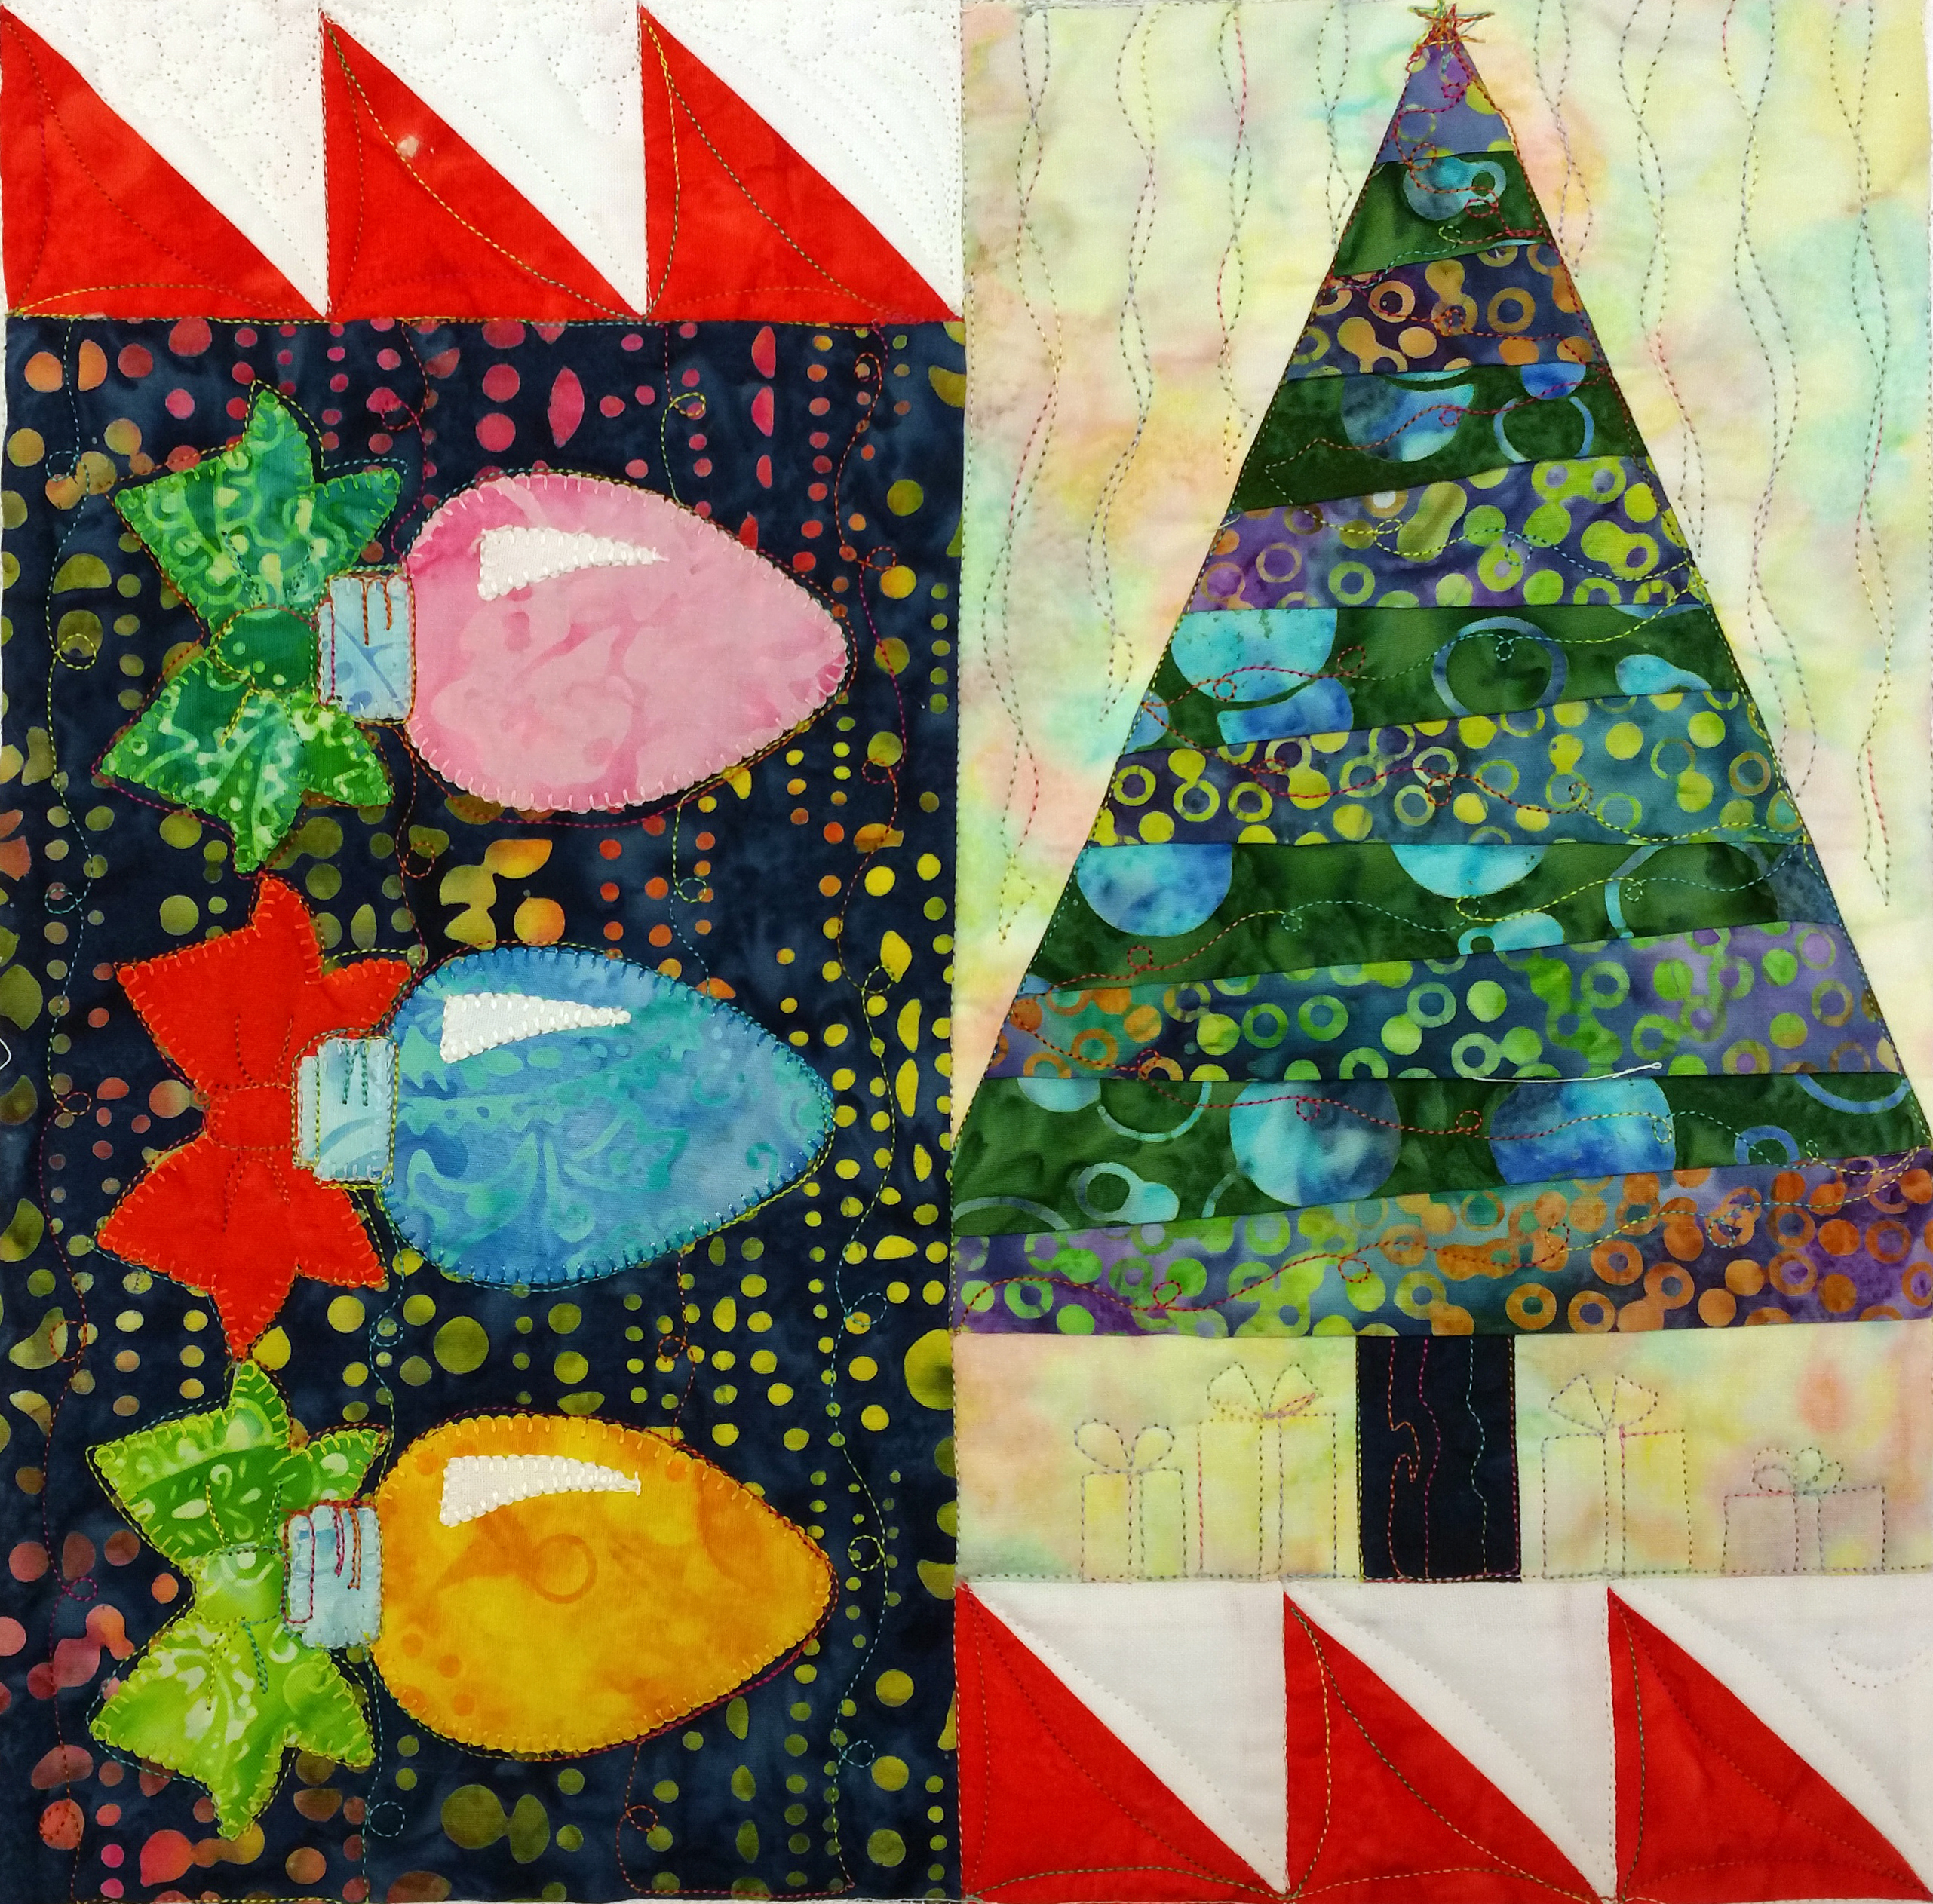
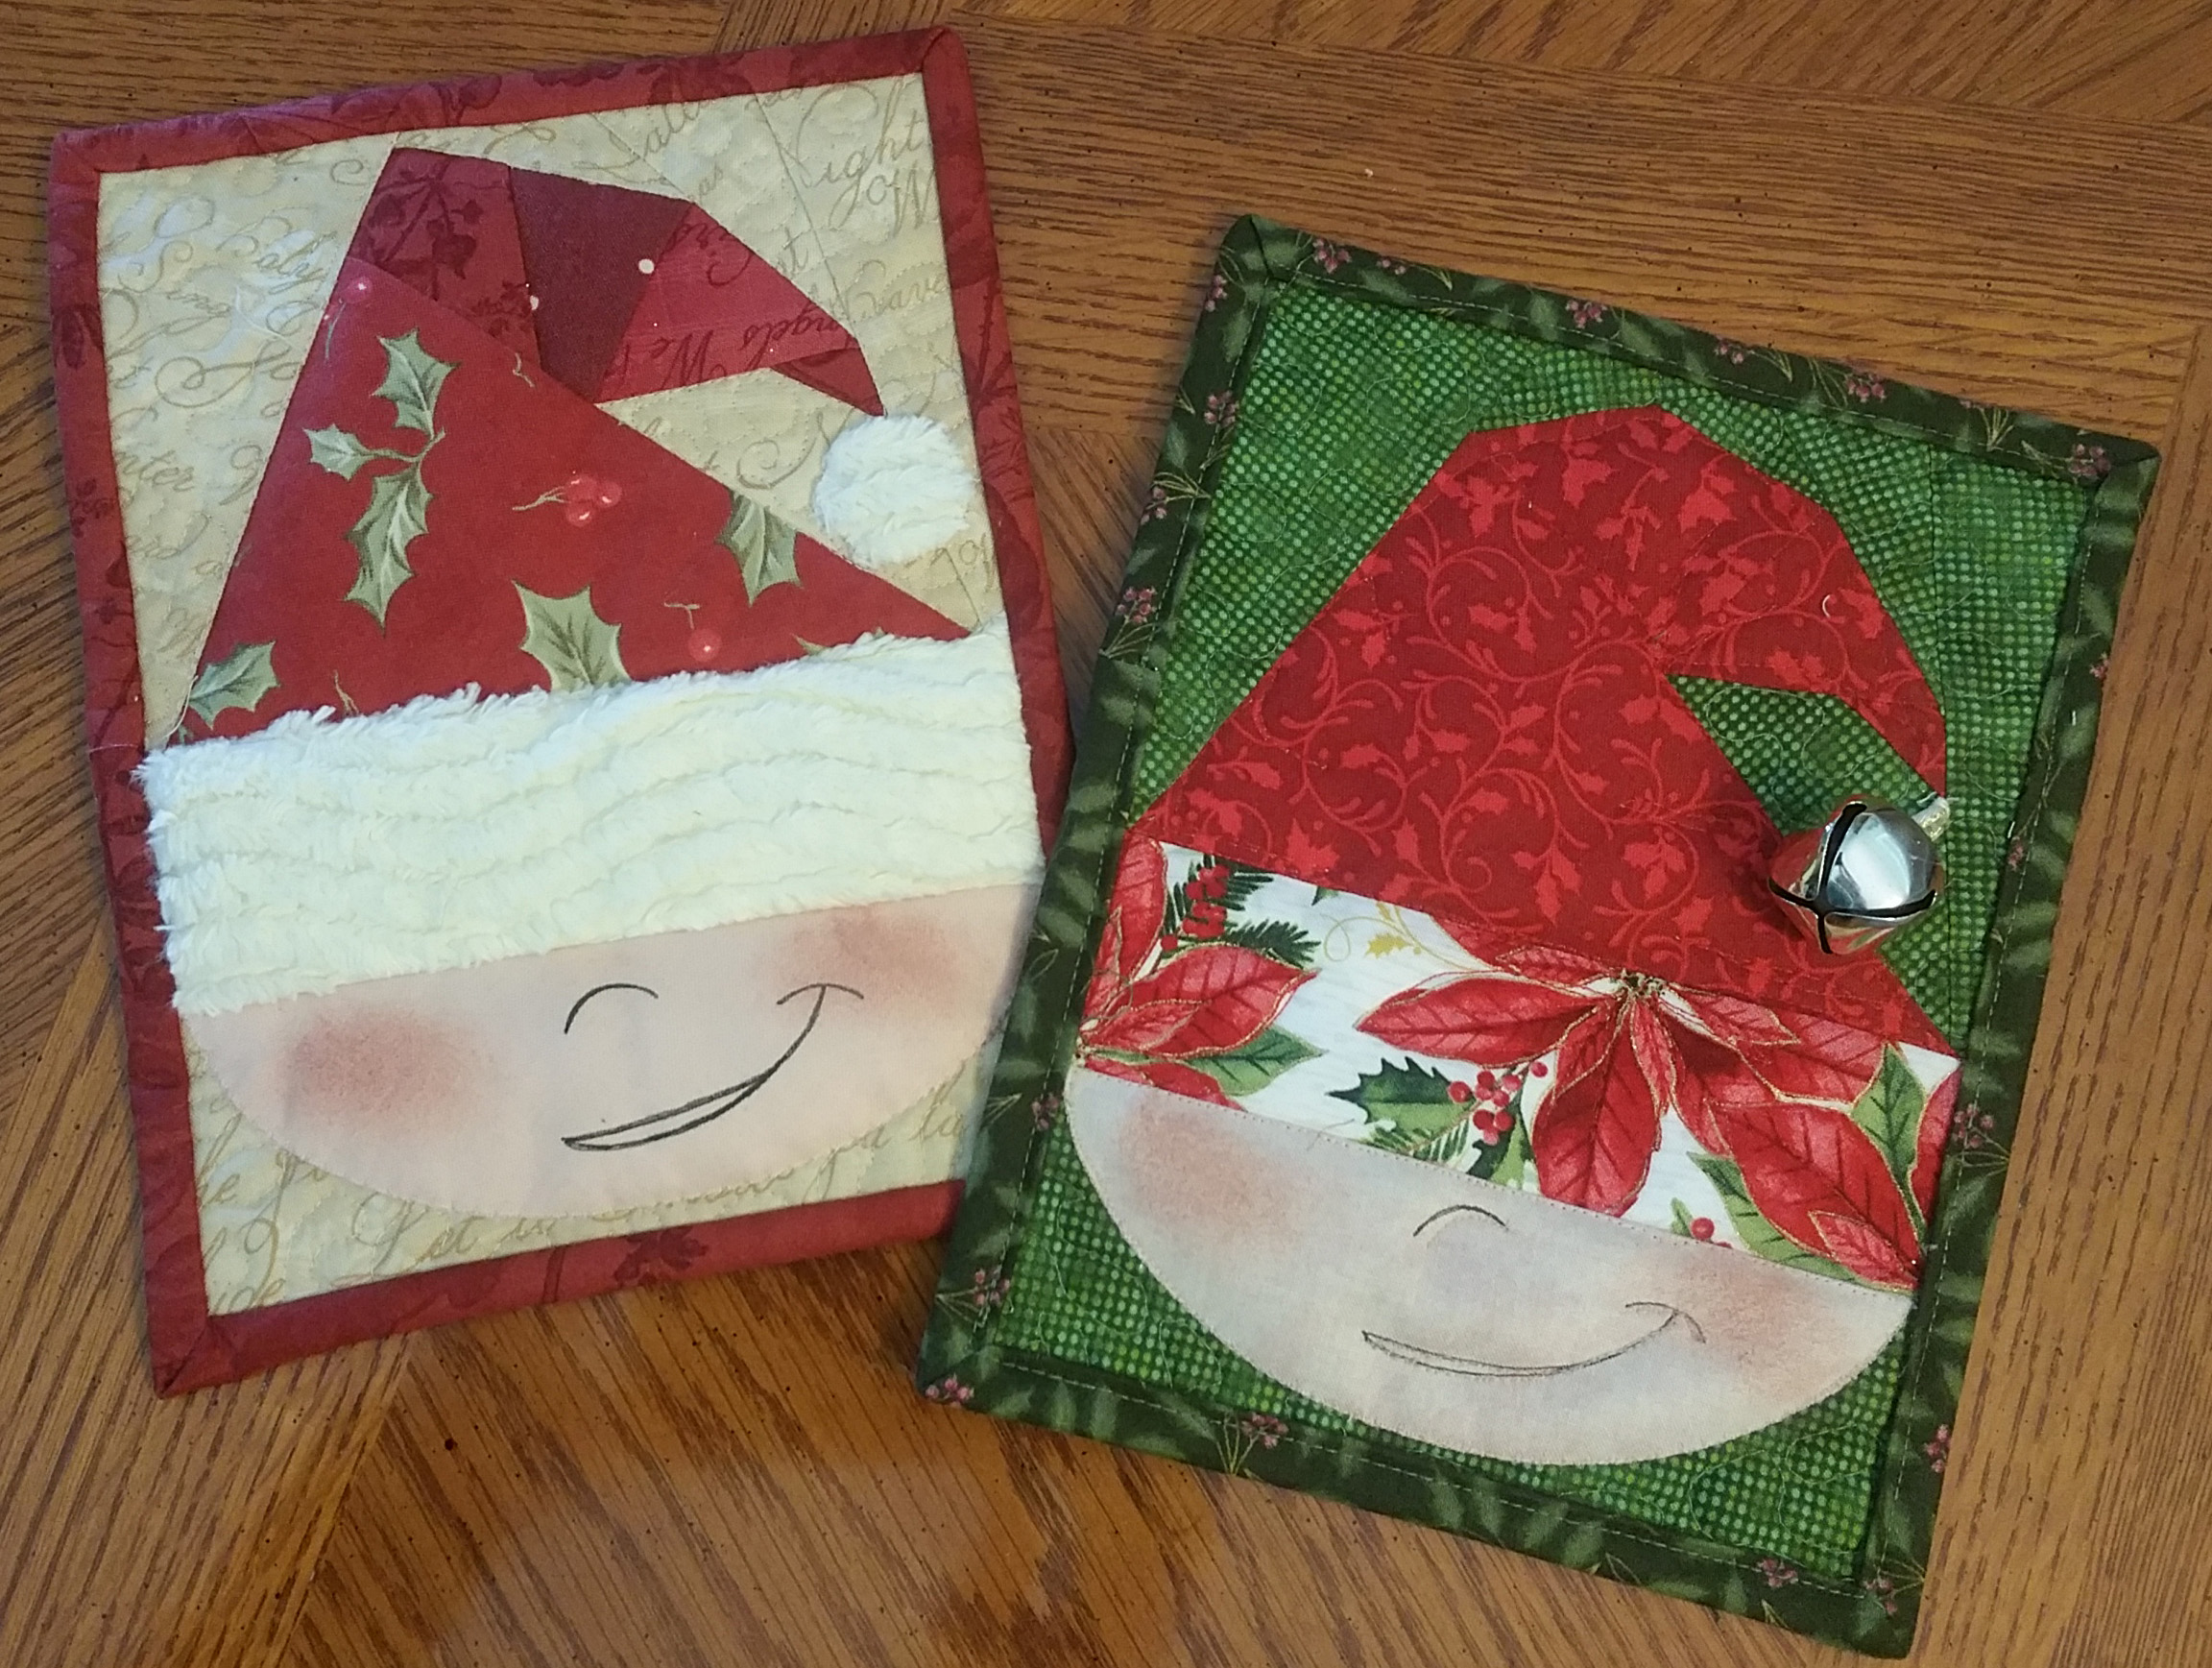
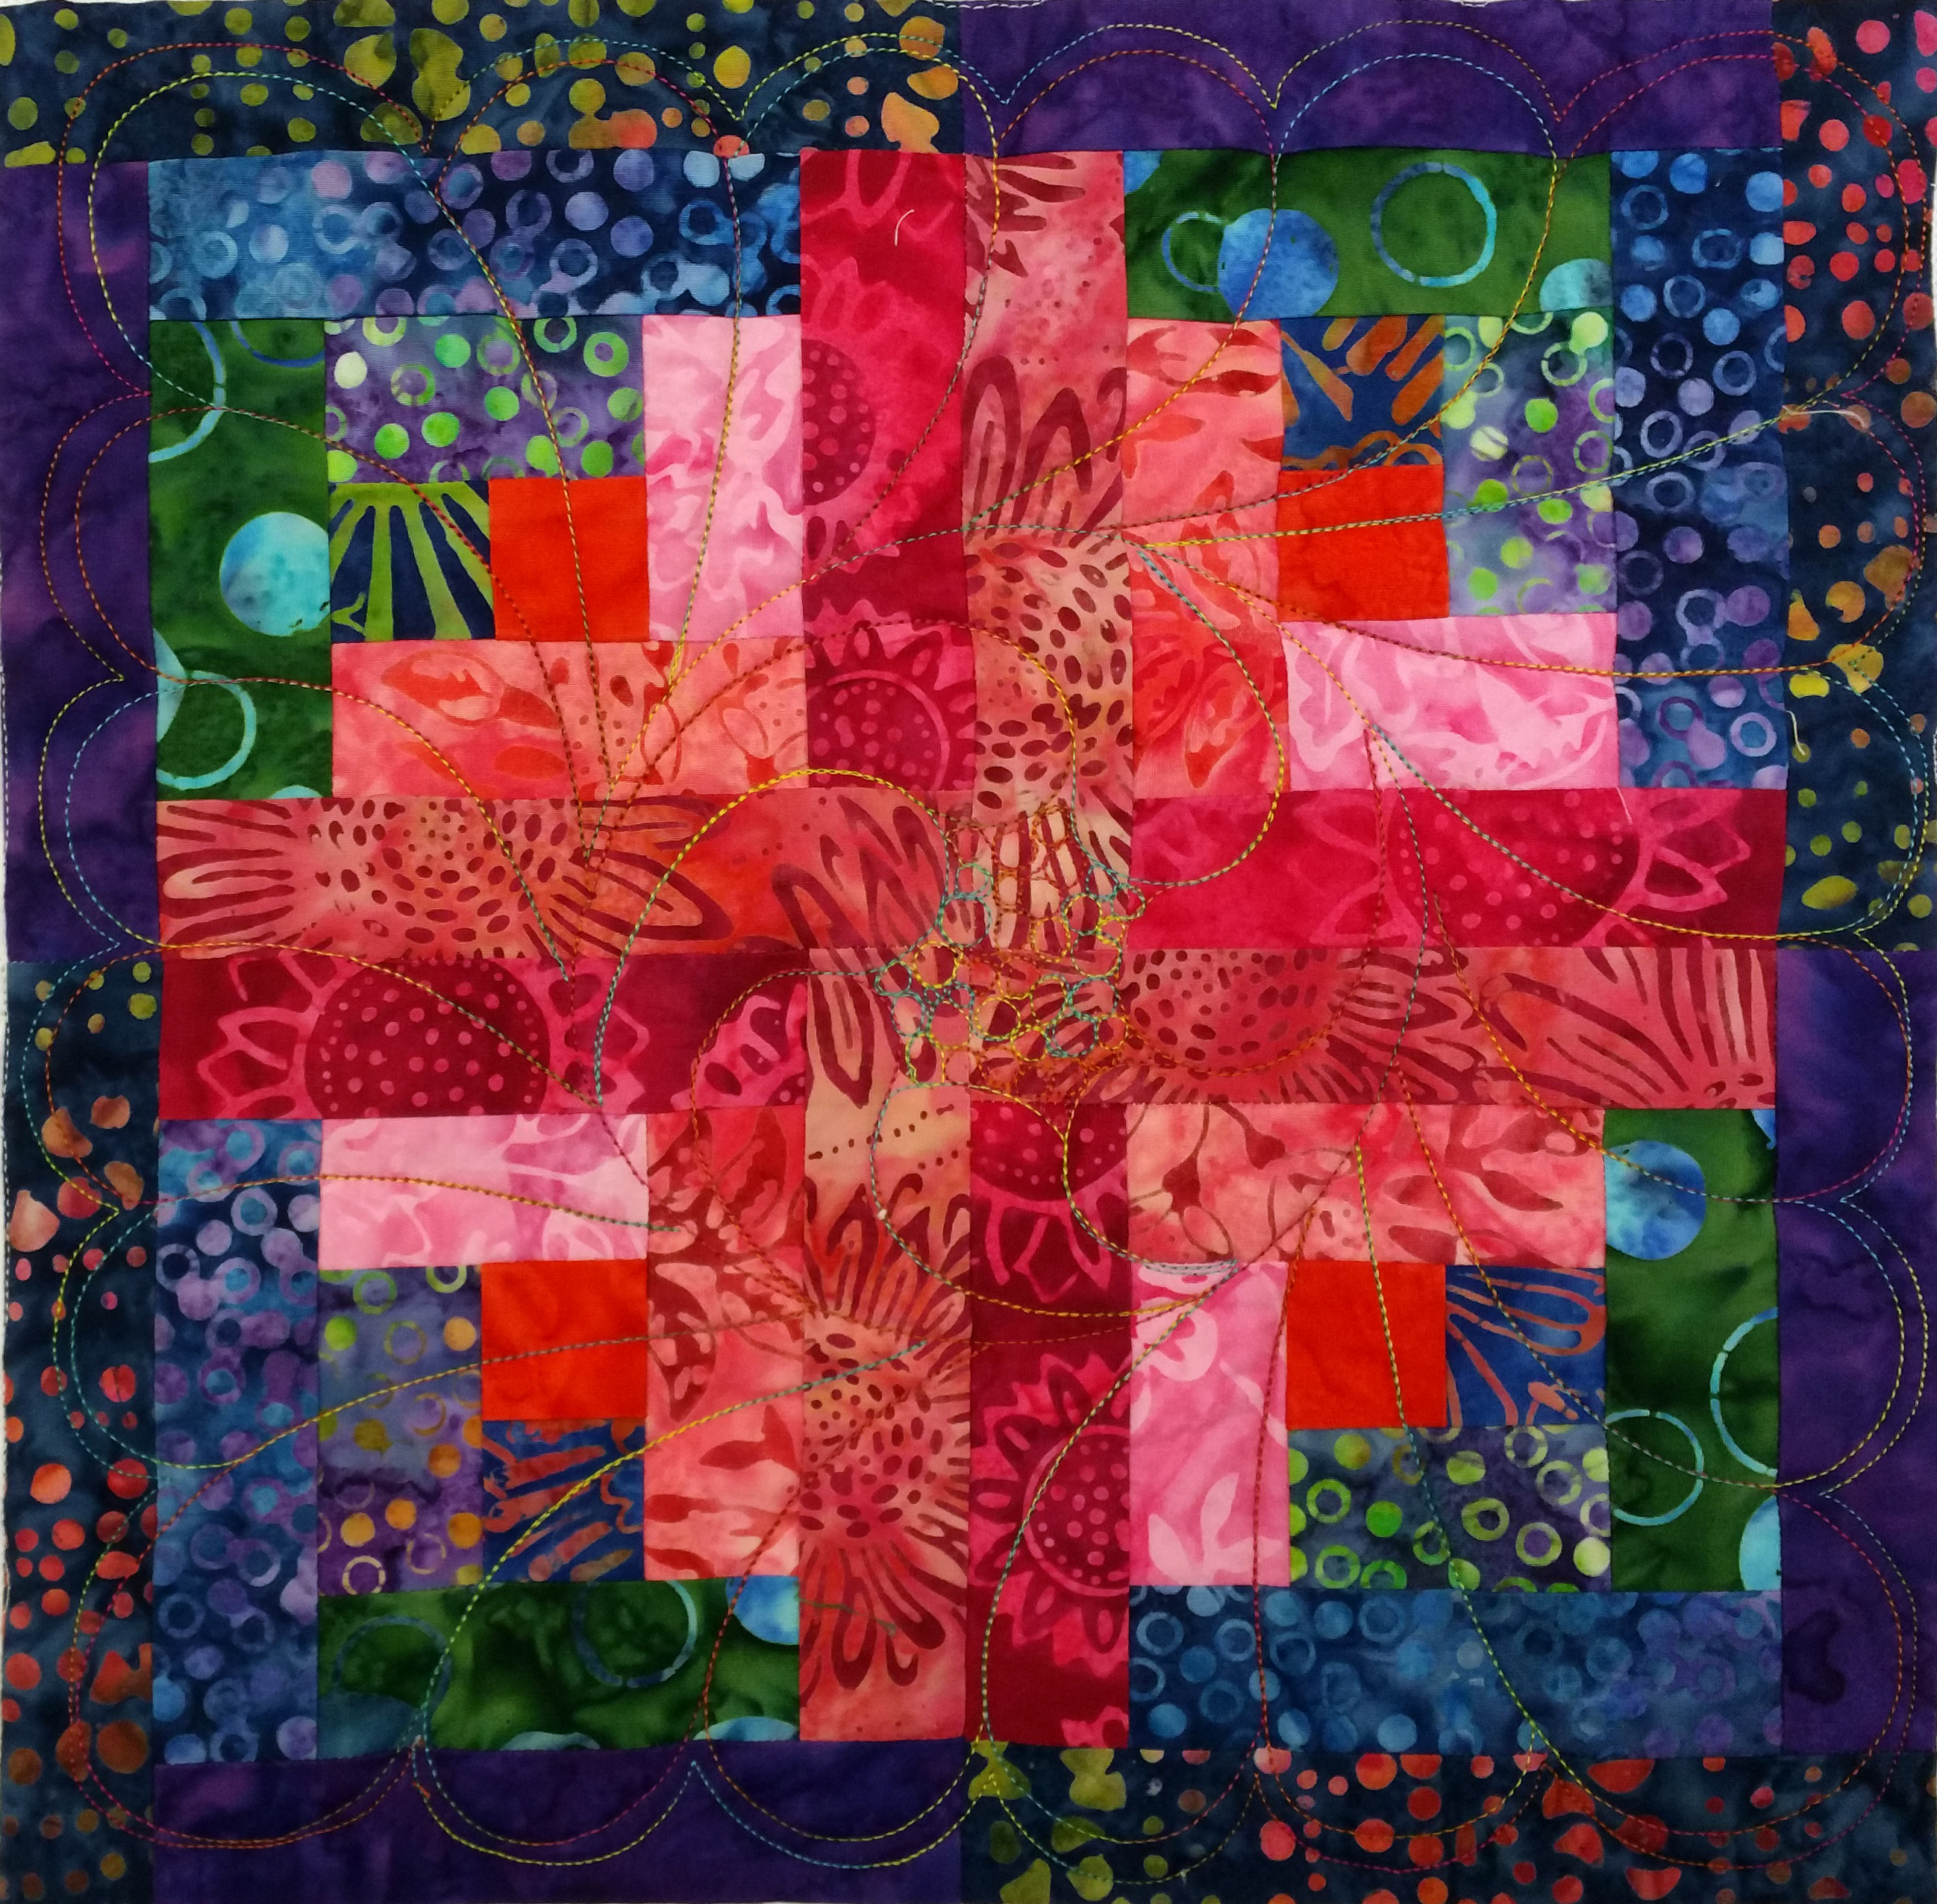
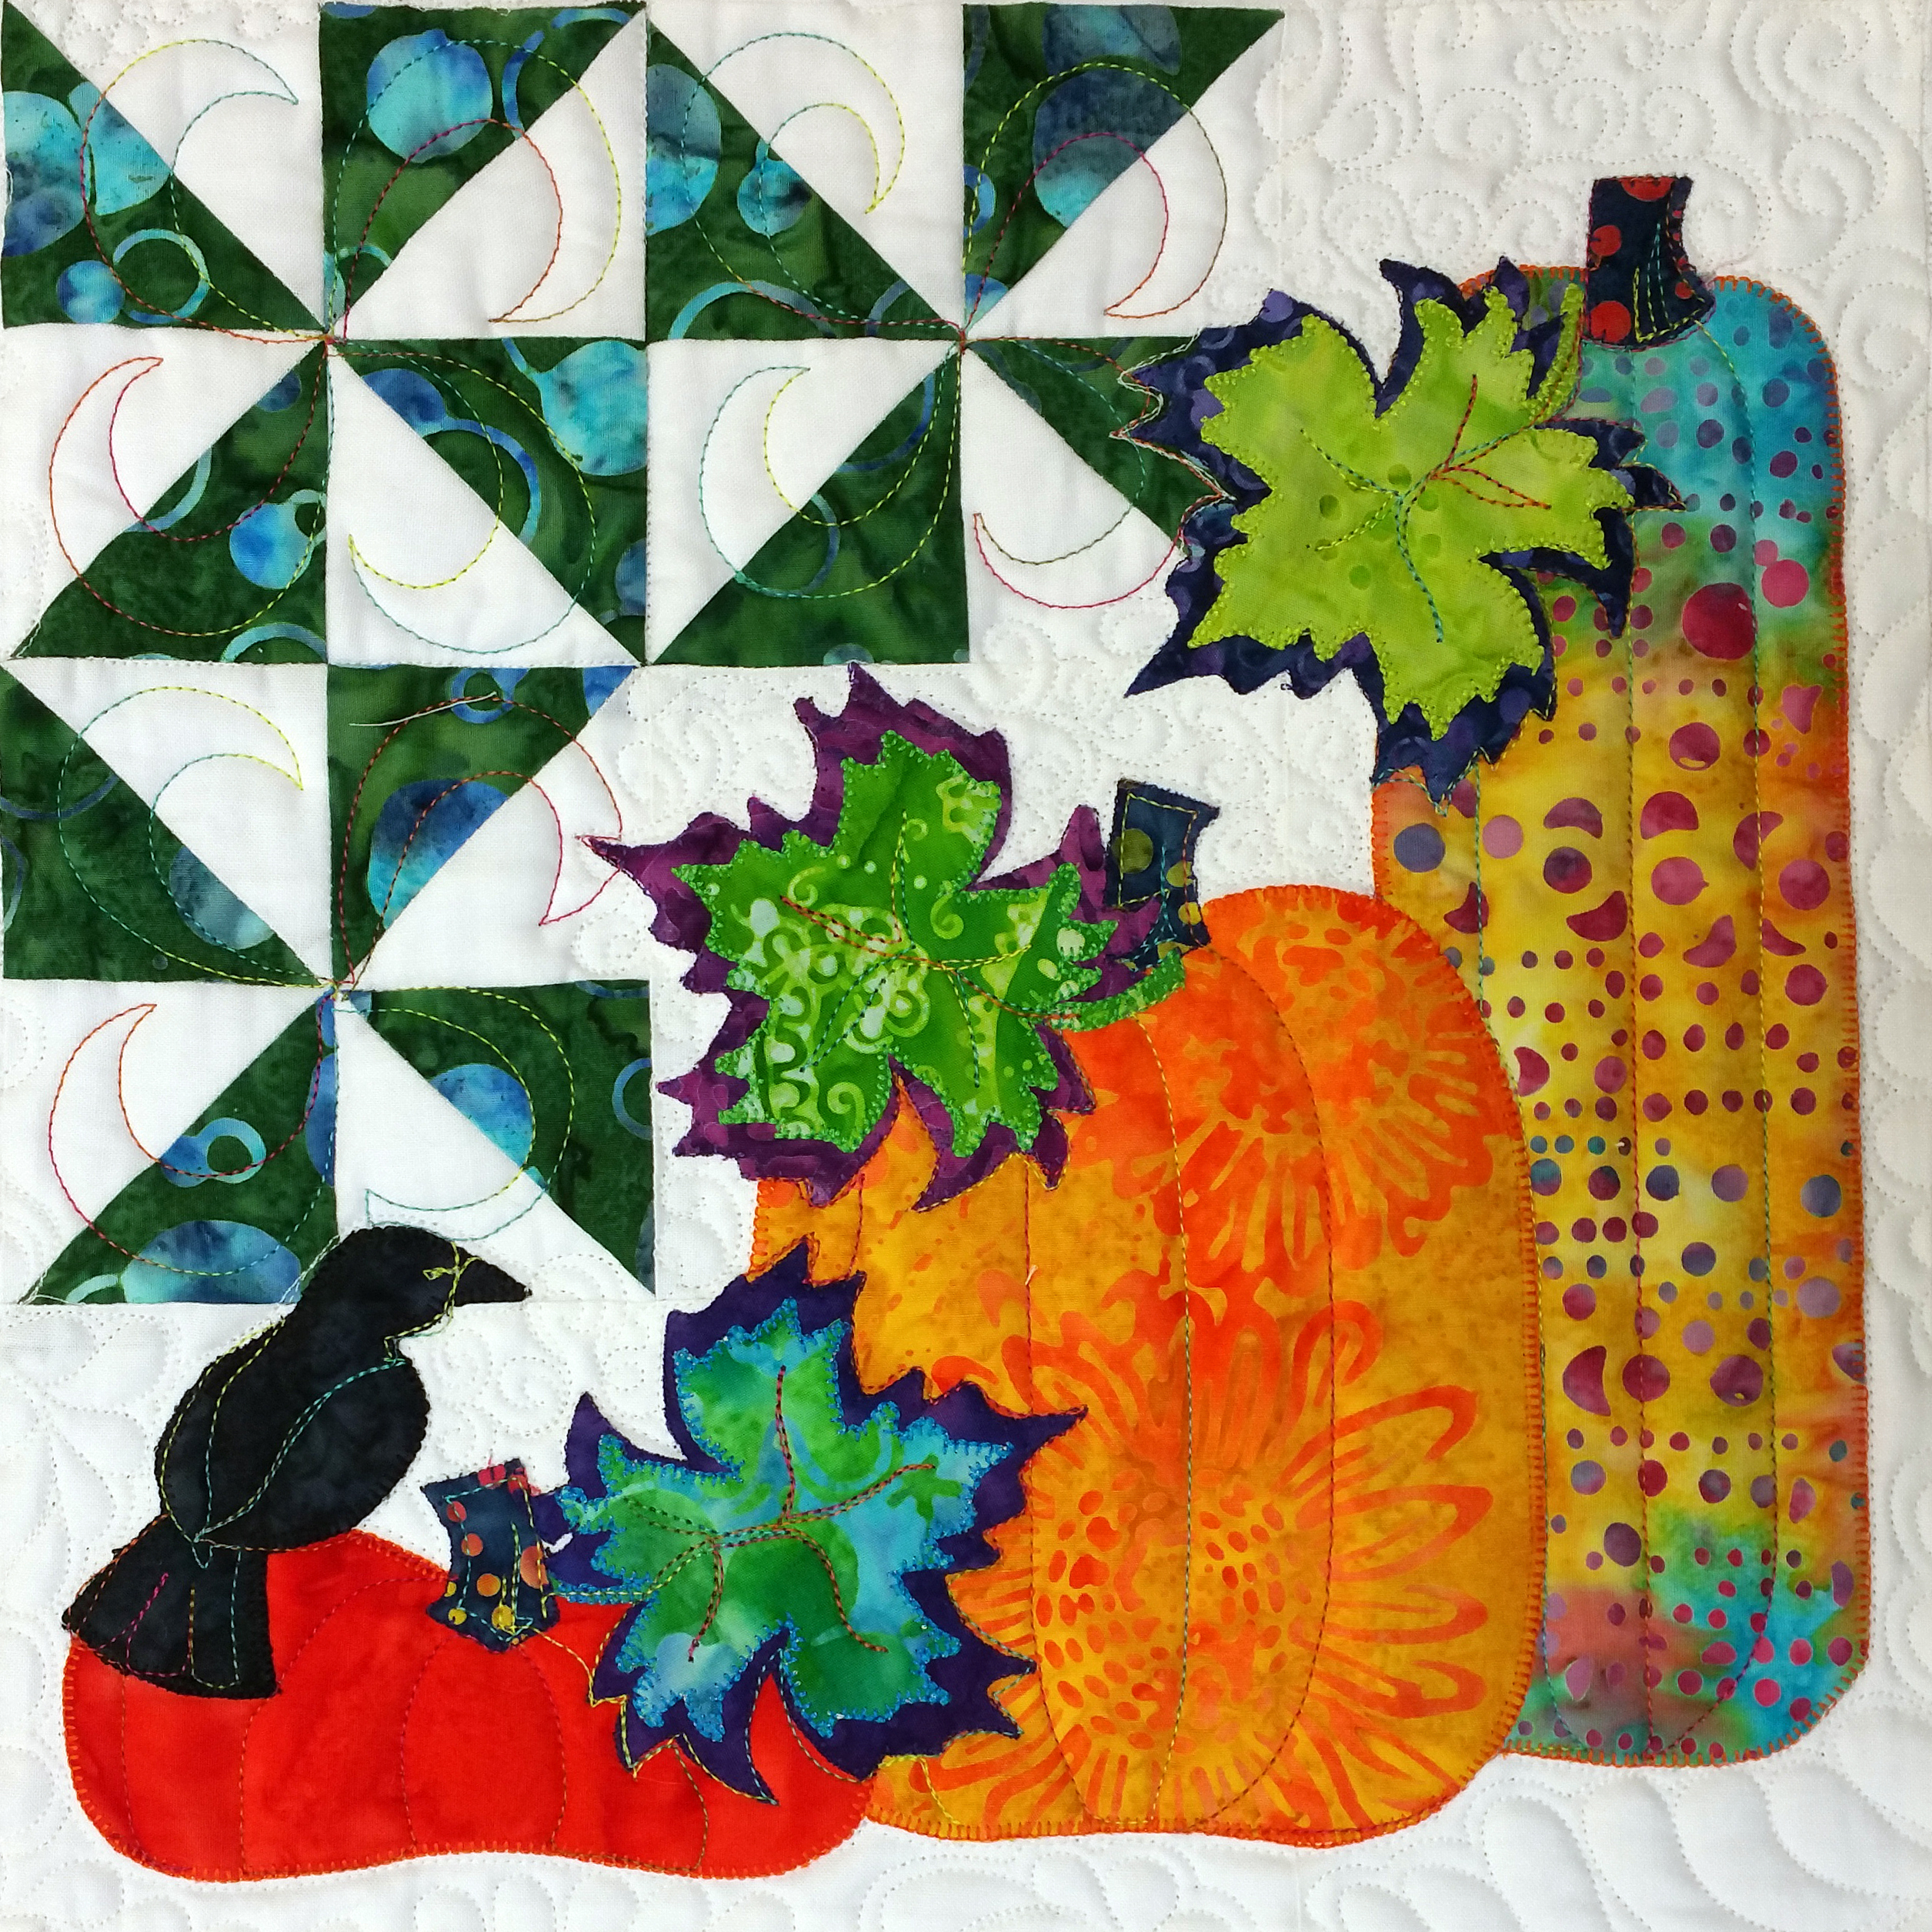
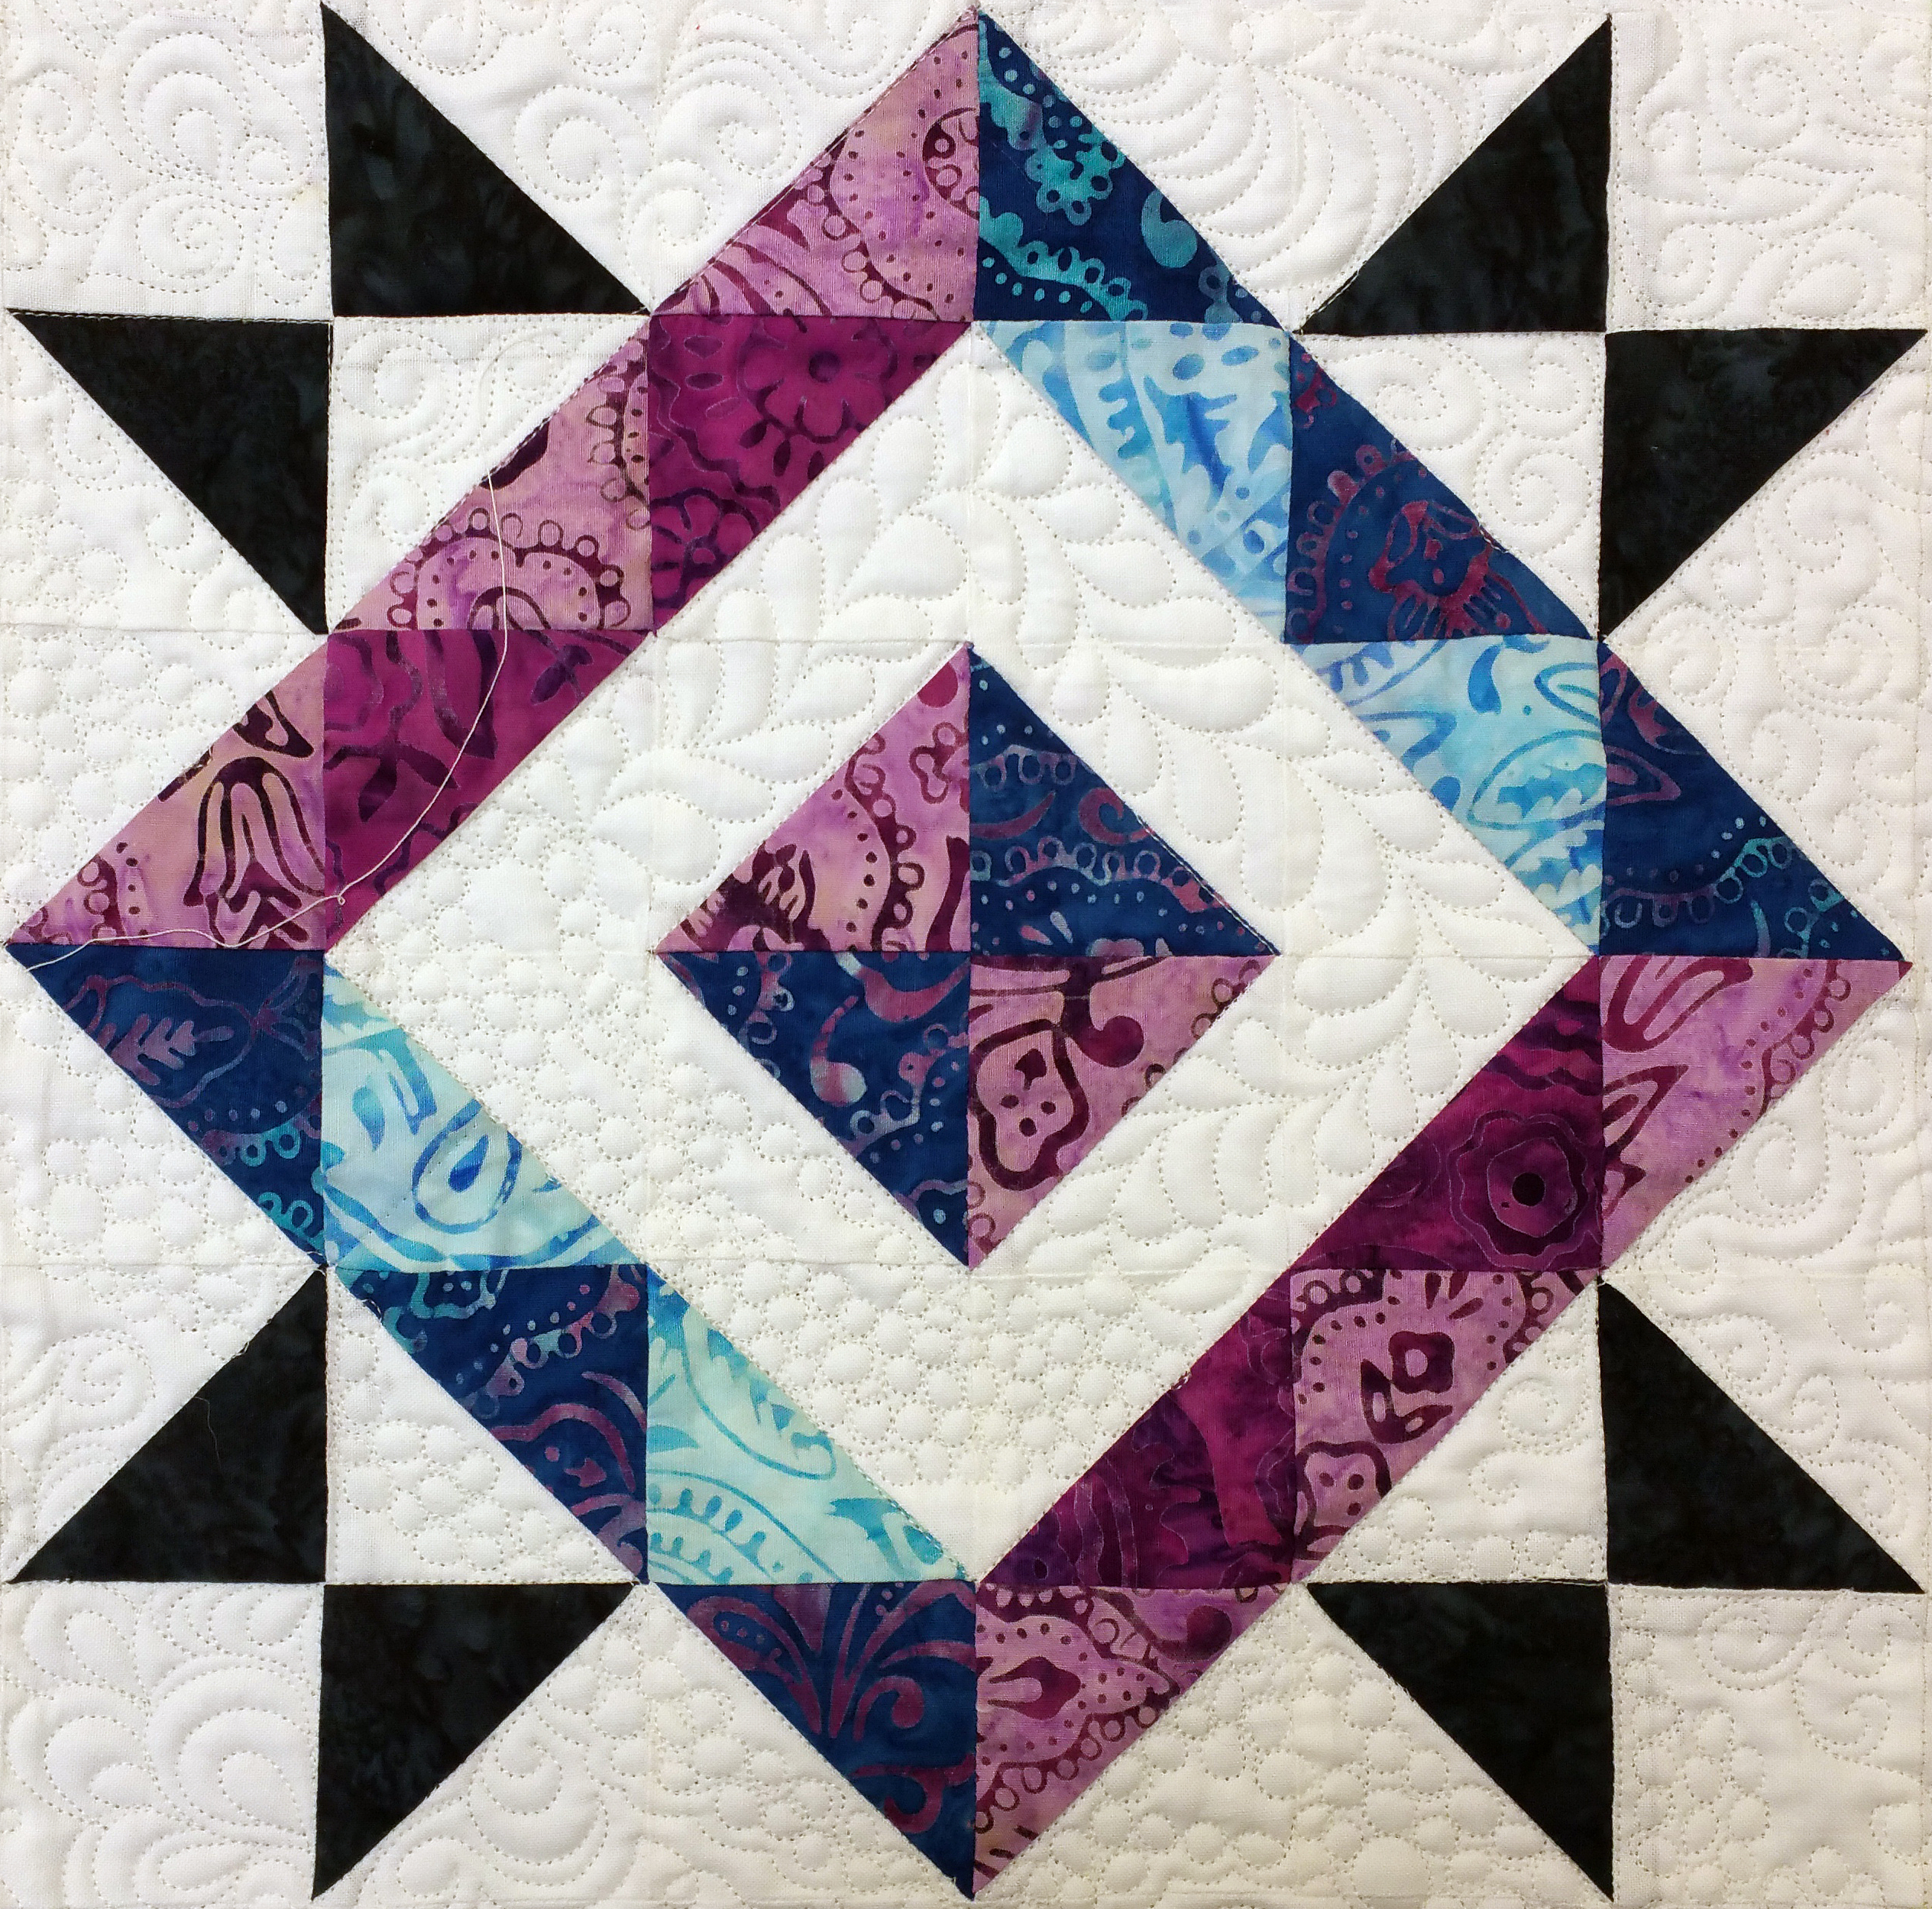
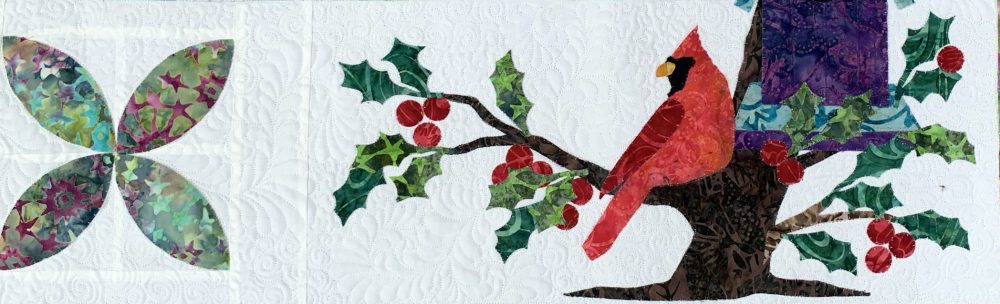
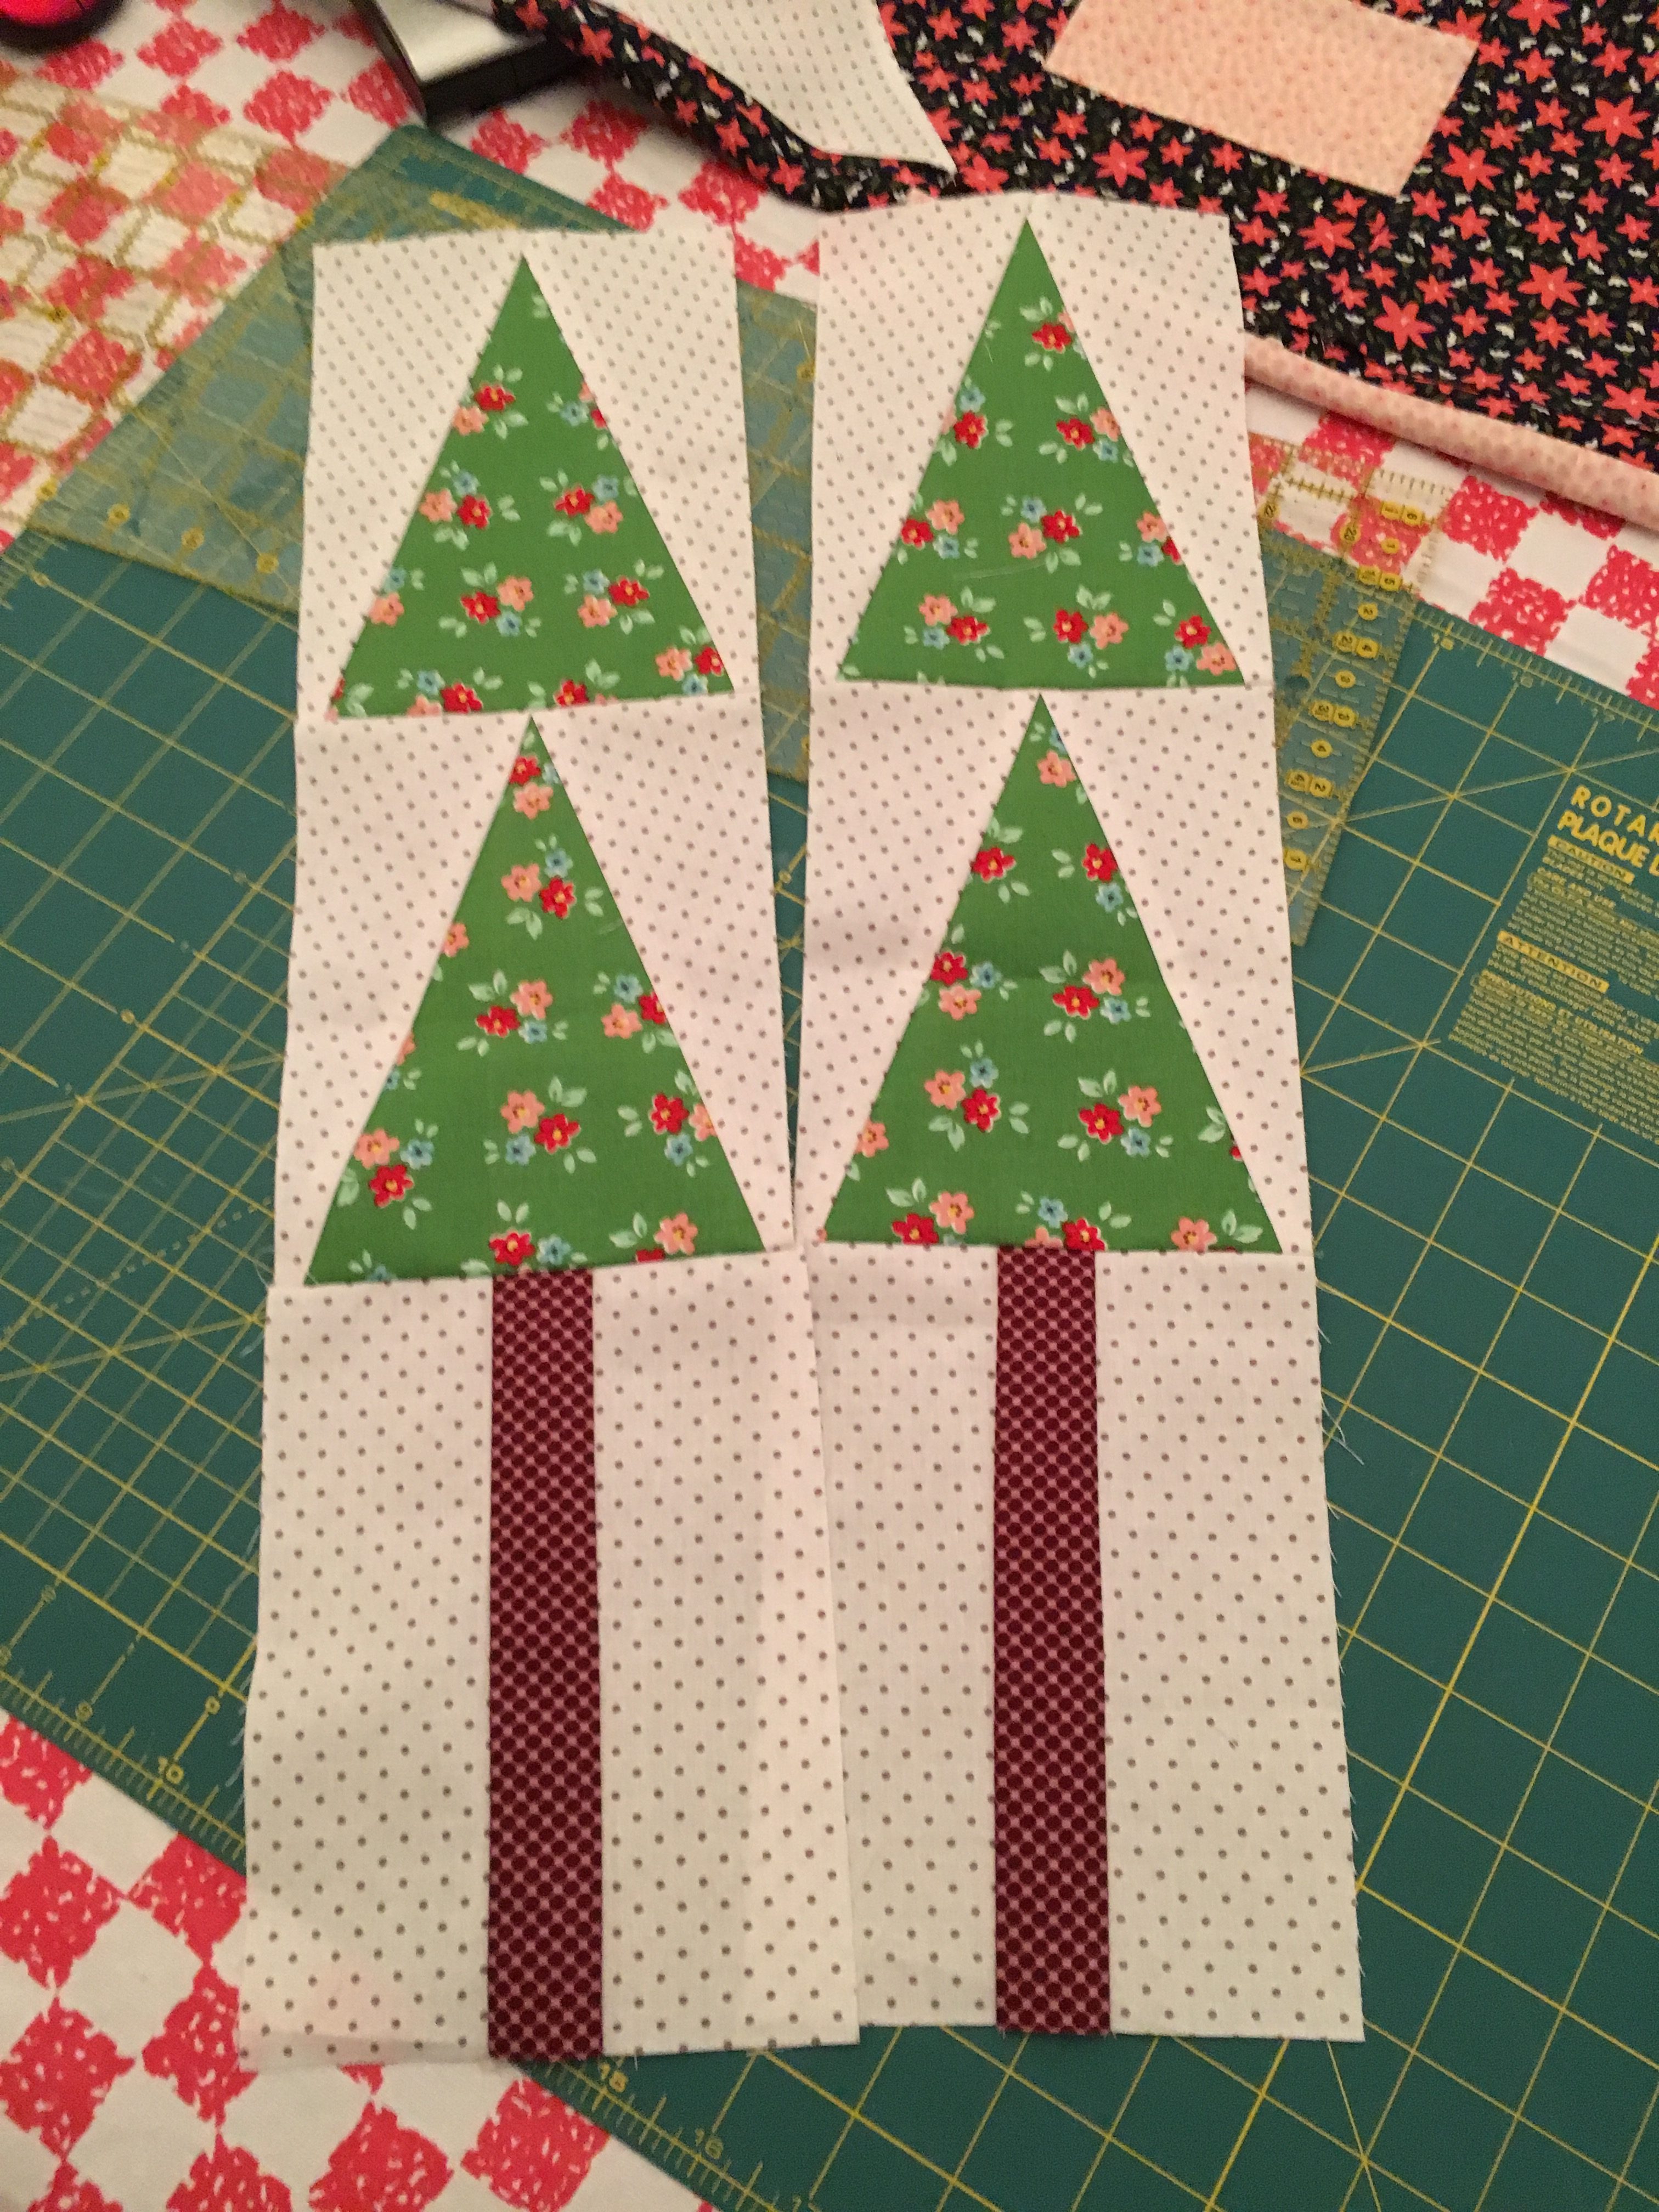
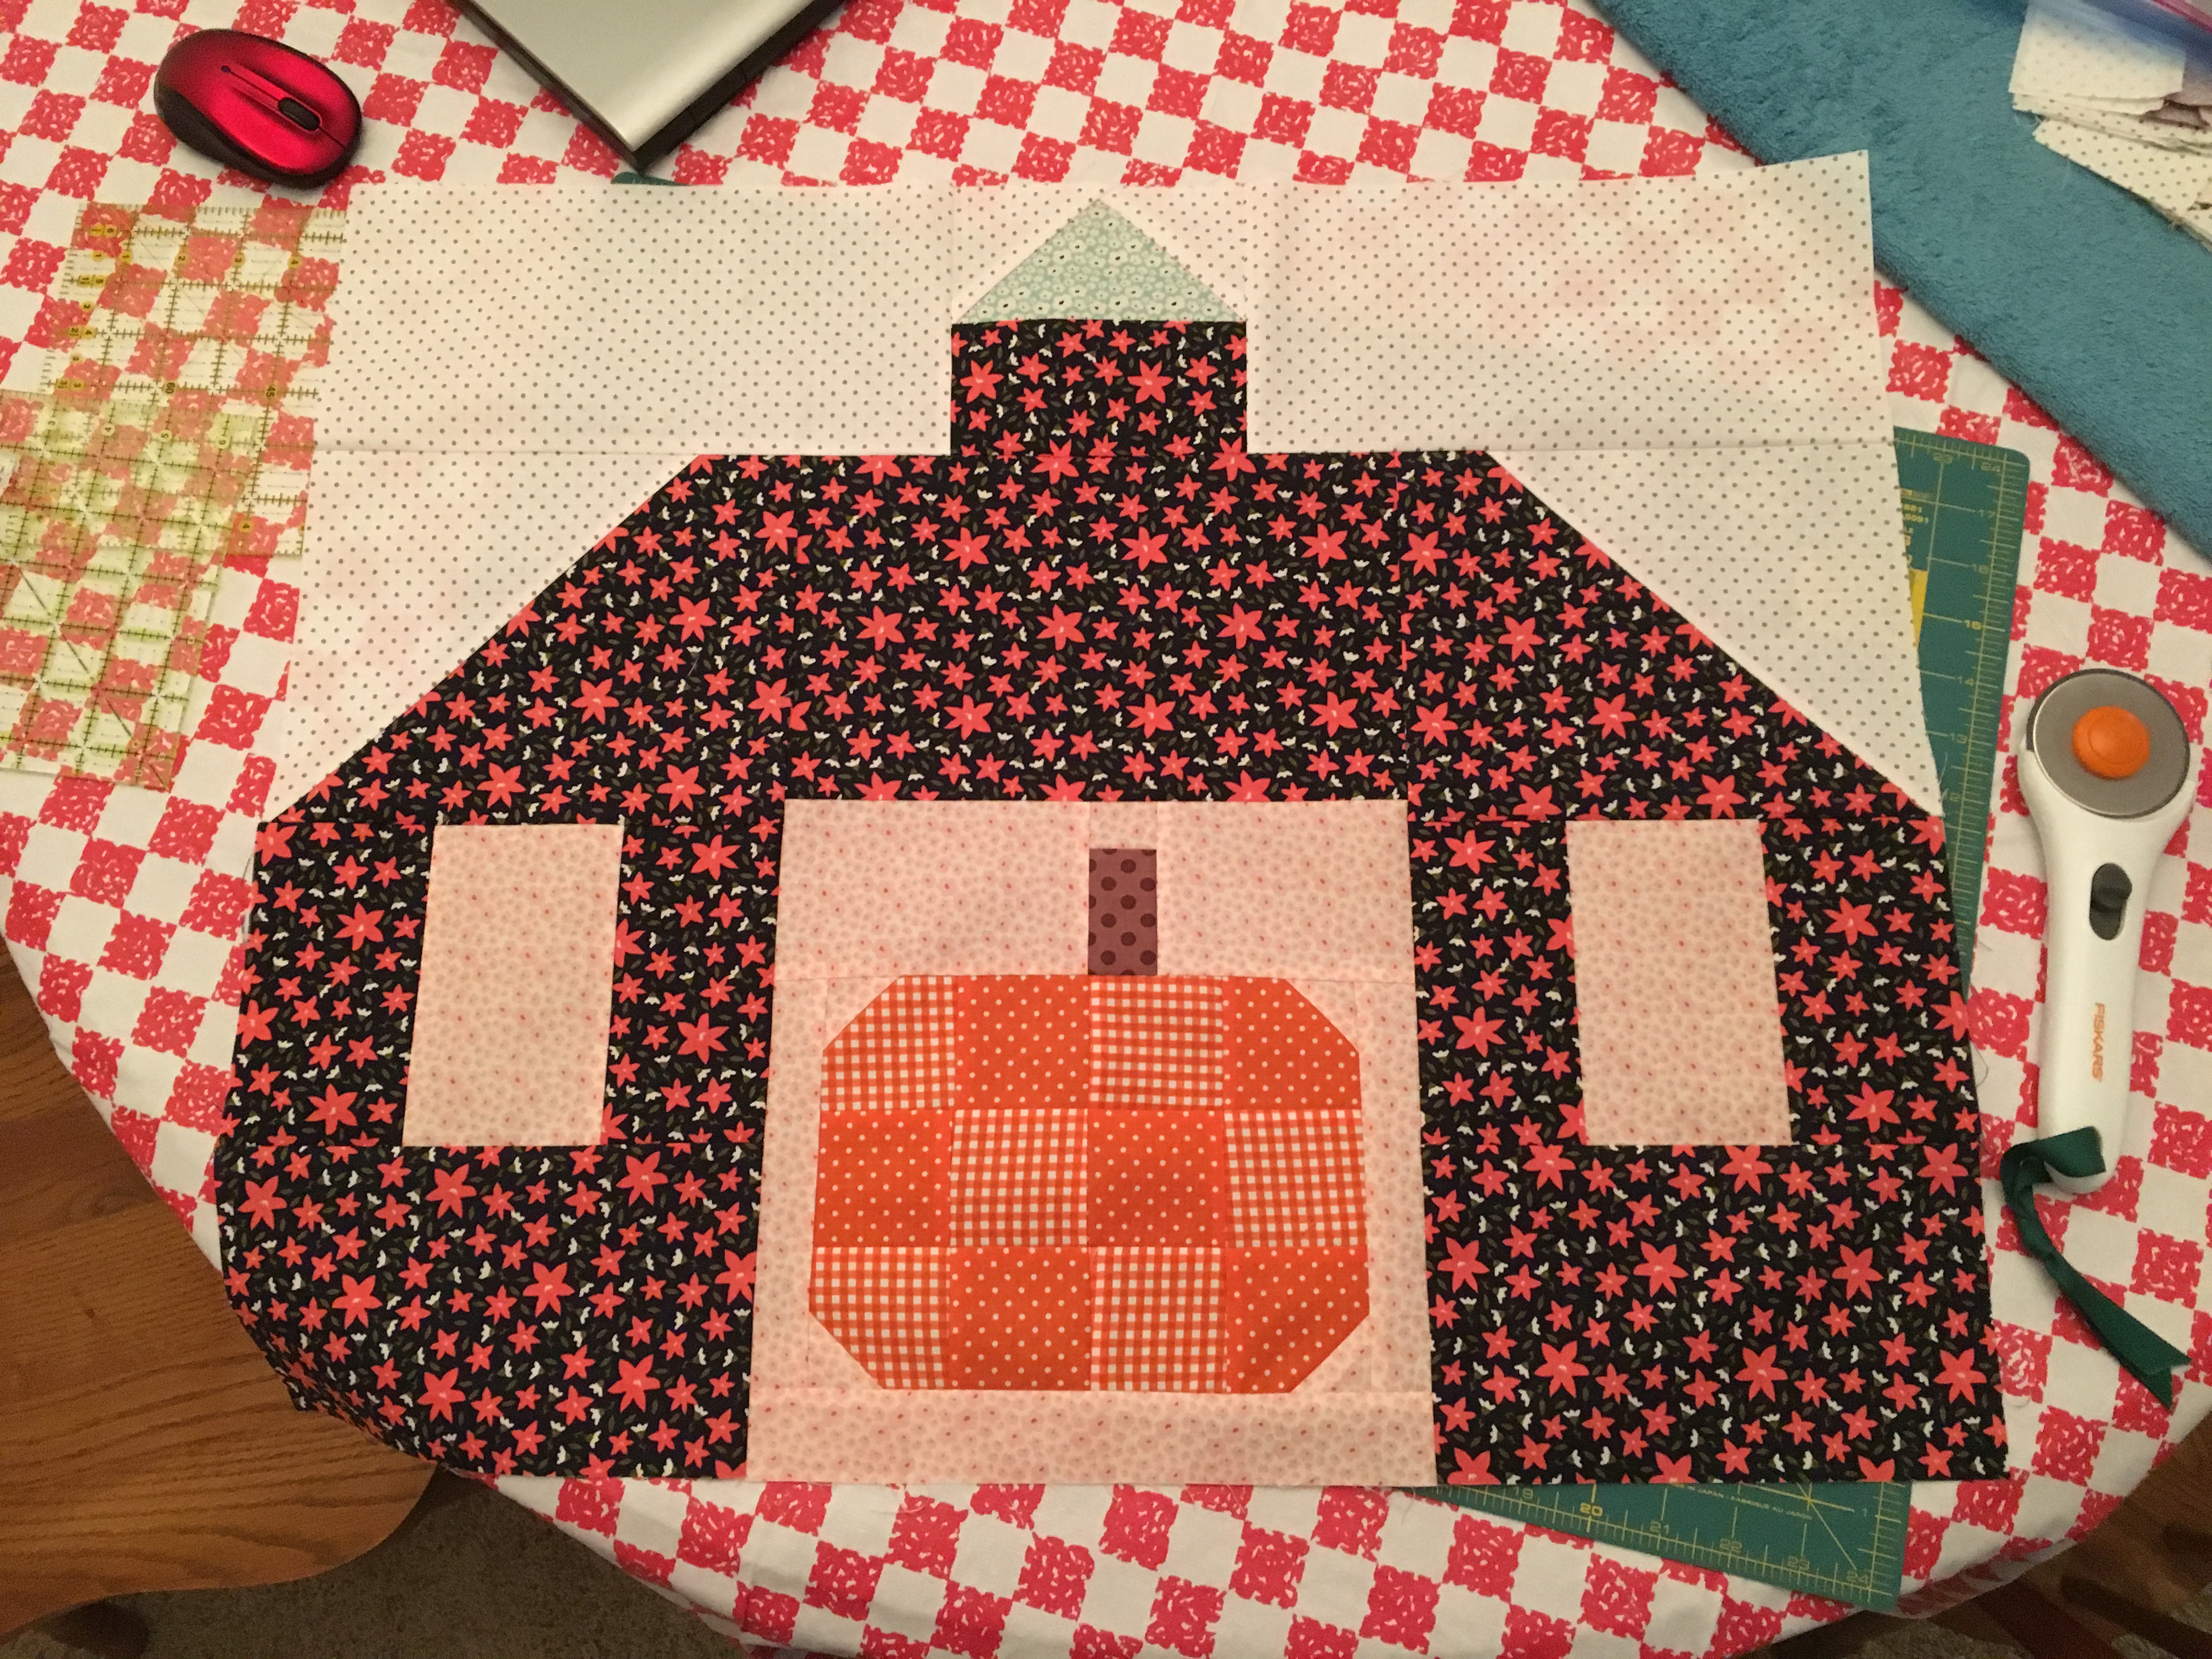
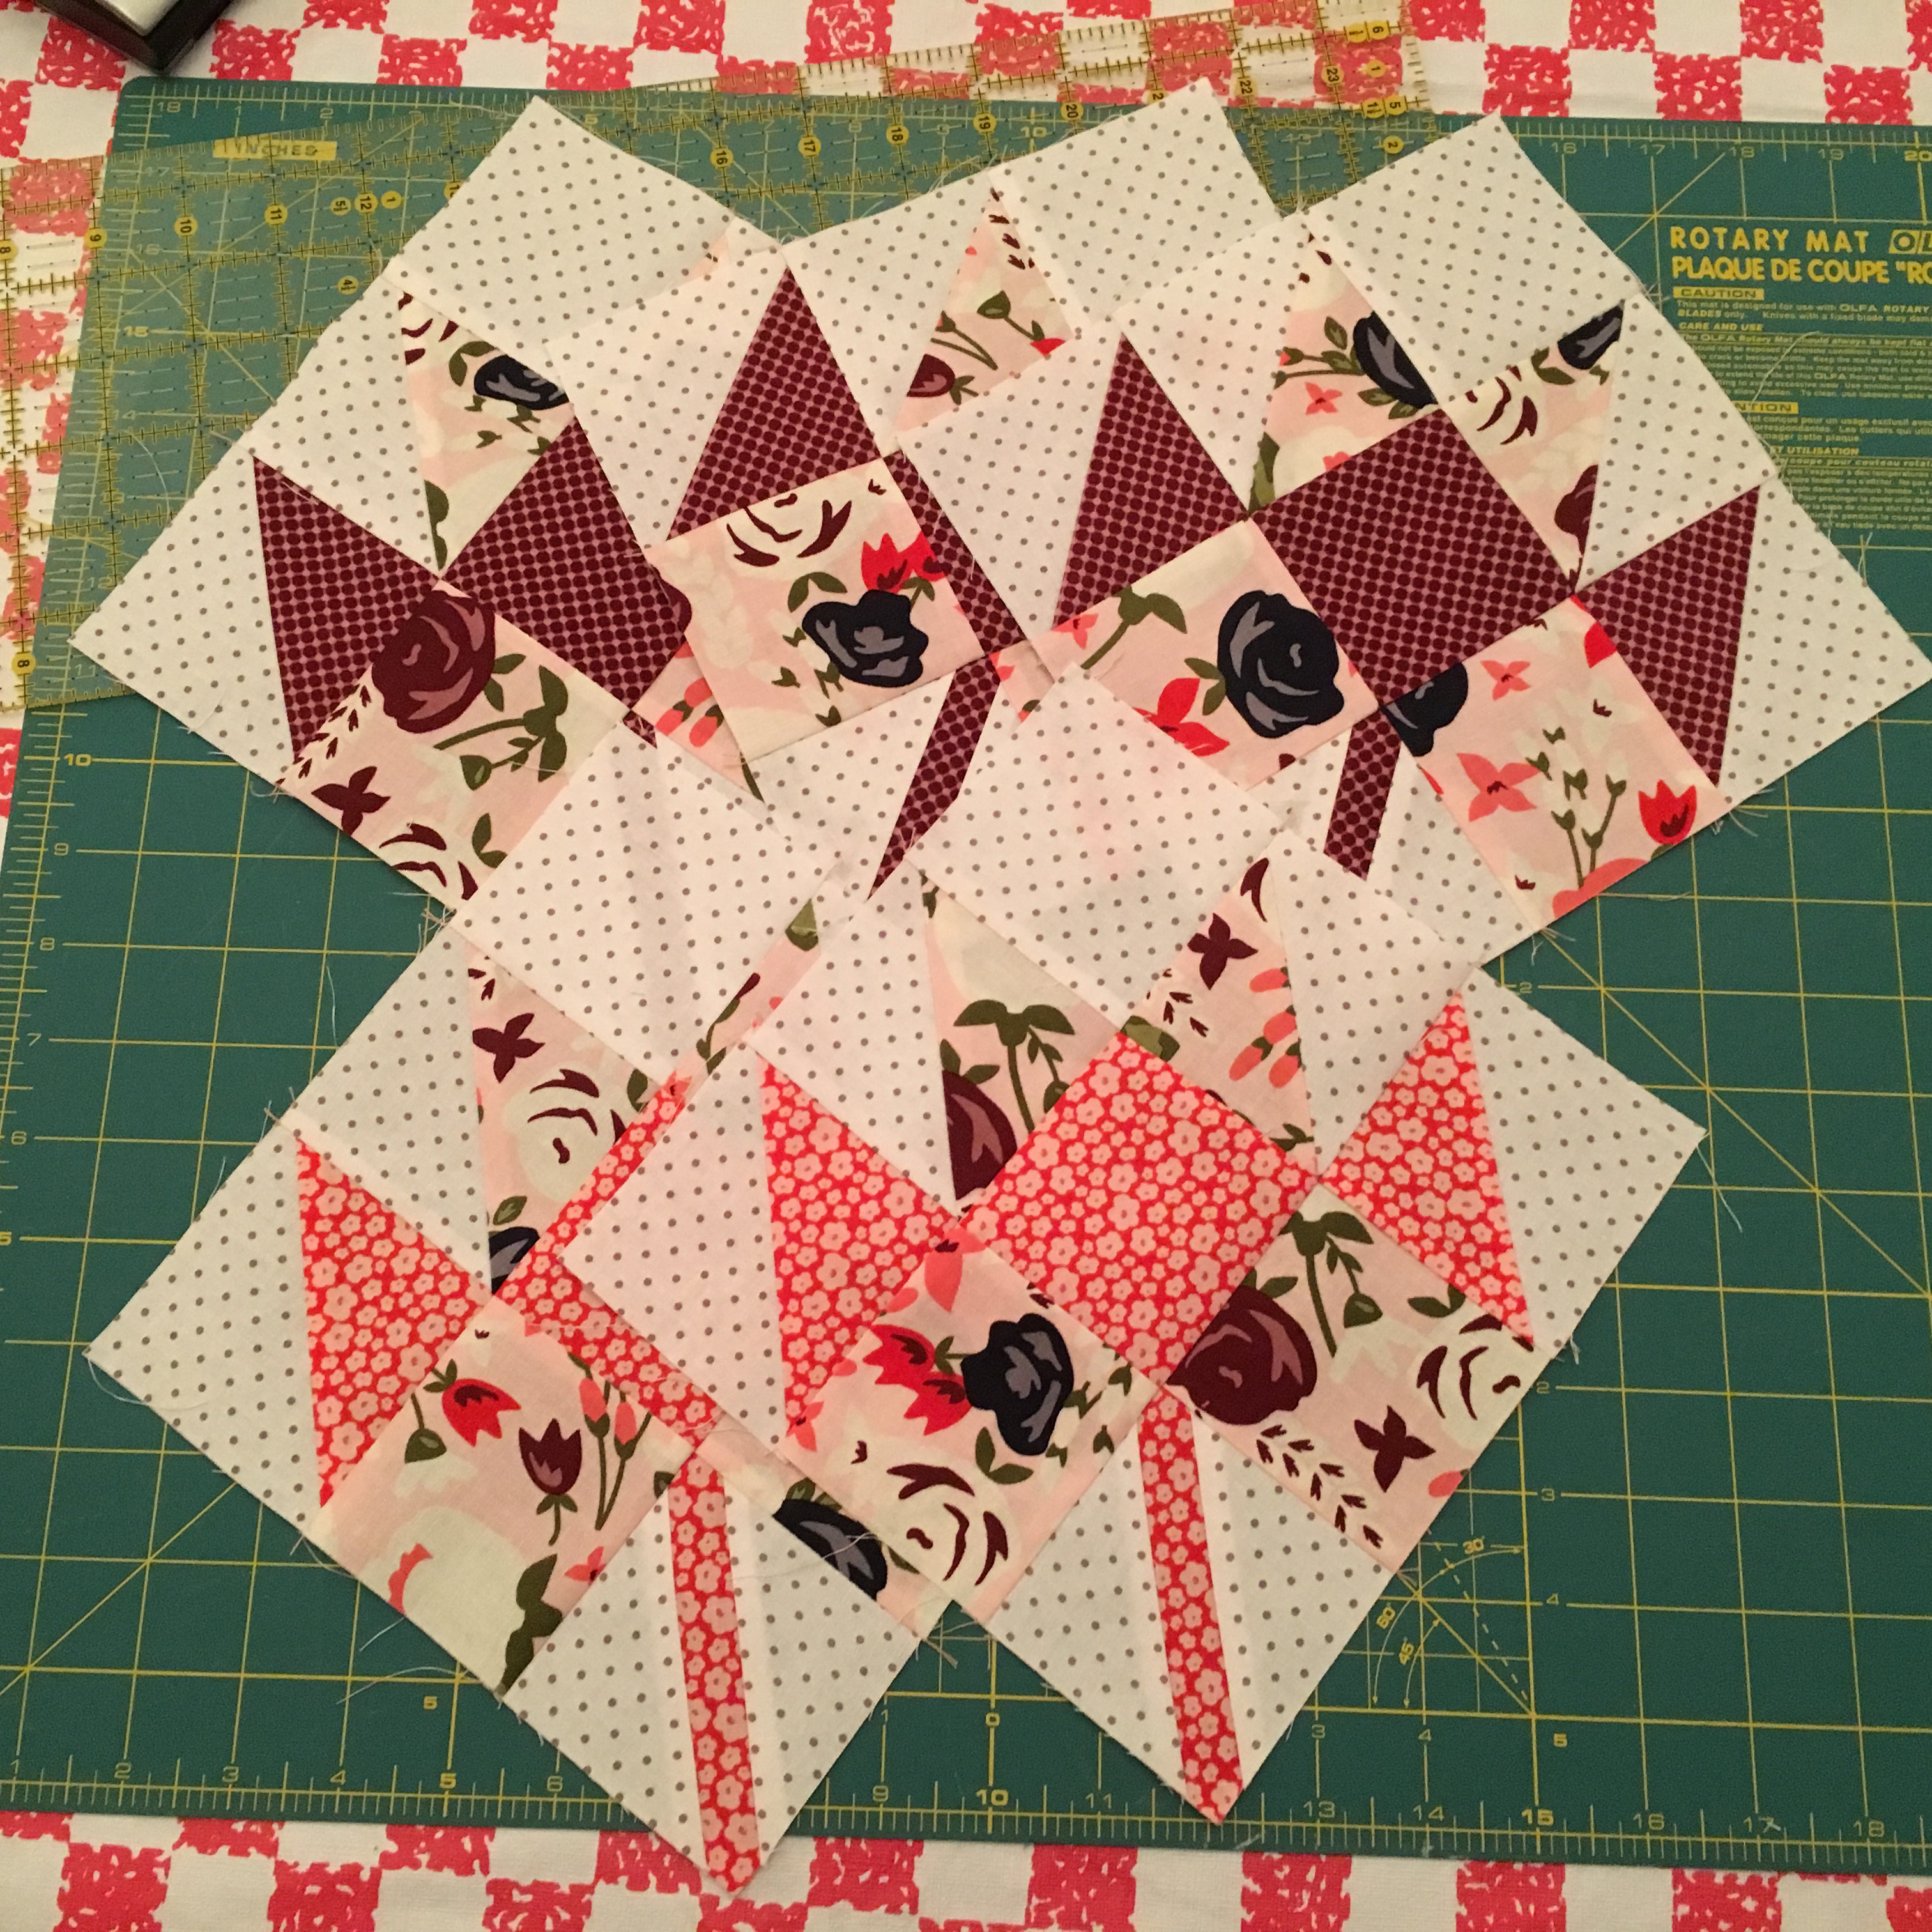
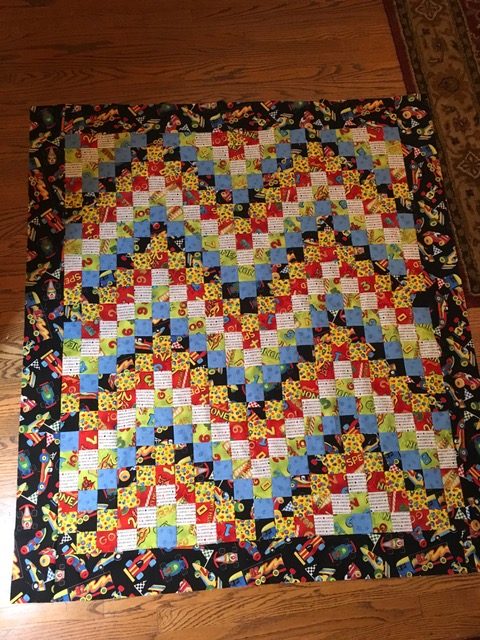
The first of the year APQ chose project #6 for us to work on for Jan. I’m already done. On my list, #6 was a basket of four unfinished runners. They needed quilting and binding. DONE. Now I’m down to 7 UFOs. What will I do for the rest of the month? Here are a few images of what the Material Girlfriends got done Jan 1. Judy’s blocks for a sampler, a baby quilt for Lora’s new nephew and my four runners. Katheline and Diana worked on their Bird Walk blocks.

img_4244 img_4243 img_4241image1 image3donerunners

So Lets add to our New Year Resolutions List to START a New Project Every Month.This way I’ll have 12 unfinished projects to do for 2018! Ha! But seriously… how about we try 12 new techniques? Learn 12 new quilting things? Try a new quilting gizmo or try a new fabric line? What block have you always admired but have yet to sew? How about a class? Or joining a guild? What about designing and sewing your very own quilt design?

You Sew Girl. Let’s make Quilting Adventures by trying new things that stretch our creativity and our skill sets. We can always do those UFOs next year!

Absewlutely,

Lisa


Holy Baby Jesus, It’s December

How did December creep up on me so fast? I haven’t even cleaned the Thanksgiving leftovers out of the frig yet. Sigh…

ChristmasMorning.Cover.8.5x11.websiteI just finished teaching this class, Christmas Morning Delight. It is one of my favorite patterns. Several years ago, I was doodling on my sermon notes during a December sermon and drew a Christmas tree dangling it’s star to delight the holy babe. Psalm 148 says “All heaven and earth will praise the Lord. Shining stars and all cedars will even praise Him.” Hmmm. Shining Stars, Cedar trees. Would it be hard to imagine a decorated Christmas tree bending in adoration to delight the babe with its star? I thought it fun to think so.

I kept my sketch and waited, waited, waited for the perfect Christmas fabric to make up this pattern. A few years went by and still no perfect fabric. Then Marcus Brothers Fabrics came out with a bright batik line called Radiant Stars. Why was I waiting for Christmas fabric? No more waiting. NONE of the fabrics used in this pattern are from a Christmas line. I used a 1/2 yard of gradient gray for behind the appliqué and Robert Kaufman’s Kona Charcoal for the star background. I sewed up Baby Jesus and wrote the pattern last December. In Between Stitches had kits, so you can always contact them if you’re interested in a kit. Christmas Morning Delight pattern can be purchased from In Between Stitches as well. (If you’re a quilt shop and would like to purchase wholesale, just contact me through my contact page.)

bonafide-cover-8-5x11-flatIntroducing…. drum roll pleases…. hot off the press, Bona Fide, the Material Girlfriend brand new, 6 month, Block of the Month pattern. We used Putty and Mortar fabric line from Marcus Brothers. We will be starting this program in January through In Between Stitches. Contact the shop if you’re interested in this BOM program, pattern or a kit.

bitesizepattern-vol2-final-1bitesizepattern-vol3-final-1abitesizevalentinebanner-finalWe’ve been busy because we’ve also just released Bite Size Vol. 2, Vol. 3, and a Valentine Banner patterns. Bite size is our 12″ block line. The blocks can be displayed in the little wire stands or wire wall racks. They’re the perfect size for some “fabric therapy” when you’re tired of your big project or just need a little project to try a new technique, practice your machine quilting, or a quick gift for a friend or loved one.

charmpackmaniac-coverBut wait, there is more. Really? Yep, just one more. Charm Pack Maniac is a fun and quick quilt pattern that is a perfect size for baby, toddler, or a lap quilt. It just takes one charm pack and some fabric for star points and background. So so easy. Just a snow ball block. It makes a delightful “I spy” quilt for little ones too.

Whew! I think that’s it. I’m adding more to the Bird Walk program page today, as well as updating my new and upcoming class schedule for next quarter (January-April 2017), and adding all these new patterns to my pattern page. So much for getting any Christmas shopping done today!

Sew on, sew forth, my quilting friend,

Lisa

Speling is Hord

Once upon a time, my oldest son was beginning 2nd grade. The teacher was having all her students fill out a questionaire on the student’s perceived strengths and weaknesses. When Matthew reached a page entitled, “What is your most difficult subject?” he wrote three words, ‘Speling is hord.”

I really enjoy different quilting techniques. I love trying new things, new rulers, new tools. In my block of the month patterns, I like including more than one quilting technique. Usually it is piecing and appliqué but many times I will include a couple blocks of paper piecing or foundation piecing. I think I heard a collective groan. I really enjoy paper piecing. It is so precise! My squares come out perfect. But I understand that “Speling is hord” for many and so is paper piecing. It has to do with left brain vs. right brain, I’m sure.

I have a tutorial I did on paper piecing (remember videos add 10 years and 25lbs to the actress) and I’ve linked it here for you. But if you have a hard time wrapping your brain around my technique, there are lots of different ways to do paper piecing. Search Youtube for different tutorials. Google paper piecing or foundation piecing to find different blogs. Someone, somewhere, has a method that will click for you. Don’t give up! Practice with some scrap fabrics first. Here is a practice project for you if you want to follow along with the video tutorial. ChristmasElfMugRugPattern

Now, if you didn’t catch all that and don’t want to sit through the chipmunks music again, here are a few easy steps.

  1. Copy your pattern onto some foundation paper. You can use printer paper but Carol Doak’s foundation paper is so much easier to remove. You can also use Alex Anderson’s foundation paper and leave it in. It will dissolve after it is washed. Trim away the bottom portion of the pattern. You only need to paper-piece the hat.
  2. Trace the lines and numbers on the back of the paper. This is to assist you in positioning your fabric.
  3. Pre-cut your fabrics. I estimate an inch or more bigger than the space it will cover.
  4. Start with number one. On the back side of the paper where you drew the lines, pin right side up the fabric piece so it covers the entire area by at least a quarter inch on all sides.
  5. Position the fabric for number 2 right sides facing together on top of the fabric for position 1. Check the position. Imagine if you sewed on the line between 1 and 2 to make the seam, then as fabric 2 is opened, it should cover the entire area of spot 2 plus a quarter inch beyond. Pin to hold it in place, flip it over and stitch the line between 1 and 2 with a small stitch. I use 1.8 on my machine’s settings.
  6. Finger press the seam open. Does the fabric generously cover position 2? No, seam rip and try again. Yes? Trim the seam to 1/4″ using a postcard to fold the paper over and an Add-A-Quarter ruler.
  7. Before adding fabric for position 3, it is easier to pre-trim the seam allowance on the line between two and three before adding the next fabric. From the front, align the post card on the line between 2 and 3. Fold the paper back over the postcard. Butt the Add-A-Quarter ruler along the card edge and trim the quarter inch. Now you can easily align the fabric for position 3.
  8. Continue in the same manner until you’ve covered all the pieces. Trim on the outside solid line and tear away the foundation paper.
  9. Cut a background rectangle 2 1/2″ x 6 1/2″. Trace the face onto the paper side of double-sided light fusible web. Follow your products directions. Stick to the wrong side of your fabric and trim out on the line. Trace the nose and mouth and then stick to the right side of the 2 1/2″ x 6 1/2″ rectangle aligning the face at the top edge of the rectangle. Heat set in place. I did a blanket stitch around the curve of the face.
  10. Sew to the bottom of the hat and give it a good pressing.
  11. Quilt and bind. You can add some rosy cheeks with fabric paint or crayon if you want.
  12. What about the hat’s pom-pom? On one mug rug I traced a quarter on some fusible web and created a pom-pom from some chenille. On another, I sewed a jingle bell. A button, yo-yo or yarn pom-pom would be just as cute! Have fun finishing him up.

Matthew eventually learned to spell. I am confident you will learn to paper piecing. Keep practicing!

Absewlutely,

Lisa

Back to Basics

BW.Block1Duck Track Block

To me, September is like a reboot month. We make all these New Year resolutions to do better, be more organized, blog more regularly blah blah blah and then we fall flat on our face after a few months. But in September, it is like I can hit the re-start button. We’re headed into a new season and for some reason I can refocus on my goals. (Maybe it’s because my household has gone back to school and to work and I have more time for me!)

Sew let’s get back to basics. Accuracy is always on my list of improvements. I dislike seam ripping and I like to get it right the first time. When I teach a class, we always start off checking the seam allowance. The seam allowance is usually the guilty party when the block doesn’t turn out the correct size. However, there are really four elements to making the block the correct size.

  1. Cutting
  2. 1/4″ seam
  3. Alignment
  4. Pressing

Cutting your fabric. Be sure you iron out all wrinkles and folds (steam is fine). Have good lighting, your proper glasses, and a sharp rotary blade. Always stand when cutting. Sitting is convenient but standing over your ruler allows for better accuracy. Always cut once away from your body and don’t see-saw back and forth. If your blade is skipping or you’re having to cut several times, time for a new blade. If you’re ruler is sliding, try non slick grips on the back and anchor your pinky on the non-cutting side of the ruler.

Your 1/4″ seam needs to be accurate. Most modern sewing machine come with a programmed setting for piecing. It is marked by a P. I can’t tell you how many students I have helped find the correct setting for their quarter inch seam. They’d been using tape when all along their machine had a perfect setting for them. Be sure to know your machine’s settings and have the proper foot. MEASURE that quarter inch before you start.

Alignment is so important. Some ladies sew like it is a race. I’m guilty too. And none of us like to be last in the class room. But it isn’t a race and accuracy is more important than finishing first. Take your time. Align that fabric up perfectly. Take time to pin. Ask yourself, “What’s the point?” When sewing points, be sure to align the ends at the point. If the fabric is slightly long or short at the other end it isn’t going to matter as much as getting your point to be at the quarter inch seam.

Pressing Matters. Press first with the seam closed (no steam). Open the pieced item and from the wrong side of the fabric, knock the seam, with the side of the iron, the direction the arrow shows in the instructions. You’re just knocking it over. Then from the front do the same, making sure the seam hadn’t folded over on itself. When pressing, I hold one side of the fabric taunt while pressing with the iron – not tight enough to stretch the fabric but to enough to press the seam well. No steam in my iron unless I want the piece to grow. This is where so many blocks fall short, is in the pressing.

If your block doesn’t turn out the size it was supposed to, examine these four elements to find the culprit.

Feel free to reboot along with me. September is a new month, a new season, a new day. I hope these tips help you with your accuracy.

Sew on my good friend,

Lisa


The T-shirt Quilt

Out of all the quilts I’ve created, you want to know which is my husband’s favorite? It’s his super hero t-shirt quilt. Michael calls it his Woobie. Sleeps with it every night too, unless it is displayed at In Between Stitches to advertise my T-shirt quilt class. Which is where it is right now. He goes to visit his t-shirt quilt regularly and insists we need a guard and bullet proof glass to encase the best and most valuable quilt in the store.

TShirtQuilt3When I was getting ready to make my husbands super hero quilt, I laid all the t-shirts he had ‘retired’ onto the dining room table. I called Michael over to take a look at the arrangement.

“What are you doing woman!!” he exclaimed.

“I’m making your t-shirt quilt, remember?” I defended.

“No!! You can’t mix Marvel and DC on the same quilt!” and he quickly removed all the DC t-shirts from my arrangement.

Since I was then short for the lay-out I wanted to make, he went into his closet and retrieved more Marvel t-shirts for the quilt. Really? What was I thinking? I naively thought a super hero was a super hero! So I made the Marvel t-shirt quilt and he LOVES it. Now it is time to finish the DC hero quilt. I’ve enough t-shirts to finish it.

Why the attachment to t-shirt quilts? T-shirt quilts are quick and easy to make. Cost less to make than other quilts of the same size. Yet, t-shirt quilts tend to be the most loved quilting creations. It’s because they are full of memories. So many memories are tied to each t-shirt. Last Christmas I gave a 49er/Giants sport t-shirt quilt to my brother-in-law and a German Shepard training/events t-shirt quilt to my father-in-law. Both were extremely delighted with their gifts.The t-shirts were full of happy memories to them.

A couple other t-shirt lay-outs.

TShirtQuilt2

TShirtQuilt1If you have a stack of t-shirts and always wanted to make a cozy memory quilt, join me for the next three Thursday evenings at In Between Stitches for my T-shirt quilt class. Click on this link to register for the class and we can get your quilt top done in the  evening classes from 6-9pm. You can choose any lay-out design from the t-shirt quilt book and I will help you create a custom beloved work of art out of those worn out tees.

Absewlutely,

Lisa

December Bite Size Block

Dercember2015BiteSizeBlock

“It’s the Most Wonderful Time of the Year… La la la la la” wish I knew all the words to the song. But isn’t it wonderful? I love love love Christmas time. We’ve even had thick frost the past few days that made it look like a winter wonderland here in sunny Livermore. And you MUST stop by In Between Stitches. The new window displays by Leslie Emery are a frosty sight to see. Just beautiful! The window on the left features the small version of our new pattern, the Double Arrow by Material Girlfriends.

20151130_184508 20151130_184519

This is my last free block download for the I Love Us Year Round pattern! Wow, the year just flew by. The December block is shown at the top of this blog and you can download the instructions here ILoveUsYearRound.all pages36-38 (Sorry, free download expired. Please purchase I Love Us pattern to get the instructions). You can now download all the blocks, from the January blog to now, to make the outside portion of the I Love Us Year Round quilt. If you should want the interior pattern as well as a hard copy of the January through December blocks, you can pick up this beautiful 40+ color pages pattern from In Between Stitches by clicking here.

ILoveUsYearRound.Cover.8.5x11.flatThe December block is fun! We get to enjoy a little piecing in making the Half Square Triangles, a little paper piecing in making the pleated Christmas tree and a little appliqué for the colorful light bulbs. I will be teaching this block at my next Bite Size class, Sunday, December 13, at 1:00 pm to 5:00 pm. Join me for some quilting merriment and we can all sing, hum and la-la-la to “It’s the Most Wonderful Time of the Year” as we sew up the December block.

Now that song is going to stick in your head all day. LOL!

Absewlutely,

Lisa

Christmas Elf Mug Rug

Merry Christmas!

ChristmasElfMugRug

Here is a fun gift for you. This cute little mug rug also makes a great hostess gift and would be perfect for a mug rug swap with your quilting friends.

The Material Girlfriend Christmas Elf Mug Rug paper piecing pattern was given by In Between Stitches in Livermore, CA, during the recent Jingle Bell Shop Hop. This is where you can learn to paper piece it! If you missed the Shop Hop and didn’t get your copy, you can download it FREE for a limited time. ChristmasElfMugRugPattern

Here is a tutorial. Yep, that’s me. Keep in mind TV adds 50 lbs and 20 years to your looks. My sweet husband, Michael, was my camera man. We’re taping in my dining room (oh, so professional) because my new office/sewing studio was just vacated by our eldest son and we’re in the process of painting it a light buttery yellow. (I’ll write a post with some pictures when I have it all done!)

Now, if you didn’t catch all that and don’t want to sit through the chipmunks music again, here are a few easy steps.

  1. Copy your pattern onto some foundation paper. You can use printer paper but Carol Doak’s foundation paper is so much easier to remove. You can also use Alex Anderson’s foundation paper and leave it in. It will dissolve after it is washed. Trim away the bottom portion of the pattern. You only need to paper-piece the hat.
  2. Trace the lines and numbers on the back of the paper. This is to assist you in positioning your fabric.
  3. Pre-cut your fabrics. I estimate an inch or more bigger than the space it will cover.
  4. Start with number one. On the back side of the paper where you drew the lines, pin right side up the fabric piece so it covers the entire area by at least a quarter inch on all sides.
  5. Position the fabric for number 2 right sides facing together on top of the fabric for position 1. Check the position. Imagine if you sewed on the line between 1 and 2 to make the seam, then as fabric 2 is opened, it should cover the entire area of spot 2 plus a quarter inch beyond. Pin to hold it in place, flip it over and stitch the line between 1 and 2 with a small stitch. I use 1.8 on my machine’s settings.
  6. Finger press the seam open. Does the fabric generously cover position 2? No, seam rip and try again. Yes? Trim the seam to 1/4″ using a postcard to fold the paper over and an Add-A-Quarter ruler.
  7. Before adding fabric for position 3, it is easier to pre-trim the seam allowance on the line between two and three before adding the next fabric. From the front, align the post card on the line between 2 and 3. Fold the paper back over the postcard. Butt the Add-A-Quarter ruler along the card edge and trim the quarter inch. Now you can easily align the fabric for position 3.
  8. Continue in the same manner until you’ve covered all the pieces. Trim on the outside solid line and tear away the foundation paper.
  9. Cut a background rectangle 2 1/2″ x 6 1/2″. Trace the face onto the paper side of double-sided light fusible web. Follow your products directions. Stick to the wrong side of your fabric and trim out on the line. Trace the nose and mouth and then stick to the right side of the 2 1/2″ x 6 1/2″ rectangle aligning the face at the top edge of the rectangle. Heat set in place. I did a blanket stitch around the curve of the face.
  10. Sew to the bottom of the hat and give it a good pressing.
  11. Quilt and bind. You can add some rosy cheeks with fabric paint or crayon if you want.
  12. What about the hat’s pom-pom? On one mug rug I traced a quarter on some fusible web and created a pom-pom from some chenille. On another, I sewed a jingle bell. A button, yo-yo or yarn pom-pom would be just as cute! Have fun finishing him up.

If that still didn’t help, come see me. I usually work Thursdays at In Between Stitches (call ahead to be sure I’m there) or join me at one of my Lisa’s Finishing Schools for Wayward Quilters classes. We meet every other Saturday evening. Check the In Between Stitches class calendar for dates. The classes fill up quickly so be sure to reserve your spot as soon as possible.

If you’re new to my blog, be sure to follow. Every month I put up a new free block pattern.

Absewutely,

Lisa

November Bite Size Block

November2015BiteSizeBlockLog Cabin block. I used to dislike this block. Twelve years ago I was going to make a log cabin quilt for my cousin Heather’s new baby boy. It took me 3 hours to make one little log cabin which turn out half an inch smaller than it was suppose to be. There was lots of seam ripping because I’d sewn the wrong color on the wrong side. “No way. The baby will be in college by the time I finish this.” Plan B. I made an Irish chain quilt instead.

Fast forward 10 years from then. Melissa Emery Grech, at In Between Stitches was giving me the opportunity to teach the Start Quilting class. One of the blocks was a log cabin. I cringed from QPTSD (Quilter’s Post Traumatic Stress Disorder). That first class, I assisted Melissa as she taught the class. When we got to the log cabin block, she taught a method she said she learned from Eleanor Burns. OMG!!! This was so much easier than the tediously torturous way I had made that first block so many years ago. I loved it. No pre-cutting the many small strips and you made multiple blocks at a time “chain piecing”. I love it! I was cured!

We American quilters have long considered this block to be the quintessential American design, though the pattern really dates back to ancient Egypt. But to us, the block represents log cabins on the prairie with red center squares for the hearth, light values on one side for the sunny side of the house and dark values on the opposite side for the shady side of the house. The hey-day of the Log Cabin quilt in this country was in the third and fourth quarters of the 19th Century.

Try out this very American tradition. You can download the instructions for the November Block for the I Love Us Year Long pattern instructions here ILoveUsYearRound.all pages34-35 (Sorry, free download expired. Please purchase I Love Us pattern to get the instructions). If you’re local, you can join me next Sunday, November 8 from 1-5pm at In Between Stitches in Livermore. We’ll also start the background blocks for the center House Block as well.

As the weather chills, start a red square fire in the hearth/heart and cozy up in your own little cabin/home and stitch some tradition of your own.

46903-Warm-And-Cozy-

Absewlutely,

Lisa

October Bite Size Block

Pumpkin Time!

October2015BiteSizeBlock

What’s not to love about Pumpkins? Okay, maybe the guts. But pumpkin is used in all kinds of cooking in the fall, from Pumpkin Spice Lattes to Pumpkin Seed Cranberry Chips (the bomb from Trader Joe’s). Pumpkin is even a favorite term of endearment and who didn’t learn this favorite poem in their childhood?

Peter Peter pumpkin eater,
Had a wife and couldn’t keep her!
He put her in a pumpkin shell,
And there he kept her very well!

This month’s block is one of my favorites from the I Love Us Year Round pattern. I confess, I designed the block but my sister, Lora put it together. The leaves are just the icing on the pumpkin spice cake. The three leaves are layered appliqué creating dimensions and beauty. She carefully (and slowly) did a blanket stitch around each machine appliquéed layer in a matching thread. When she quilted it, she quilted in the vines giving the leaves even more dimension. Delicious!

If you’d like to make this pretty block, just down load the pattern here. ILoveUsYearRound.31-33pages (Sorry, free download expired. Please purchase I Love Us pattern to get the instructions). When you add blanket stitches to your machine appliqué projects, remember before starting to test your blanket stitch settings and change your machine’s foot to an open toe. You want plenty of space to view what you’re doing! See, easy as pumpkin pie.

I’m teaching this block tomorrow, Oct. 4, at In Between Stitches from 1pm – 5pm. If you’re local, join us for some fun. You can contact In Between Stitches or register for class online.

PumpkinSpiceRumLatteI’ll sign off with my favorite pumpkin recipe. Brew some nice hot coffee. Fill 3/4 in a mug, add a little William Sonoma’s Pumpkin Coffee syrup, a little half and half, a splash of rum (or two splashes), top with whip cream and sprinkle with pumpkin spice… hmmm… perfect. However, too much of a good thing and you’ll end up doing some seam ripping. 😉

Absewlutely,

Lisa

September Bite Size Block

What am I forgetting?

September2015BiteSizeBlockI’ve got three lists. Got the camp gear, food, directions, tickets, batteries, check. I gave instructions to the boys and Grammy, check. Left money for their groceries and adventures, check. I sent in my invoice for work, watered the plants, filled the pool, check.

What am I forgetting?

Balanced the checkbook, paid the bills due while we’re gone, check. Filled the car with gas, checked the brakes, tires and other automotive stuff, check.

What am I forgetting?

Cleaned the house, tidied the yard, fed and watered the dogs. Check, check and check. Okay, we leave at the first crack of dawn…for 10 days. What am I forgetting?

We’re home now but despite the three lists, I forgot a few things. Does that happen to you too? I forgot to fill out the school athletic paperwork for my son’s high school cross country team, plus there was a physical required (thanks Grammy for taking care of that!).

And I forgot to write my blog. I try to upload the new block on the first of every month. I even had it all ready a week prior to leaving on our vacation. All I had to do was write a quick paragraph and hit upload. Well, I remembered on September 1 but I was in the middle of a Nevada desert wilderness that had spotty cell and text coverage. No internet. None. Just blowing dust and a bunch of crazy campers.

It is very nice to be home where I can finally complete the things I forgot. This month’s Bite Size block is a breeze compared to last month’s teeny tiny Half Square Triangles! Download the instructions to make this pretty block ILoveUsYearRound.InsidePgs28-29 (Sorry, free download expired. Please purchase I Love Us pattern to get the instructions). You can also join me this coming Sunday, September 13 from 1-5pm to make this block. I will be teaching the many different techniques in making Half Square Triangles so don’t pre-cut your fabrics if you’re coming to class. If you have Lynn Wilder’s Patchwork Math Using Quilting Design Components book, bring it with you. If you don’t, it isn’t required for class, but I will be showing you what a gold mine her book is. It is definitely one you’ll want as a resource in your personal Quilting Library.

Can you believe I also forgot that it was my dear husband’s 50th birthday the day after we returned from our trip? He turns 50 on the 8th! I don’t know why I didn’t realize there wasn’t more time between our return and Mike’s birthday!  Perhaps I needed a fourth list. Fortunately, his birthday wish was a family trip to Old Sacramento and the train museum. Quick calls to the boys and it is all arranged.

Now… what else am I forgetting?

Absewlutey,

Lisa